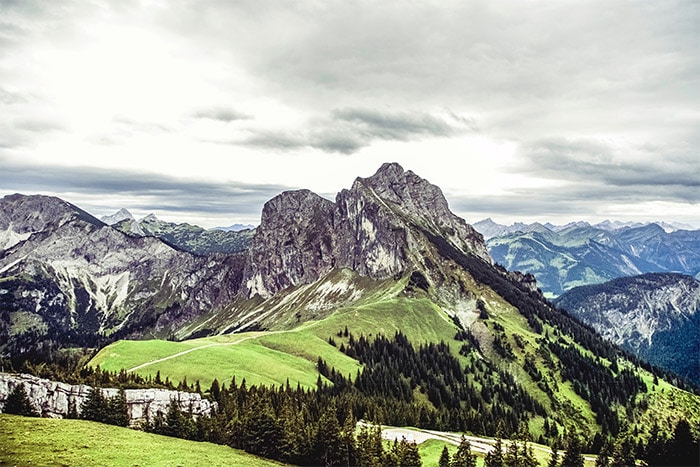
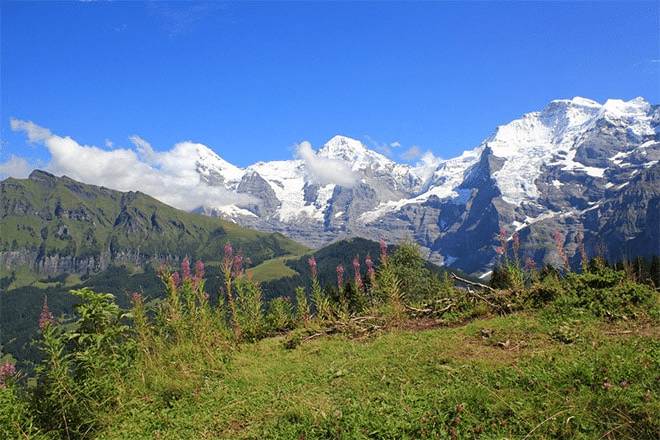
Photo by Markus Spiske / CC0
What is a better subject for an iconic landscape photo than a majestic mountain peak? While mountains provide an ideal setting for nature photography, they also present some challenges. In this post, we’ll look at tips that can help you to get the best results with your own mountain photography as well as locations and photos of mountains for your inspiration.
→ Related reading: 10 Locations in the U.S. for Amazing Mountain Photography
1. Plan Ahead and Anticipate the Lighting
Planning ahead is always important, regardless of whether you are shooting mountains or some other type of landscape. There are two reasons that I think planning is especially important for mountain photography:
- You may need to do a lot of hiking and expending a lot of energy (and taking time) to get from one place to another. Planning ahead can help you to be in the right spot at the right time without wandering around spending a lot of time and energy trying to find the shot that you want. Tools like Google Earth can be helpful for planning and scouting.
- Lighting can be very challenging in the mountains. Peaks can block the sun and valleys can be in deep shadow, so planning ahead can help to anticipate the conditions and the lighting. The Photographer’s Ephemeris is a helpful tool for planning based on lighting, and of course, watching the weather forecast is important as well.
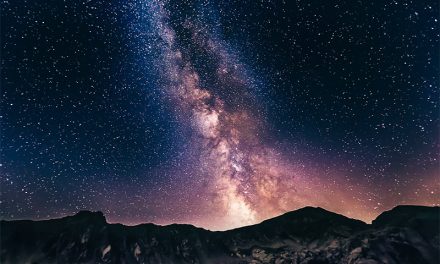
2. Understand that Golden Hour Could Be Very Short, or Non-Existent
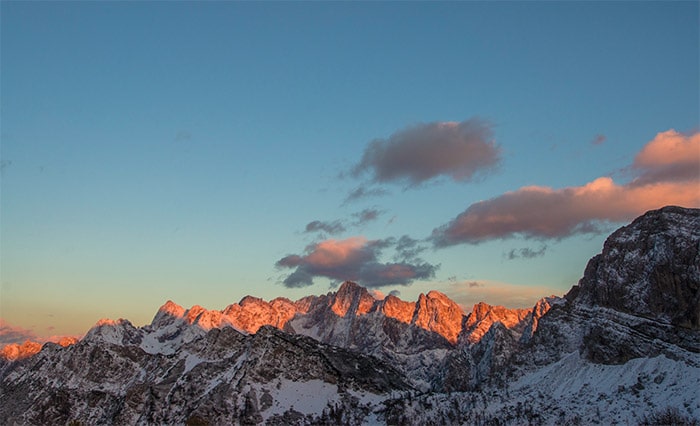
Photo by Ales Krivec / CC0
Typically with landscape photography, the best time is right around sunrise and sunset. But in the mountains, you may find that, depending on your location, the peaks could block the sun and shorten, or even eliminate, the golden hour. This won’t be the case in every situation, but be aware that waiting for the golden hour may leave you without the shot that you were after.
→ Related reading: Guide to Shooting Landscapes in Low Light
3. Include Foreground Interest in Your Composition
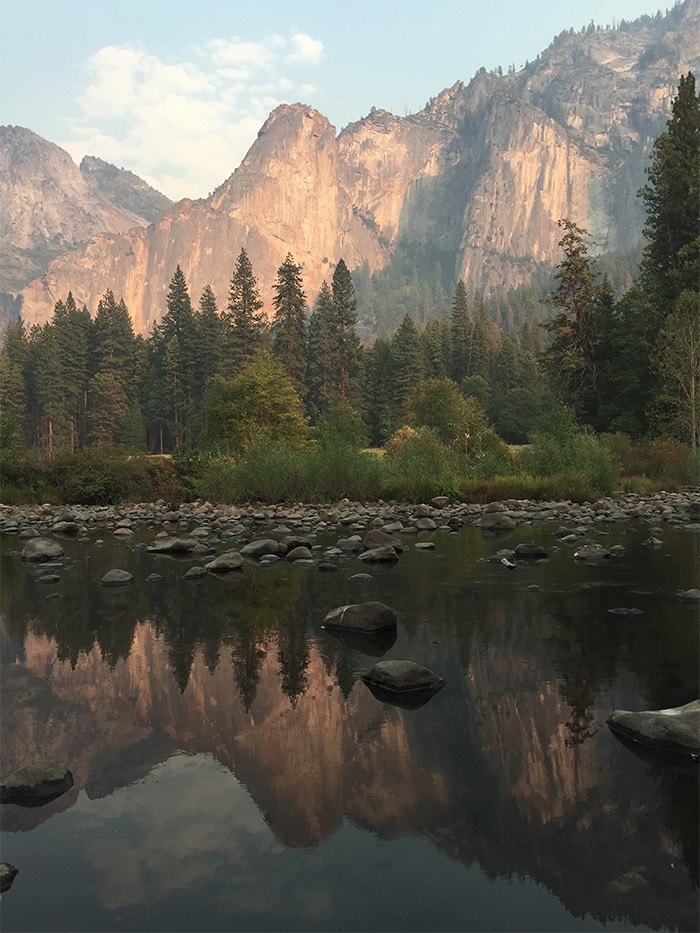
Photo by Michael Hirsch / CC0
Foreground interest is an important part of composition for landscape and nature photography, and perhaps it is never more evident than in photos of mountain peaks. If the peak or peaks are the focal points of the shot, you don’t want the foreground to dominate the composition, but you do want to have some interest that will pull viewers in. In some cases, you can use a foreground element with leading lines that will direct the viewer’s eye to the mountain peak.
→ Related reading: How to Use Foreground Elements in Your Compositions
4. Change Your Perspective
Mountainous areas obviously include a great deal of variety in topography, and changing your perspective even just a little bit can have a dramatic effect on the end result. Rather than limiting yourself to one spot, try hiking or some light climbing to get to a different elevation that will give you an alternative perspective of the same scene. In many cases, the most interesting and unique photos will come from different perspectives.
This is especially true when you are shooting at a popular location that has already been photographed countless times before.
→ Related reading: How Perspective Impacts Landscape Photography
5. Include People for Scale
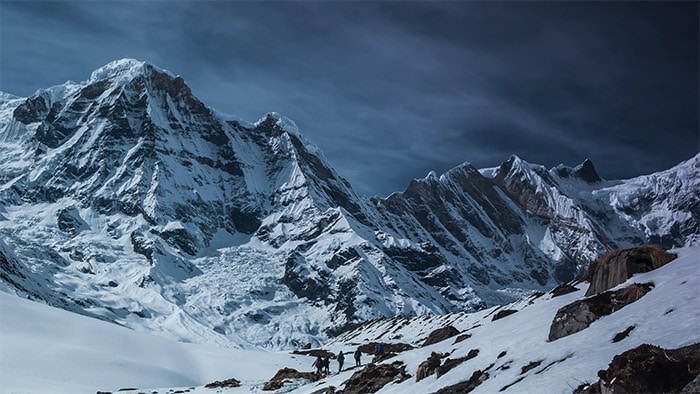
Photo by Lee Roylland / CC0
With most landscape photos you are probably trying to eliminate people from your composition in any way possible. However, sometimes it can be a good idea to include a person, or a group of people, in your shots to help give a perspective on the scale of the landscape. You certainly don’t need to do this with every shot, but look for the right opportunities.
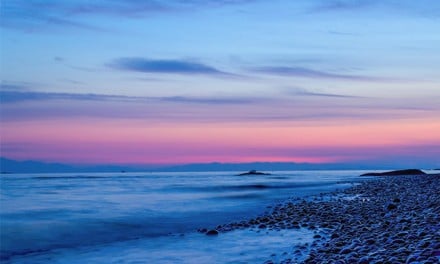
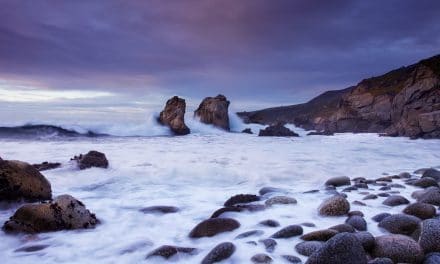
6. Include Water in the Composition, When Possible
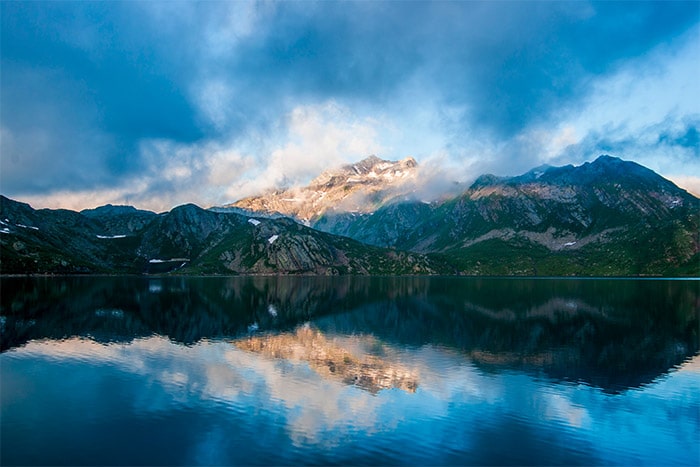
Photo by Alberto Restifo / CC0
Mountains and bodies of water go very well together. Lakes, waterfalls, and streams can all be perfect elements to include in your compositions.
→ Related reading: Using Reflections in Landscape Photography
7. Bracket Your Shots
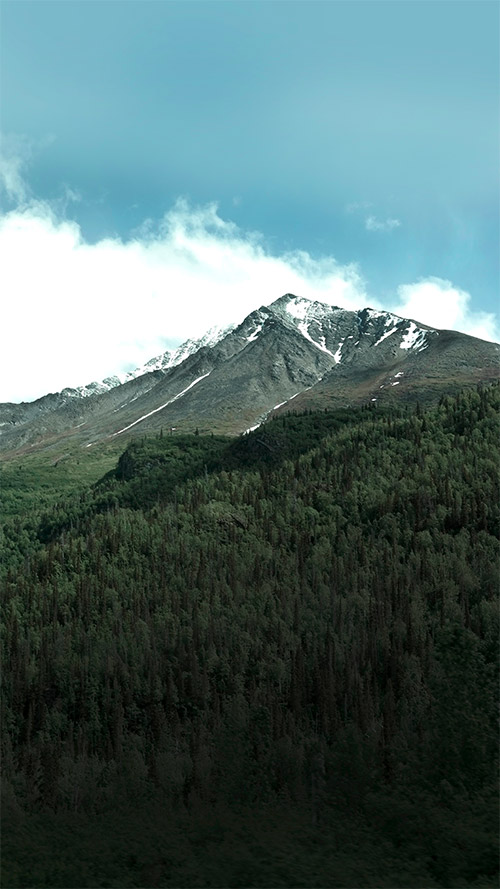
Photo by Alejandro Gonzalez / CC0
Because the lighting and shadows can be quite tricky in the mountains, bracketing your photos can be a good practice. This means that you would take multiple shots of the same scene (usually with your camera on a tripod) exposing one shot for the lightest part of the scene, like the sky, and exposing another shot for the darkest area in the scene, as the shadows of the valley. The exposures can then be blended manually in Photoshop, or you can use them to create an HDR image in Lightroom, Photomatix, or some other HDR software.
Sometimes two different exposures are enough, and in other cases where there is a greater variance from light to dark, you may want to take 3, 5, or 7 shots.
To learn how to use Lightroom’s HDR merge please see this video tutorial.
8. Use a Small Aperture
In general, a small aperture (larger f/stop number) will allow you to keep more of the scene in focus. With mountain shots, you will typically want as much of the scene to be in focus as possible. Not only do you want the foreground elements to be in focus, but you also want the distant peaks to be in focus.
A small aperture like f/16 – f/22 can help to accomplish this, but be aware that each lens is a little different. Don’t assume that shooting at f/22 will automatically give you the sharpest image. Most lenses have a range where they tend to be the sharpest, so it is important to test your lenses and know how they perform.
You may find that you’ll get the sharpest photos at somewhere around f/11 – f/16 instead of pushing it closer to f/22.
→ Related reading: 11 Steps to Tack-Sharp Landscape Photos
9. Carry a Lightweight Tripod
When photographing mountains you will typically need to hike, and in some cases, you may even need to do extensive hiking, climbing, and camping. The weight of your tripod can have a big impact whenever you are doing these types of activities.
Having a lighter tripod will make your trek much easier and will keep you from leaving your tripod at home simply because you don’t want to carry it.
See our recommended gear on this page.
10. Don’t Limit Yourself to Iconic Shots
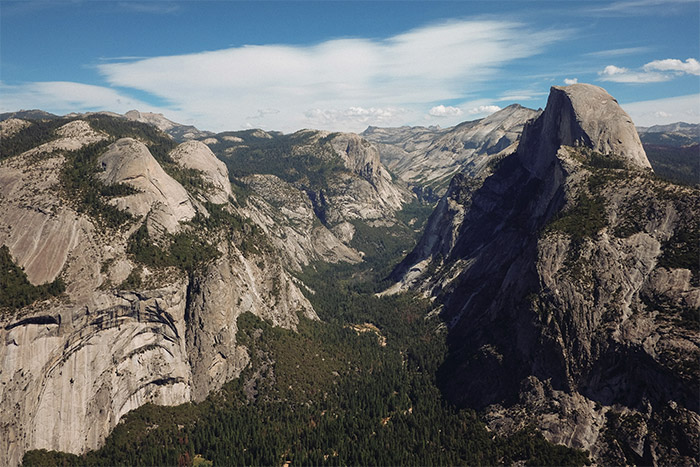
Photo by John Salzarulo / CC0
Many of the mountains that are popular photographic subjects have certain views that are iconic and have been seen many times by most viewers. While there is nothing wrong with taking some shots of your own from these common angles and perspectives if you want to create something that really gets the attention of the viewer it is difficult to accomplish when you are basically re-creating a shot that has already been seen many times.
If you are at popular destinations you can look for new perspectives to get a unique shot. And if you are researching places to go, consider locations that aren’t as familiar to most viewers. There are many great destinations that will give you the opportunity for amazing shots that most people have never seen.
11. Have the right gear
This applies not just to your photography gear, but also to the things which are going to help you get up the mountain.
Walking poles may be a good idea, especially where the terrain is uneven or if you are planning a climb which will last for more than a day. The poles help to keep you steady and also distribute some of the impact of walking away from your hips, ankles, knees, and lower spine. This will be especially important if you have heavy camera gear to carry along with you as well.
Make sure that you have a backpack with at least two sturdy, padded straps and a waist belt to distribute the weight a little better. It should feel comfortable when you set off, as you need to cover a good distance wearing it and it won’t get much lighter.
Do carry food and drink with you, more than you think you will need, as you won’t be able to get hold of anything else if you need it or get stuck for longer than expected. Choose options that will help you to generate healthy and natural energy, so that you don’t run out of steam during your climb.
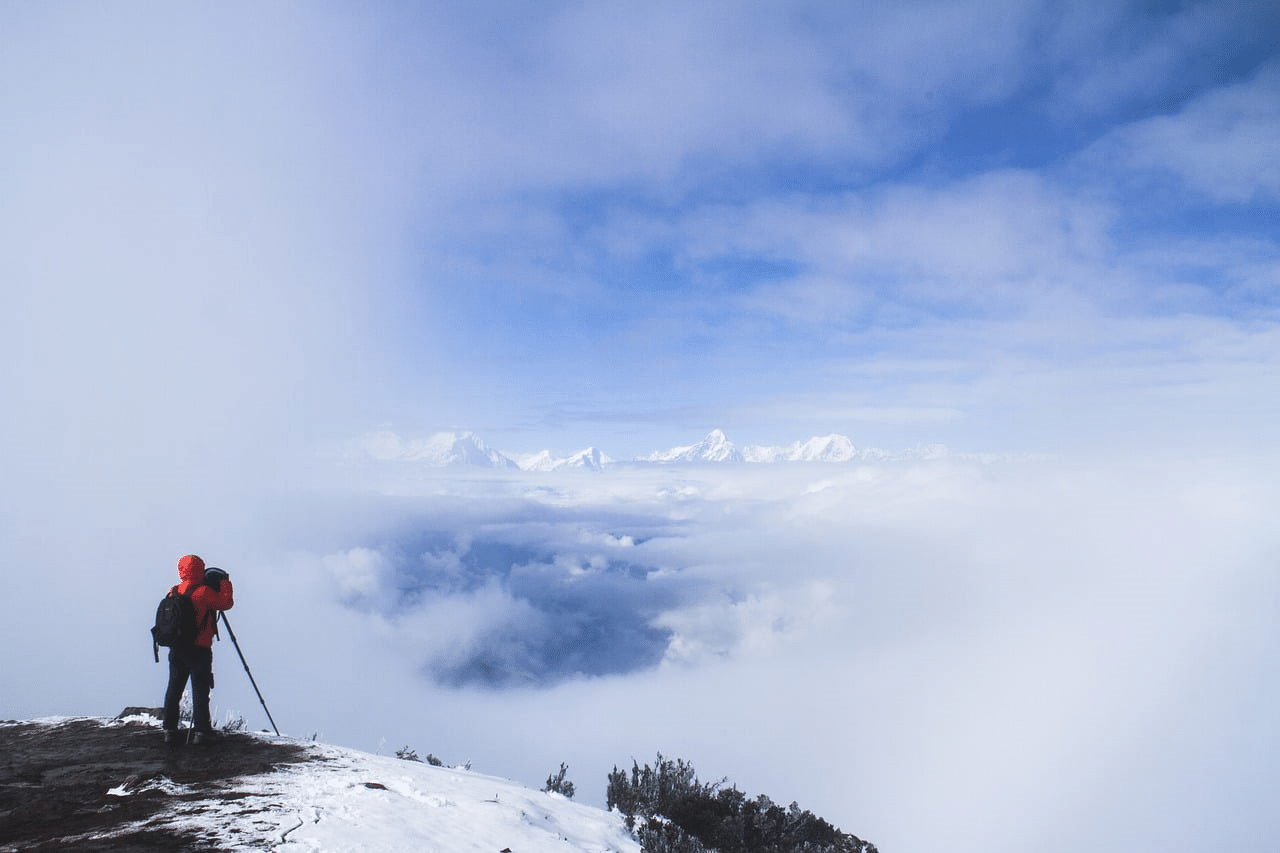
photo under CC0
12. Dress sensibly
Warm clothing is an absolute must, but remember that it must also be comfortable to wear and easy to maneuver around in. Look for well-fitting shoes that give good support around your ankles, preferably with grippy soles. You can find hiking boots or even boots that are specially designed for climbing the inhospitable environment of a frozen mountain range.
Dress in layers if you are going to a high altitude, as you may want to add or remove them while you go. The temperature changes can be very rapid in thin air, so they may take you by surprise if you are bundled up too tightly. It’s also advisable to wear wind and rainproof clothing for your outer layer.
Don’t forget to bring along a waterproof cover for your camera as well – it’s a good idea to keep it wrapped up even when it isn’t raining, for protection against falling in the snow or dust whipped up by the wind.
13. Protect your eyes
The sun reflecting off the snow can be incredibly bright. Once you get above the clouds, there is also nothing to protect your eyes when you look into the sky. For this reason, plan to bring sunglasses and even a brimmed hat to keep the sun away even more.
Consider getting a filter for your camera lens which will bring down the brightness a touch – it can even be painful to your sight to look through the viewfinder when the sun is reflecting off the white expanses around you.
14. Cover your skin
Even if most of your skin will be covered by clothing, there are bound to be some gaps – especially around your face. If it does get warmer, you might also uncover your hands, arms, and neck to cool down. Be sure to bring along sunscreen, as the rays of the sun can be more intense at those high altitudes.
What’s more, you will need insect repellent during the warmer months, because there are lots of airborne critters who thrive at this time. Wearing lighter colored clothing at this time can also discourage insects from taking a bite out of you.
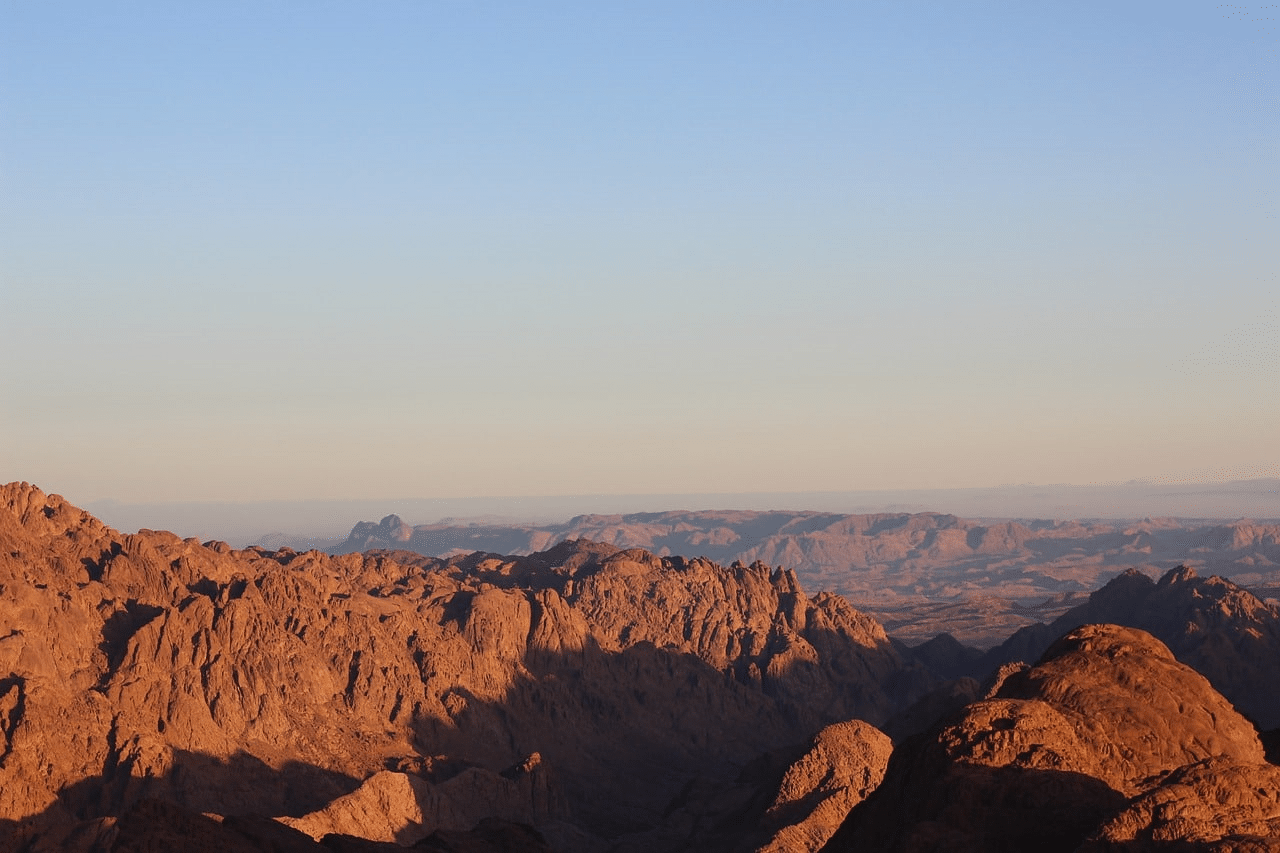
photo under CC0
15. Prevent altitude sickness
Acute Mountain Sickness or AMS is extremely serious and is normally known as altitude sickness because it’s the most common disorder that those climbing at high altitudes experience. It’s characterized by a severe headache, and may also include nausea, fatigue, insomnia, dizziness, and drowsiness.
AMS can also put you at a higher risk of developing high-altitude pulmonary edema (HAPE) or high-altitude cerebral edema (HACE), both of which are life-threatening conditions.
One of the biggest steps towards preventing this is to start with acclimatization techniques. You will want to start at a lower altitude and climb up gradually, rather than getting flown into a higher level. It can be tempting to get in quick to get the shot you want, but you could end up seriously suffering for it! Once you get to around 8,000 feet, it’s even recommended not to climb more than 1,000 feet more every day.
You should also consider getting medical advice before you climb if you’ve ever suffered from a severe asthma attack, a heart attack, a blood clot, or a stroke. These are all conditions that could be exacerbated by the altitude.
To boost your health further, don’t drink any alcohol, don’t smoke, stay hydrated, and eat regularly on the climb. You can also carry an oxygen supply if it feels necessary.
There is also medication that you can take in order to help your body cope better with the height of your ascent. If your trip will take more than one day, consider sleeping at a lower altitude where possible so that you aren’t always sleeping at the highest possible point of your climb. It’s harder to breathe during the night at a high altitude.
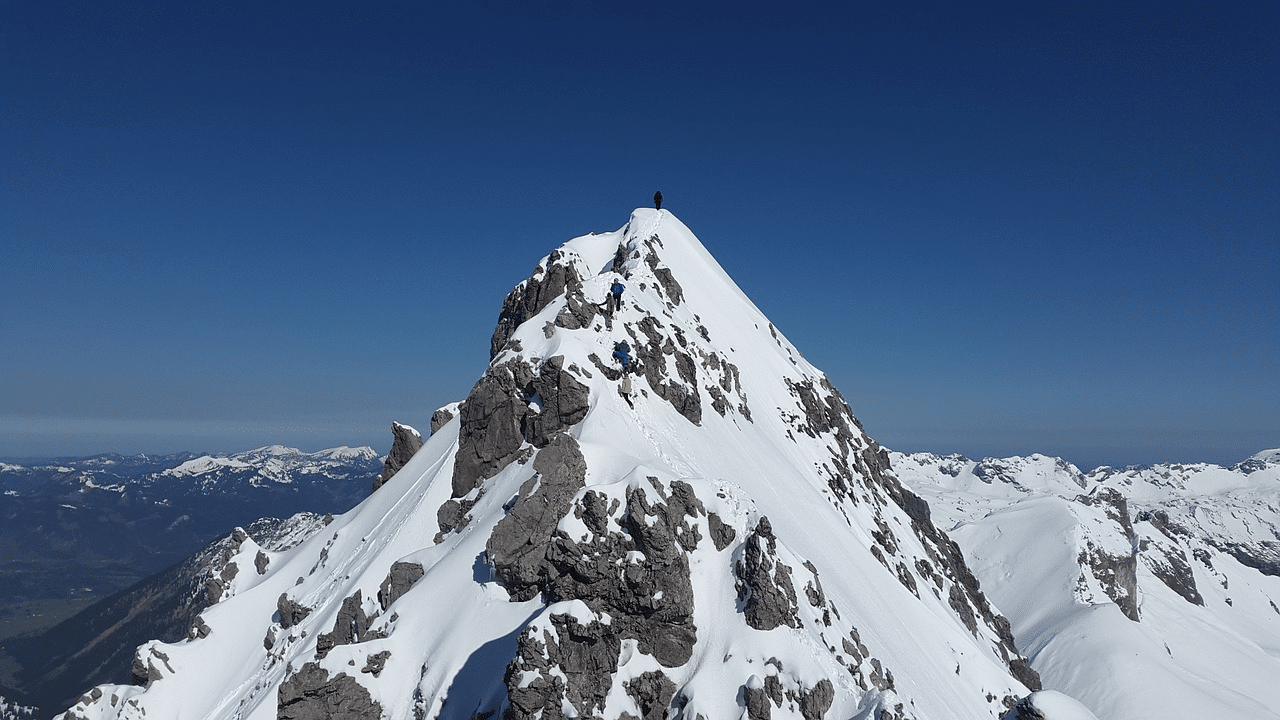
photo by Simon Steinberger | CC0
16. Take action
If there is any kind of emergency during your climb, it’s important to take action as soon as possible. If you or someone you are climbing with shows any signs of altitude sickness, you should descend immediately. You should try to go 3,000 feet lower or more to recover from the effects.
You can also take medication, take oxygen, or go inside a pressurized Gamow bag to help slow the sickness. Take a satellite phone so that you can indicate that you are in need of emergency assistance if possible.
17. Have back-ups
Certain parts of your camera may start to malfunction or function in a strange way in cold temperatures. One of these is your battery.
It’s entirely possible that cold weather will cause the charge to drop out of your battery, leaving you with much less life than you thought. Take spares with you stored inside your clothing to keep them warm, and turn off any functions that aren’t absolutely essential for camera use – such as the LCD screen, the flash, and even the autofocus.
Turn your camera off completely when you aren’t shooting.
18. Protect your lenses
Lenses are very susceptible to damage from condensation when you are moving from one area to another where the temperature differs greatly. Try to slowly bring your camera out of a warm environment – such as your base accommodation – into the colder air.
You can move it into a porch or other covered area for an hour after leaving a heated area, to help it settle a bit more. If the cold is seriously intense, you may wish to take several intermediate steps. During this time, you can remove your battery so that it stays warm for shooting later.
In order to reduce the risk of condensation even further, get a simple air-tight bag and a sachet of silica gel. Put the camera and the gel into the bag together. The gel will soak up any condensation so that your camera stays dry and undamaged.
You should also place your camera and lenses into a bag that has extra padding, as the glass can become more brittle in the cold. This means that if you should drop them, you definitely want them to be protected as much as possible. Be sure to use your neck strap or a wrist strap when shooting, in case the cold makes the camera slip out of your hands or gloves.
A lot of the steps that you need to take to protect yourself and your camera during a mountain climb are simply common sense. Some of them, however, can only be learned through experience the hard way. That’s why it’s a good idea to take the advice of those who have gone before you!
Remember that you also need to be prepared for a safe climb, even if you feel that you are ‘only’ documenting those who are traveling with you.
10 Locations in the U.S. for Amazing Mountain Photography

Mount Rainier National Park by Ralph Arvesen / CC BY 2.0
Perhaps no other type of landscape is more capable of creating powerful photographs than mountains. Whether you are showcasing a flowing mountain stream, beautiful snow-capped peaks, or a pristine lake in a valley, the mountains provide plenty of possibilities.
Grand Teton National Park – Wyoming
Grand Teton National Park is located in Wyoming, just south of Yellowstone National Park, and is well known as a great place for mountain photography. Conveniently, many amazing views in the park are also relatively easy to access. The Snake River Overlook, Oxbow Bend, and Schwabacher’s Landing all provide iconic scenes. Teton Park Road, Jenny Lake Scenic Drive, and Signal Mountain Summit Road will all give you some great views.
→ See more places to photograph in Wyoming.
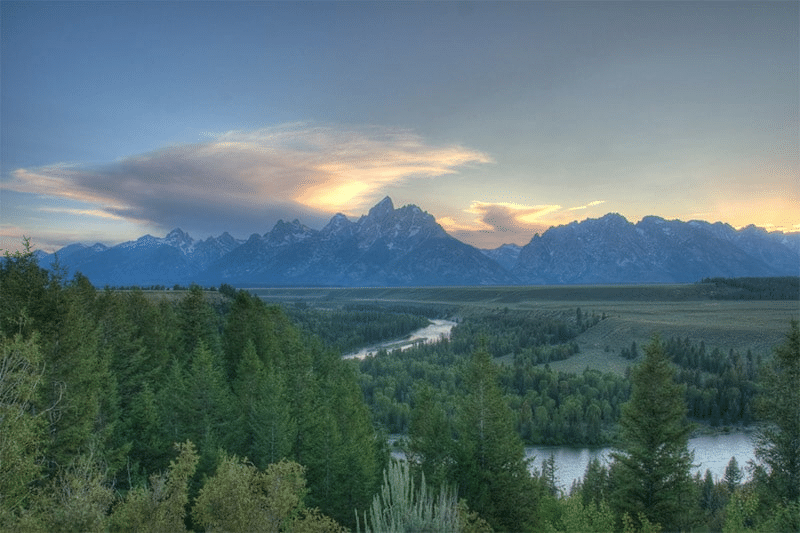
Snake River Overlook by Brian Holsclaw / CC BY-ND 2.0
Glacier National Park – Montana
Glacier National Park in northern Montana is a favorite of many landscape photographers. Going-to-the-Sun Road is one of the most scenic roads you will find anywhere. The road crosses through the park high in the mountains, proving plenty of great views and photo opportunities. The park is also home to several lakes that are great for including in your mountain photos.
Lake MacDonald is shown in the photo below.
→ See more places to photograph in Montana.
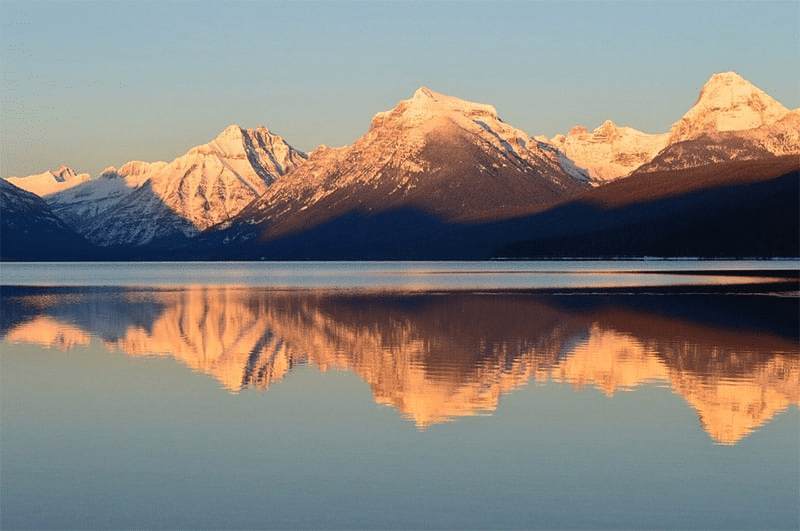
Glacier National Park by skeeze / CC0
Mount Rainier National Park – Washington
Mount Rainier National Park, about 60 miles southeast of Seattle, includes Mount Rainier and other peaks in the Cascade Range. At more than 14,000 feet, Mount Rainier rises impressively above the surrounding landscape. The mountains, valleys, waterfalls, and meadows make this a great park to photograph.
→ See more places to photograph in Washington.
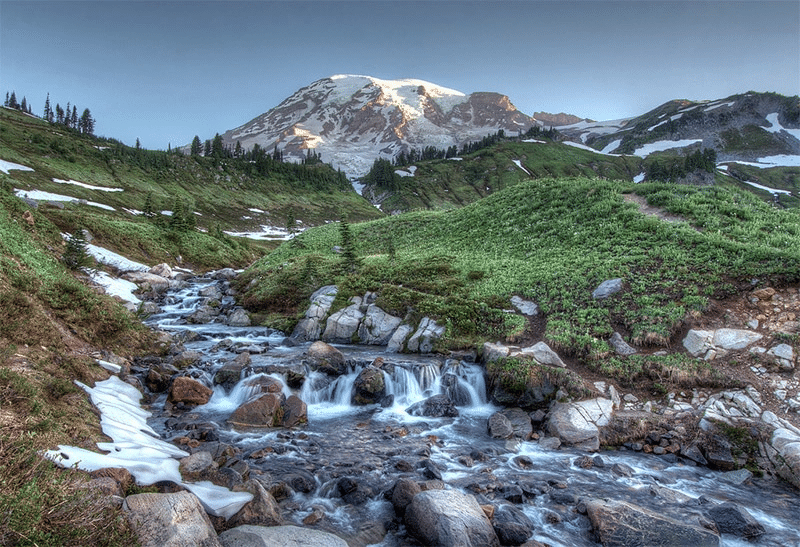
Mount Rainier National Park by Ralph Arvesen / CC BY 2.0
Rocky Mountain National Park – Colorado
Rocky Mountain National Park is conveniently located near Boulder and Denver. While there is no shortage of mountain views throughout Colorado, Rocky Mountain National Park is one of the most popular places. The park features stunning mountain views, lakes, wildlife, and trails for exploring. Trail Ridge Road and Old Fall River Road provide plenty of beautiful views.
→ See more places to photograph in Colorado.
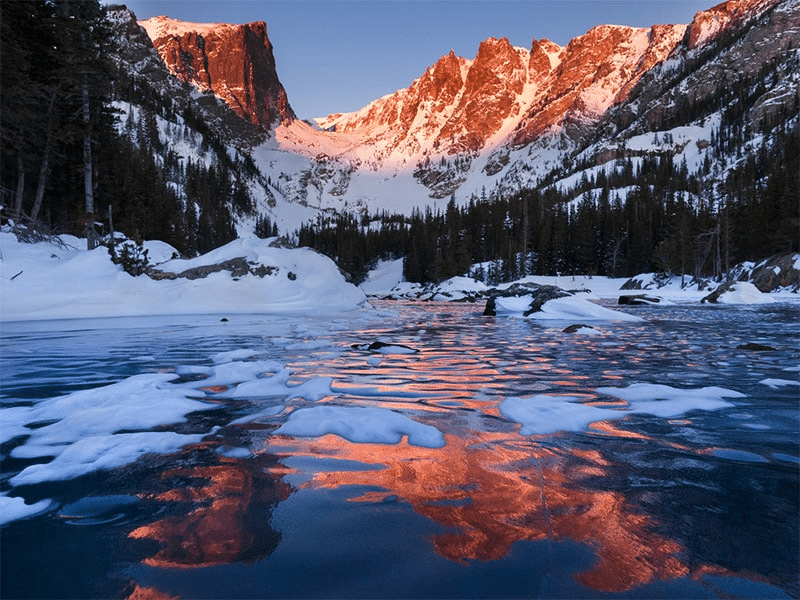
Rocky Mountain National Park by Bryce Bradford / CC BY-ND 2.0
Sawtooth National Recreation Area – Idaho
The Sawtooth National Recreation Area in central Idaho includes 40 mountain peaks over 10,000 feet in height and more than 300 lakes. The Sawtooth Scenic Byway (Idaho State Highway 75) provides access to the area. Redfish Lake and Little Redfish Lake are excellent for photographing with the mountains in the background.
→ See more places to photograph in Idaho.
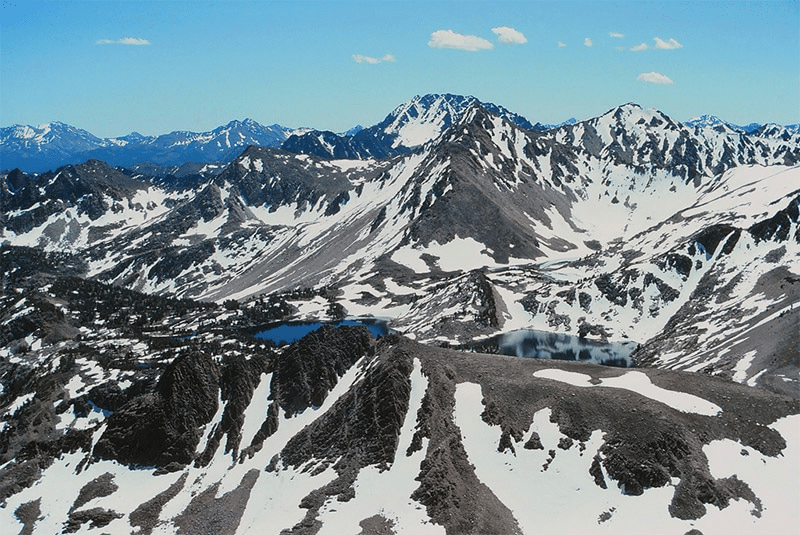
Sawtooth National Recreation Area by Roy Luck / CC BY 2.0
Shenandoah National Park – Virginia
Shenandoah National Park is just about 75 miles west of Washington, DC. The centerpiece of this mountain park is Skyline Drive, a 105-mile road that runs the length of the park and includes 75 scenic overlooks. In addition to the overlooks, you can also find spectacular views from any of the hiking trails within the park (most of the trails start somewhere along Skyline Drive).
For more details see our Guide to Photographing Shenandoah National Park.
→ See more places to photograph in Virginia.
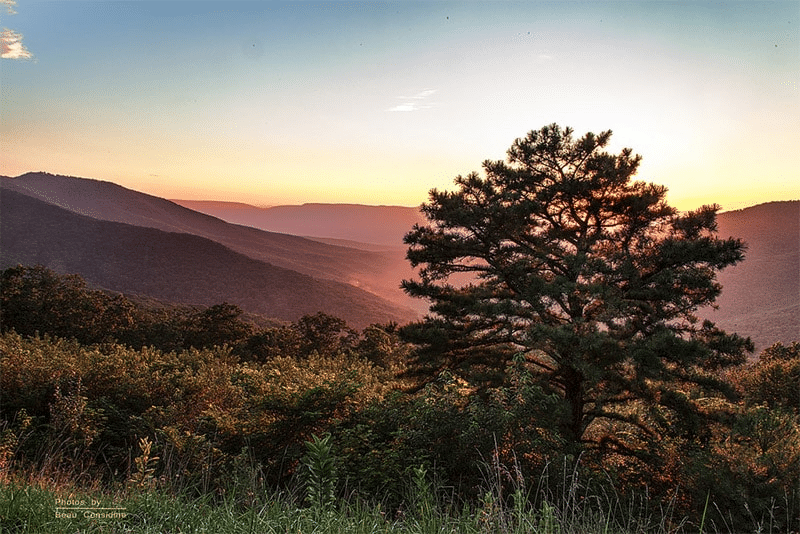
Shenandoah National Park by Beau Considine / CC BY-SA 2.0
Great Smoky Mountains National Park – Tennessee and North Carolina
The most-visited national park in the U.S., Great Smoky Mountains National Park is an ideal place to capture beautiful mountains in any season. Spring and fall are especially popular, but summer and winter are also great possibilities in this park. There are a few different roads that travel through the park, with overlooks and viewpoints providing quality photo opportunities.
You can drive to Clingmans Dome and walk a short distance to reach the highest point in the park. For details please see our Guide to Photographing Great Smoky Mountains National Park.
→ See more places to photograph in Tennessee and North Carolina.
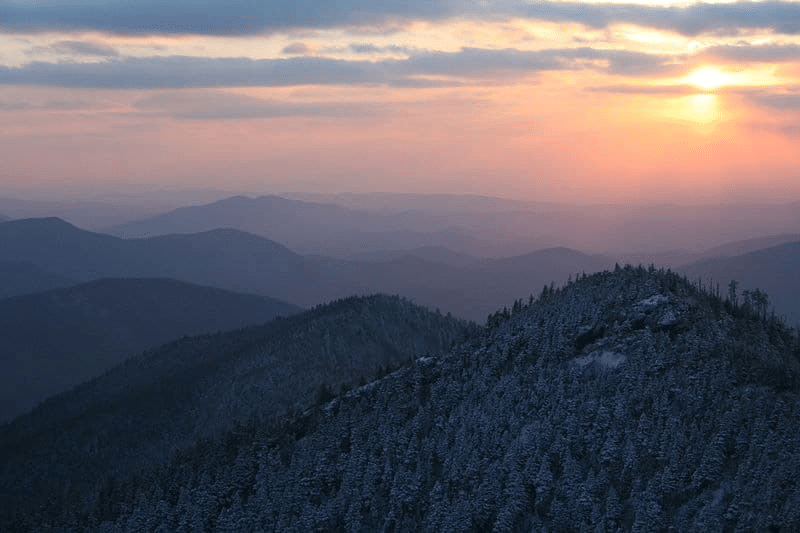
Great Smoky Mountains National Park by Aviator31 / Public Domain
Mount Shasta – California
Mount Shasta is a 14,000-foot volcanic mountain in northern California. It rises beautifully above the surrounding landscape, making it a perfect subject for photos. The majestic, snow-capped peak is a favorite of many photographers.
→ See more places to photograph in California.
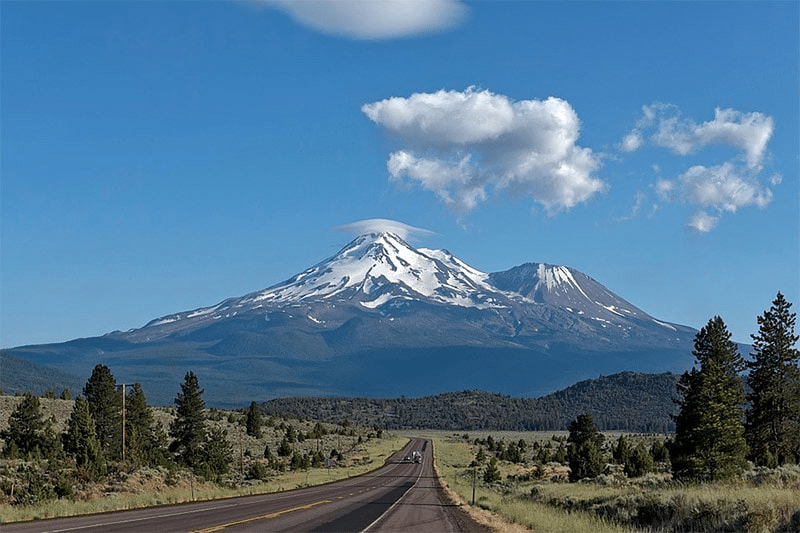
Mount Shasta by tpsdave / CC0
Denali National Park – Alaska
Denali National Park in Alaska is home to Denali (formerly known as Mount McKinley). At more than 20,000 feet in elevation, Denali is the tallest peak in North America. Denali Park Road provides access to the park and its spectacular views, although only a portion of the road is open to private vehicles.
Traveling by tour is required to continue on the road beyond that point.
→ See more places to photograph in Alaska.
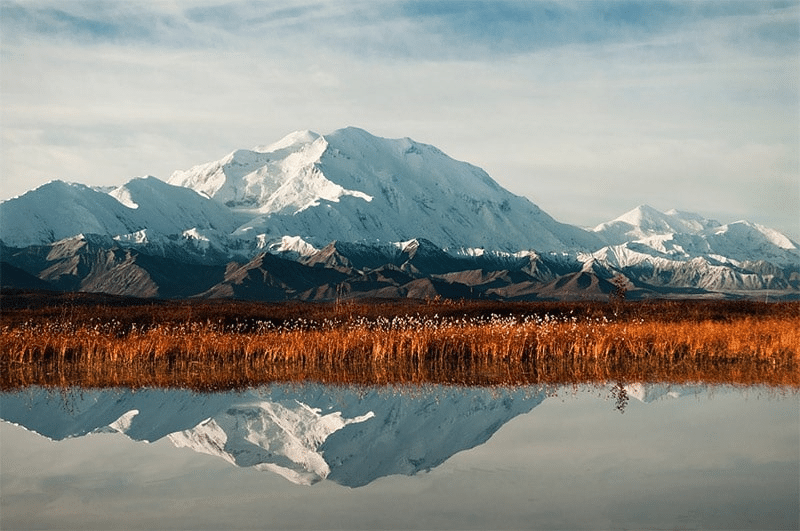
Denali National Park by skeeze / CC0
Wrangell – St. Elias National Park – Alaska
Wrangell – St. Elias National Park in Alaska ranges in elevation from sea level to 18,000 feet. Roads in the park are limited, but unlike several national parks in Alaska, traveling by car is possible.
→ See more places to photograph in Alaska.
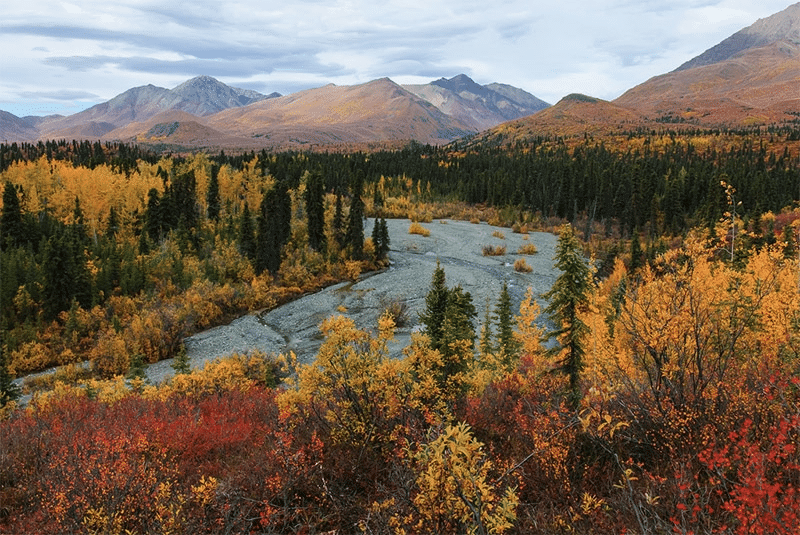
Wrangell – St. Elias National Park by Bryan Petrtyl / CC BY-SA 2.0
Amazing Photos of Mountains
Mountains are a common and popular subject in landscape photography, and with good reason. Whether the mountains serve as a background to a pristine lake or blooming flowers, or the mountains provide the focal point of the photograph, they can play an integral role.
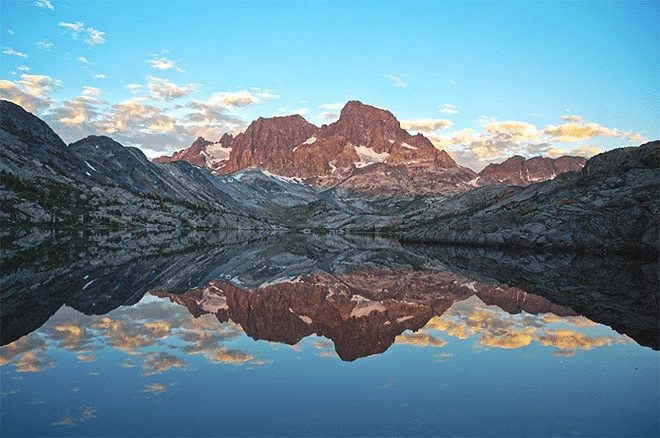
Mountain by Ross Donihue / CC BY 3.0
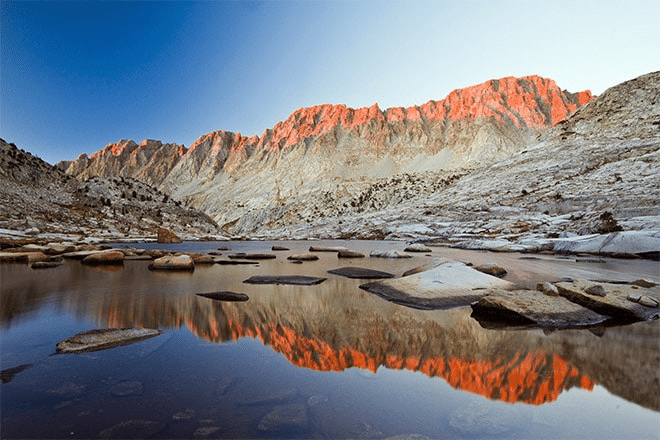
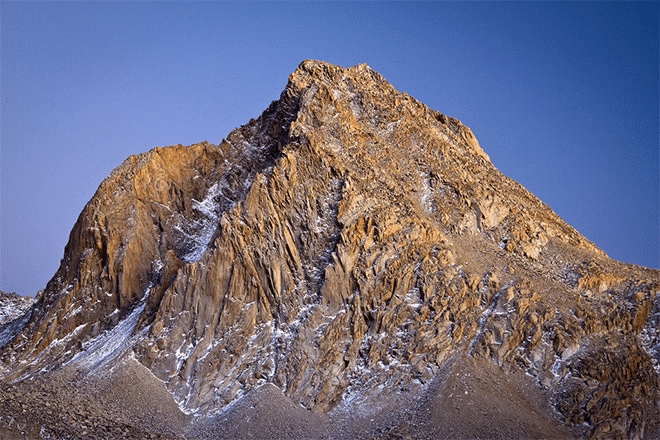
Darwin by Jeff Pang / CC BY 3.0
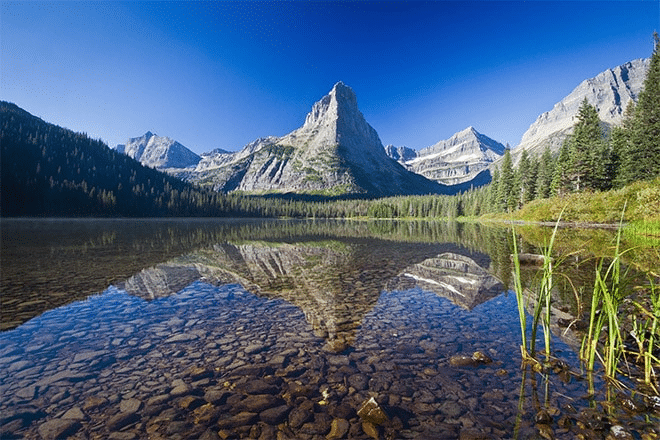
Glenns Lake by Jeff Pang / CC BY 3.0
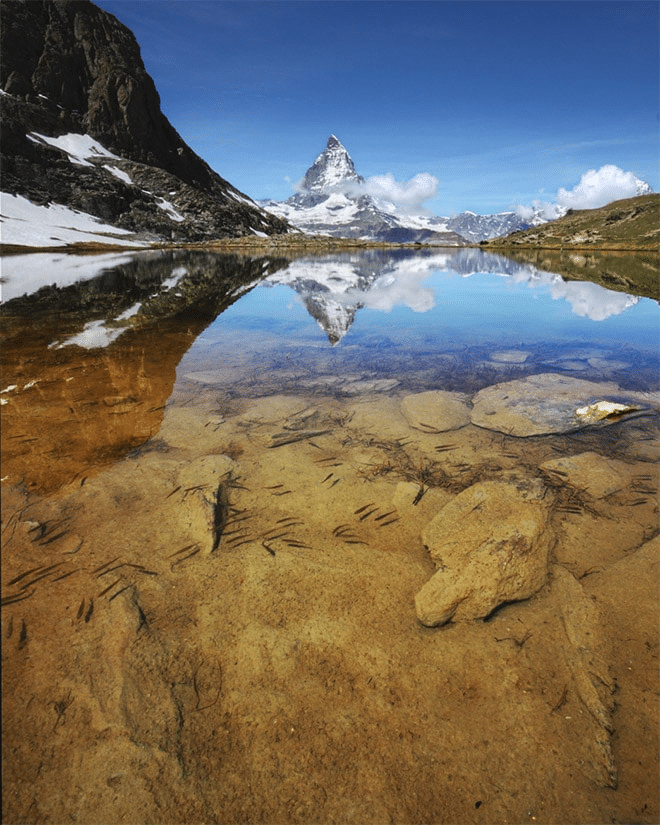
Riffelsee by Jeff Pang / CC BY 3.0

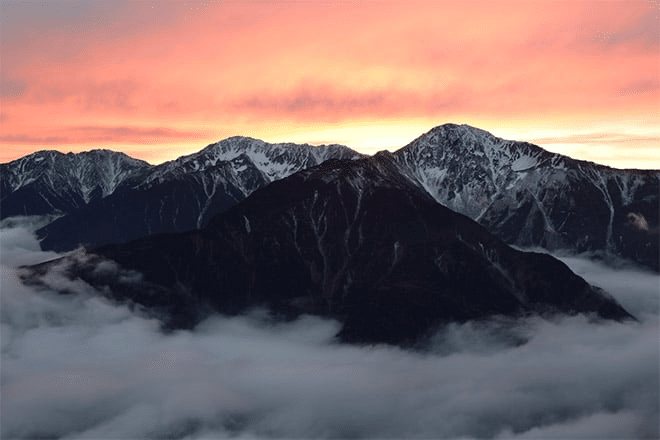
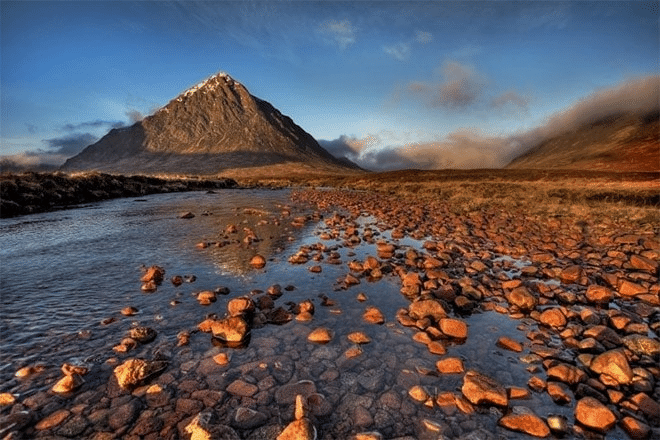
Smoking Mountain by Nuno Fernandes / CC BY 3.0
Whisper by Jeff Pang / CC BY 2.0
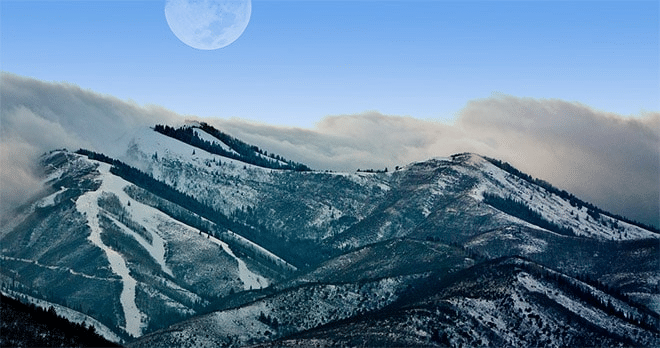
Park City Mountains by Joseph DePalma / CC BY 2.0
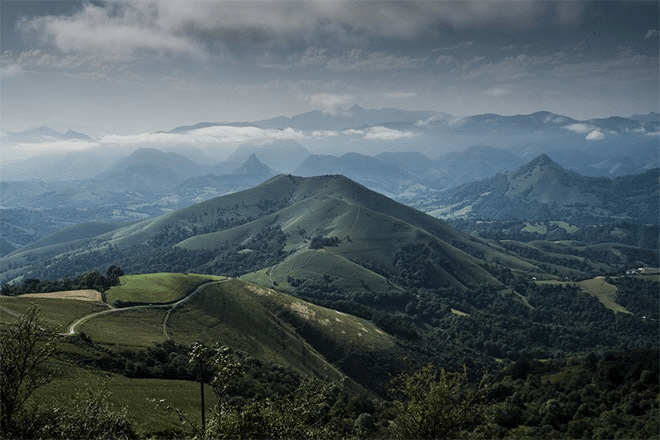
Pyrenees by Vincent / CC BY 2.0
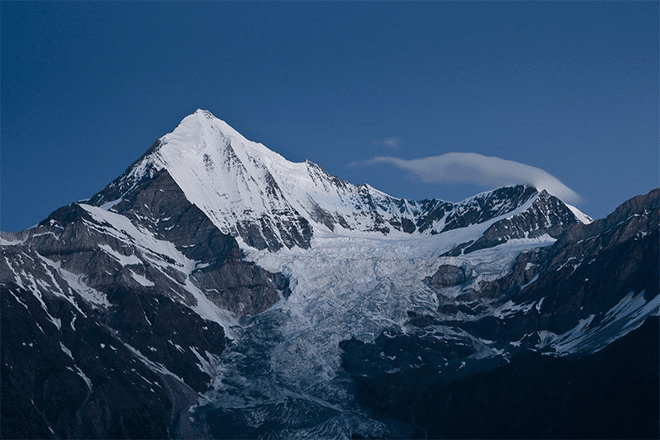
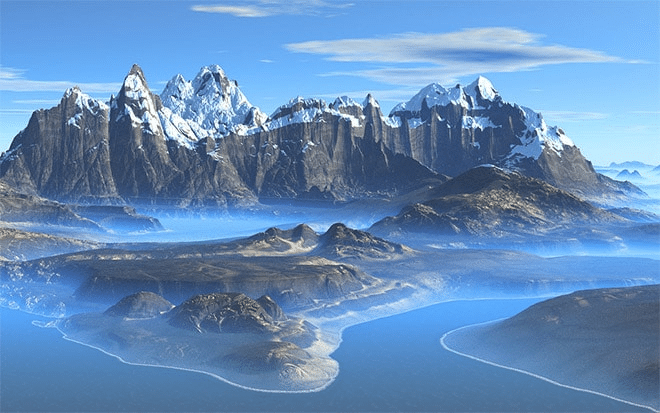
The Snow Mountain Which Burns by T hino / CC BY-ND 2.0

Mountain by Cheryl / CC BY-ND 2.0
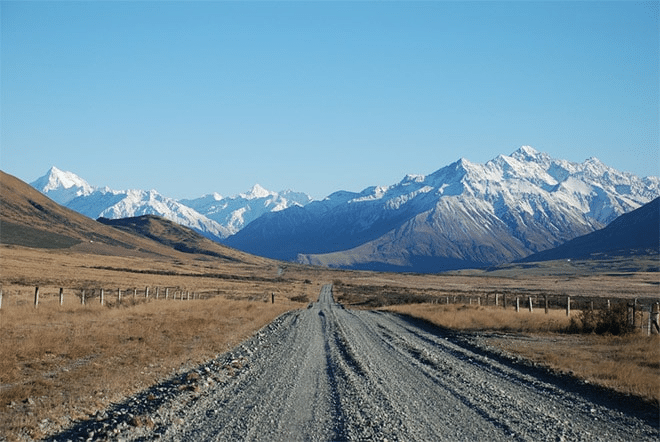
Pott’s Road, Canterbury, New Zealand by Phillip Capper / CC BY 2.0

Sailor Lake by Jeff Pang / CC BY 2.0
Mountain by mike138 / CC BY-ND 2.0
Huxley by Jeff Pang / CC BY 2.0
Mountains and Coast by Serendigity / CC BY-SA 2.0
In Switzerland by Els / CC BY 2.0
Photo license links: CC BY 2.0, CC BY 3.0, CC BY-SA 2.0, CC BY-ND 2.0,CC BY-SA 2.0, CC BY-ND 2.0, CC0


Thanks for sharing.
You’re welcome. Thanks for your comment.
Oh wow, thanks for featuring one of my pictures, and most of all, thanks for the attribution!
You’re welcome Alberto. We’re happy to give credit even to kind photographers like yourself who allow their photos to be used with no requirement of attribution.