
Shenandoah National Park – photo by Marc Andre
Shenandoah National Park in Virginia is a beautiful mountain park that is a great place to photograph. Located about 70 miles west of Washington, DC, Shenandoah is one of the top national parks in the east and is easy to reach and access. It is known for being especially picturesque during autumn, as well as for the abundant wildlife within the park. This page will give an overview of the park and the most noteworthy locations and trails for photographers, so if you are planning a trip it should help with your scouting and planning.
The layout of Shenandoah National Park is rather unique. It is a long, narrow park that stretches mostly north and south in the Blue Ridge Mountains. Skyline Drive is the centerpiece of the park. It is a 105-mile road through the park with 75 scenic overlooks along the way. In addition to the overlooks, most of the park’s trails are also accessible from Skyline Drive. Visitor’s centers, lodging, restaurants, and gas are also located along Skyline Drive.
For a larger view, please click the map.
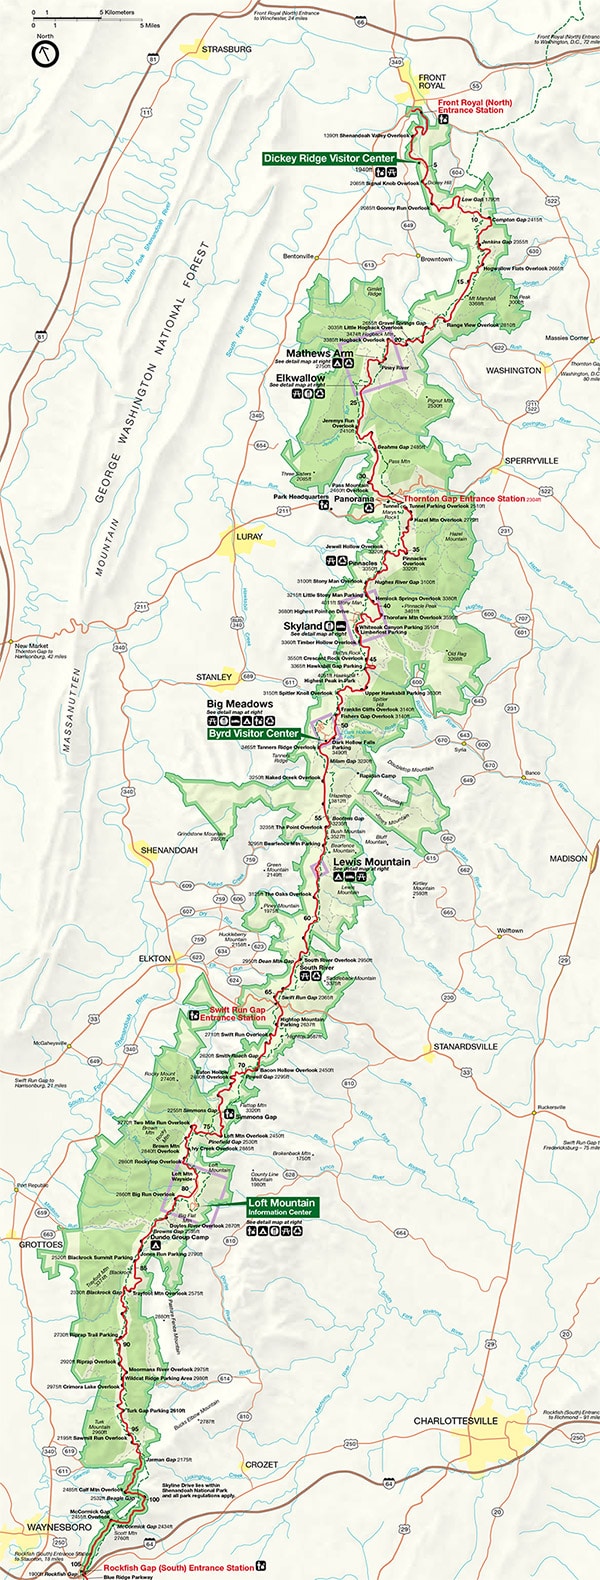
There are four entrances to the park: a north entrance in Front Royal, a south entrance in Rockfish Gap, and two entrances in between (Thornton Gap and Swift Run Gap). The north and south entrances are basically the end points of Skyline Drive, and the Thornton Gap and Swift Run Gap entrances can be used from both east and west and will allow you to enter near the middle of Skyline Drive. If you are using a GPS for directions be sure that you are heading towards one of these entrances because there are some other roads that enter the park, but they are not open for public access.
→ Related reading: Photographer’s Guide to Great Smoky Mountains National Park
Skyline Drive
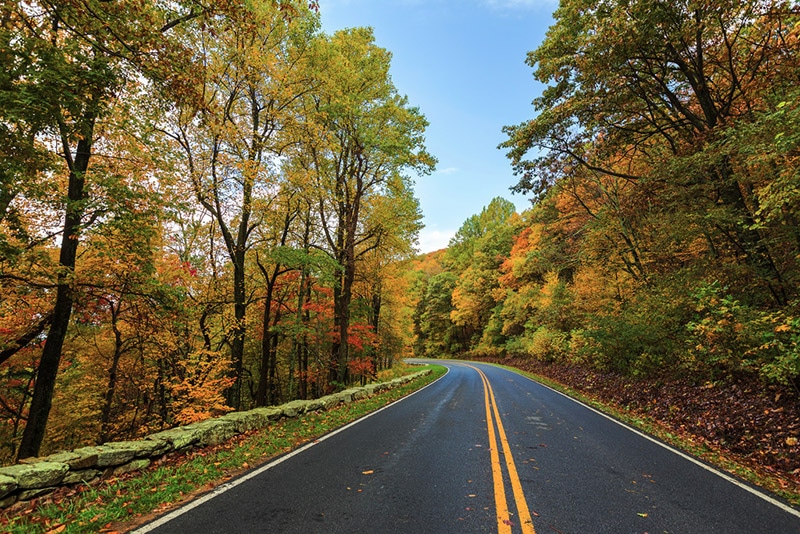
Skyline Drive – photo by Shenandoah National Park / CC BY 2.0
Skyline Drive runs the full length of the park and is the only main road within the park. There are some other roads that extend off of Skyline Drive, but pretty much anywhere you need to drive within the park will use Skyline Drive to get you there. It is a two lane road (one lane each direction) with a speed limit of 35 miles per hour in most places. So even if you didn’t stop at any of the overlooks it would take a few hours just to drive the length of Skyline Drive. Keep this in mind when you are planning your trip, because getting from one location to another can take quite a while. Skyline Drive can also get busy during peak seasons. Along Skyline Drive you’ll see mile markers on the side of the road. These are really helpful because the maps, in may cases, list the mile marker for areas of interest, like an overlook, trailhead, restaurant, or visitor’s center.
The overlooks can be accessed from either direction on Skyline Drive. Some of the overlooks have a good bit of parking available, but many are smaller pull offs on the side of the road with room for several cars. In off-peak seasons you should have no trouble finding parking at the overlooks, but in peak seasons they can get more crowded, especially the ones that only have room for a few cars.
In addition to the overlooks you will also get amazing mountain views from other stretches of the road while you are driving. Personally, I found the views from the road to be more interesting and more stunning than many of the overlooks. At some places along the road there is no room for an overlook or parking, so the overlooks are mostly in places that have a combination of a nice view and ample room for stopping cars. Aside from the overlook parking, there are also parking lots for trailheads and occasional areas for pulling off the side of the road. In these places you can park and explore the area to find your own views that may not be available from any overlook. You can also photograph the woods, rocks, and other interesting things along Skyline Drive.
→ Related reading: 10 Tips for Impressive Mountain Photography
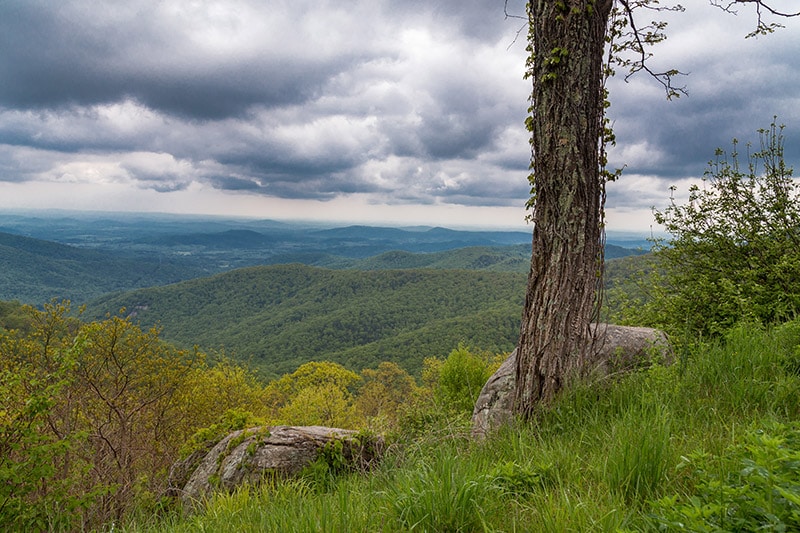
Near Little Hogback Overlook – photo by Marc Andre
Skyline Drive Overlooks
With 75 official overlooks there is no shortage of views along Skyline Drive. Of course, not all of them are equal. Some have views that are limited due to trees and foliage, while others have wide open vistas that are great for photography. In this section I’ll point out some of my favorite overlooks and why they stand out. The overlooks listed here are in order from north to south.
Tunnel Parking Overlook
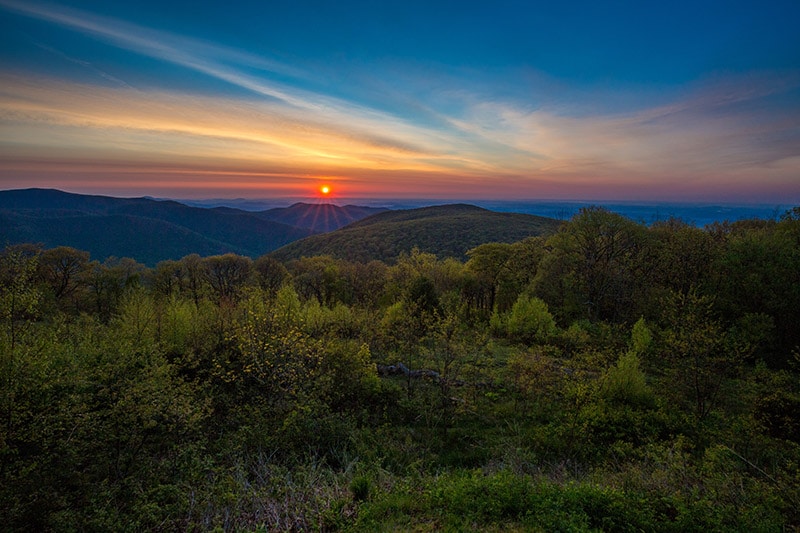
Just south of the Thornton Gap entrance is the Mary’s Rock Tunnel. At the south end of the tunnel is Tunnel Parking Overlook (mile 32.5). The overlook faces east and gives you a great open view, making it an ideal spot for sunrise photos.
The view from Tunnel Parking Overlook – by Marc Andre
Hazel Mountain Overlook
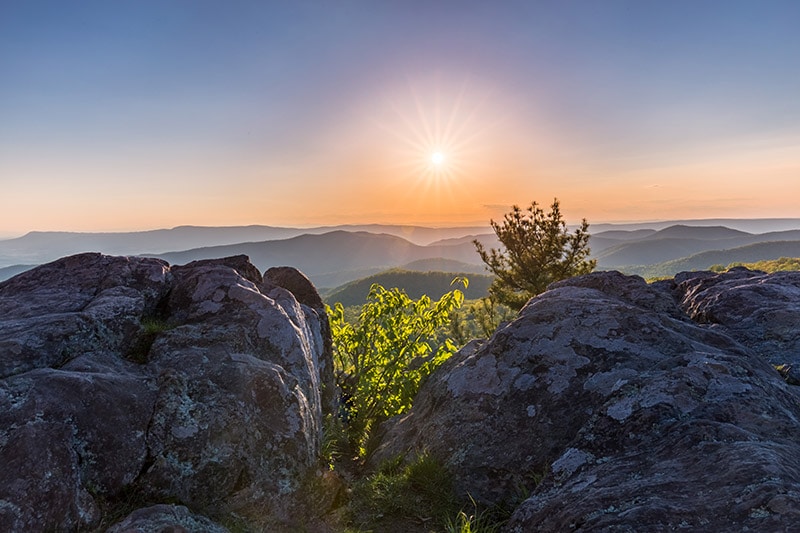
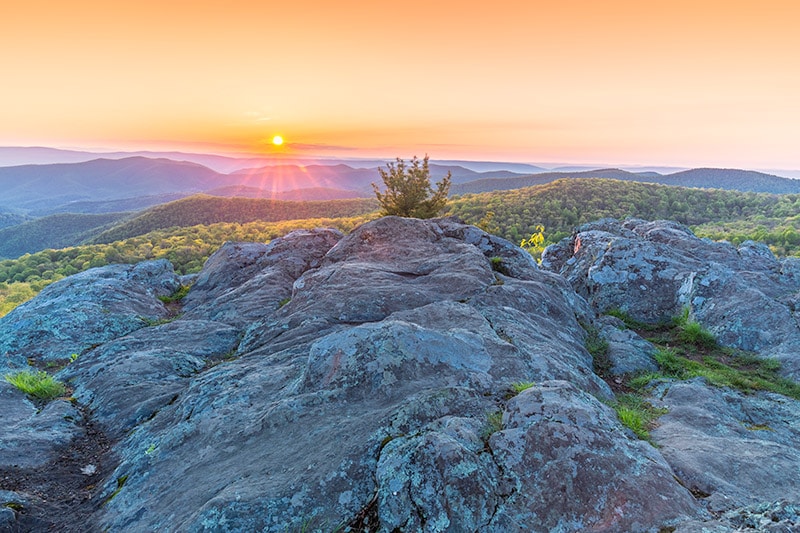
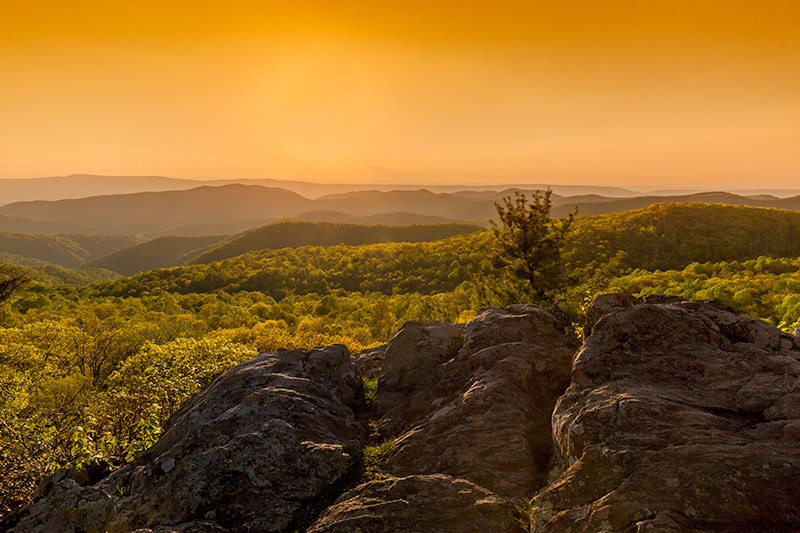
At mile 33, Hazel Mountain Overlook is unique because of the rocks/boulders located at the overlook. You can climb on the rocks to get a great view, of use the rocks in your composition. This overlook is also east facing and provides a nice vantage point for sunrise photography.
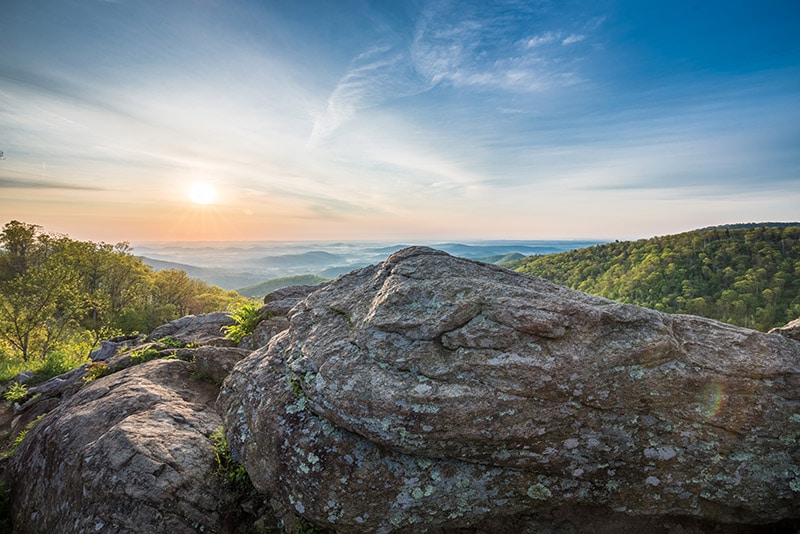
Hazel Mountain Overlook – by Marc Andre
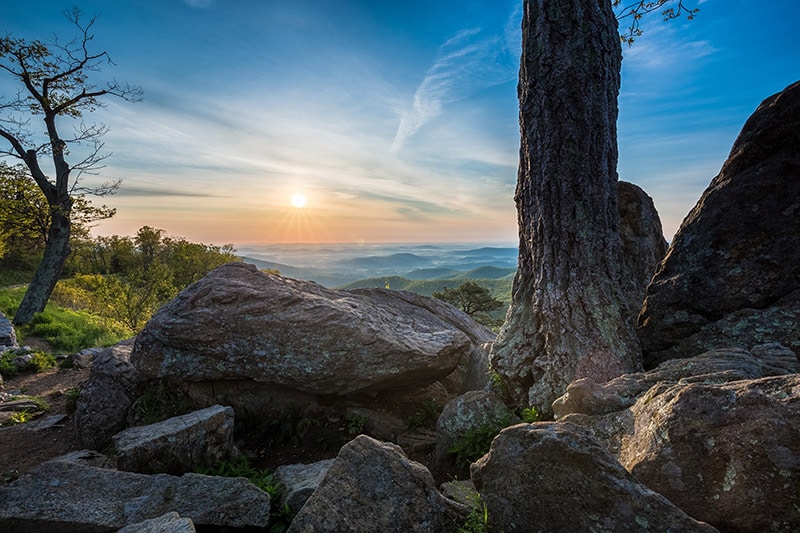
Hazel Mountain Overlook – by Marc Andre
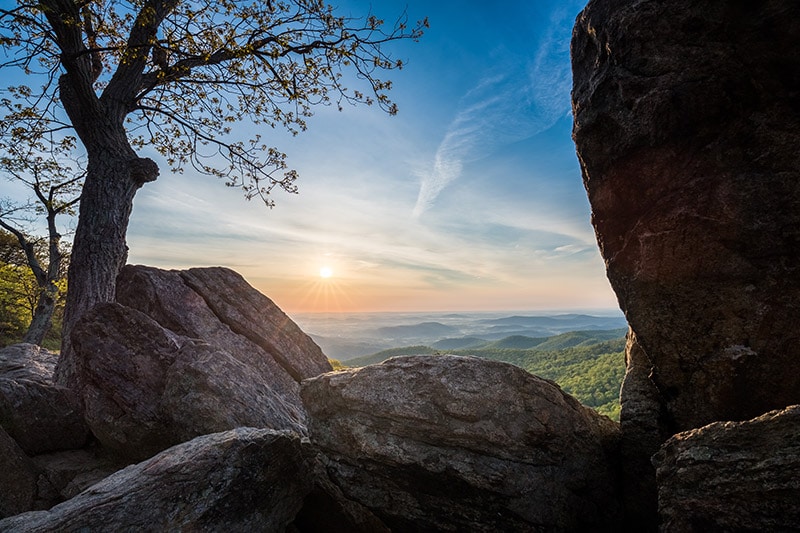
Hazel Mountain Overlook – by Marc Andre
Hemlock Springs Overlook
Hemlock Springs Overlook (mile 40) is another east-facing overlook that can be a great spot to catch the sunrise. It is located just north of the Skyland Resort, so if you want to catch the sunrise here you can be very close by staying at Skyland.
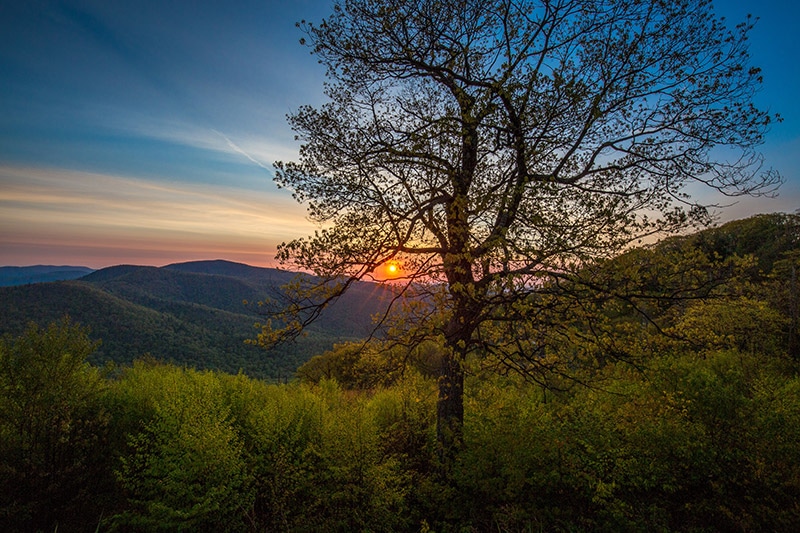
Hemlock Springs Overlook – photo by Marc Andre
Thorofare Mountain Overlook
The next overlook south from Hemlock Springs is the Thorofare Mountain Overlook (mile 40.5). This east-facing overlook seems to be one of the most popular places for photographing the sunrise. There were three other photographers the morning I was there, and no more than one other photographer at any of the other overlooks I visited at or around sunrise. At the Thorofare Mountain Overlook there is plenty of room for several photographers along the small stone wall by the parking area. You can also step over the wall and photograph from a small field that is flat enough.
Thorofare Mountain Overlook – by Marc Andre
The Point Overlook
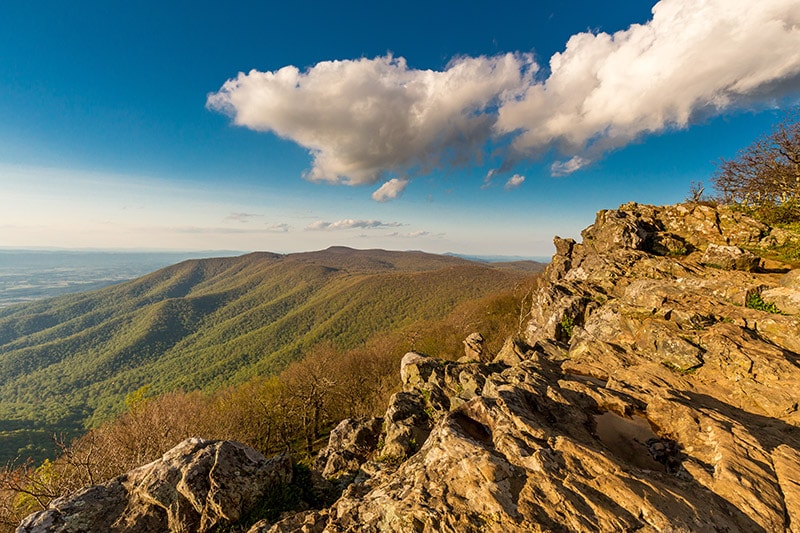
Traveling further south, The Point Overlook (mile 55.5) is a west-facing overlook with a nice view for sunsets. From the overlook there is a short trail the leads you down about 100 feet to a rocky area. From here you can get the best view. The photos below were taken from that spot. The overlook is located just a few miles south of Big Meadows Lodge. Big Meadows also has two restaurants and a gas station, so it is a convenient place to stay.
The Point Overlook – photo by Marc Andre
The Point Overlook – photo by Marc Andre
The Point Overlook – photo by Marc Andre
Brown Mountain Overlook
At mile 77, Brown Mountain Overlook gives a bit of a different view than any other overlook, especially right now. In April, 2016 a large fire burned 10,000 acres of the park and forced closure to this section of Skyline Drive. This overlook is also the starting point of the Brown Mountain Trail.
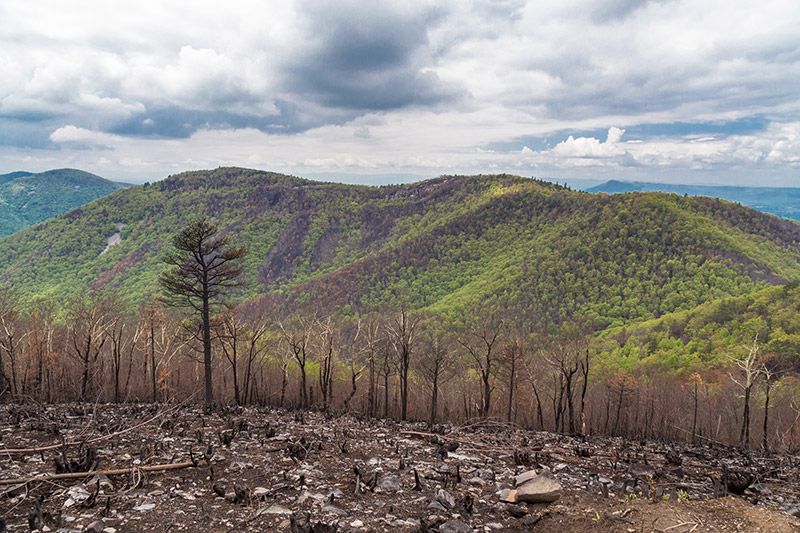
Brown Mountain Overlook – photo by Marc Andre
Wildlife
You’re also likely to see wildlife just by driving along Skyline Drive. I saw several black bears, many birds, and countless deer. All of the bears I saw were close to the road and in the northern half of the park. I don’t know if that was coincidence or if that is where the black bears tend to be within the park. When you are driving on Skyline Drive always keep an eye out for deer that may be in the road or crossing the road. I didn’t see as many deer as I expected during most times of the day, but around sunrise and early in the morning they were everywhere.

Photo by Katy Cain / Public Domain
Hiking Trails
As a visitor to Shenandoah National Park you get spoiled by the views that are so easily accessible from Skyline Drive. However, the many trails in the park can provide even more spectacular views. Some of the trails are short and quick, and others are more intense day hikes. If you’re working with limited time in the park you will probably stick to the shorter trails, and fortunately some of those shorter hikes can get you to places that are great for photographers. Here is a look at some of the best trails and hikes within the park.
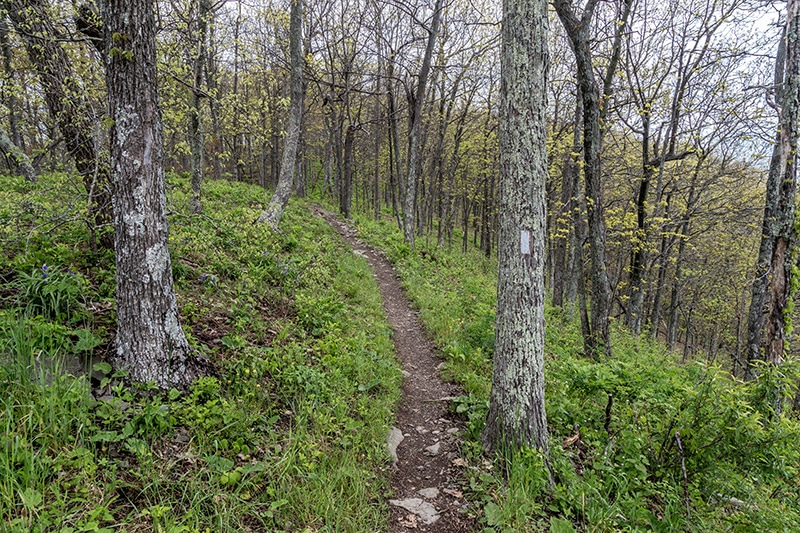
Stony Man Trail
The Stony Man Trail is a great option if you want an amazing view and you have a limited amount of time available. It is about 1.6 miles roundtrip and is a relatively easy hike, although there is some elevation gain. The summit of Stony Man Mountain provides a stunning view of the Shenandoah Valley, and the rocky mountaintop is perfect for photographing. You can get a lot of different vantage points by walking/climbing around the rocks at the top.
This trail starts at mile 41.7. There is a large parking area just off of Skyline Drive near a sign for Skyland, and the trailhead for is at the end of the parking lot near Skyline Drive.
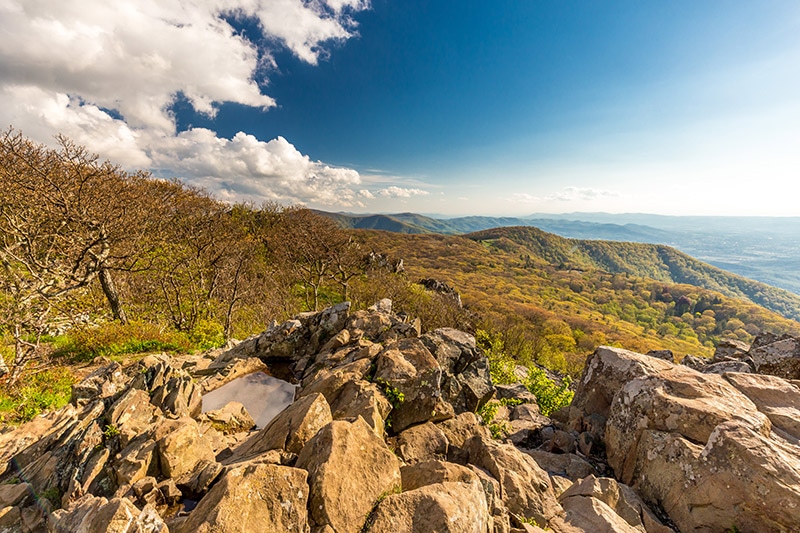
View from Stony Man Mountain – photo by Marc Andre
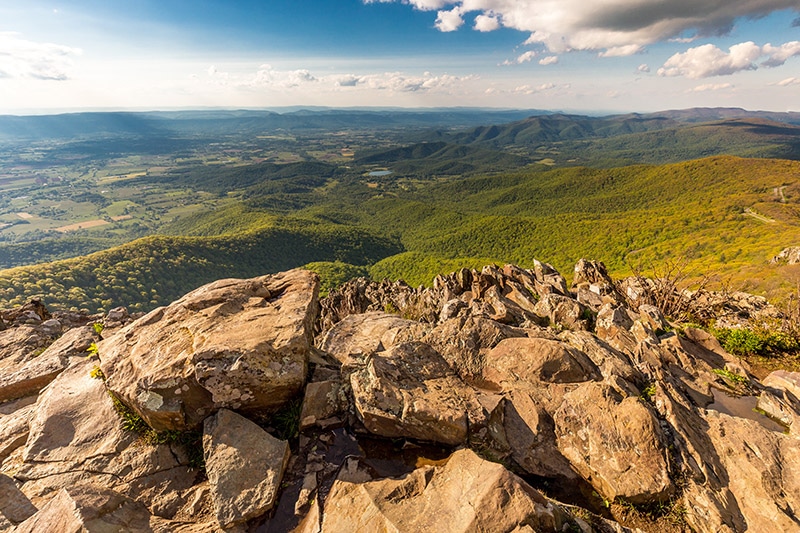
View from Stony Man Mountain – photo by Marc Andre
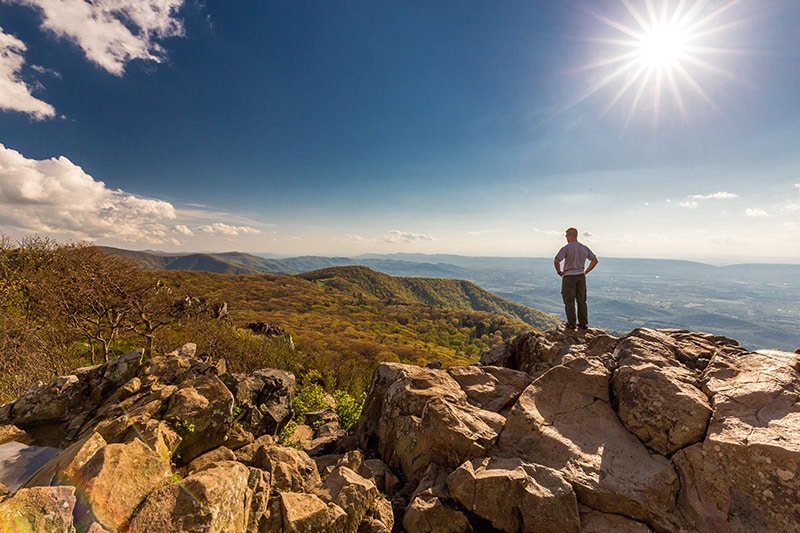
View from Stony Man Mountain – photo by Marc Andre
Lower/Upper Hawksbill Trail
Hawksbill Mountain is the highest point in the park, and from here you will have a great view for photographs. The summit is rocky, which can help for creating an interesting foreground in your photos. You can take either the Upper or Lower Hawksbill Trail, although the lower trail is a bit steeper. The Upper Hawksbill Trail (2.1 miles roundtrip) starts at the Upper Hawksbill parking area at mile 46.7 of Skyline Drive. The Lower Hawksbill Trail (1.7 miles roundtrip) starts at the Hawksbill Gap parking area at mile 45.6.

View from Hawksbill Mountain – photo by Marc Andre
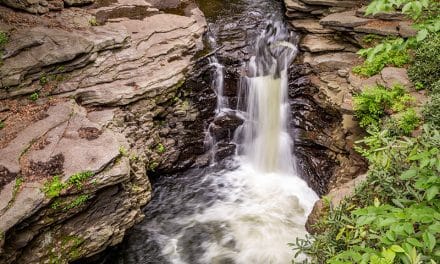
Dark Hollow Falls Trail
One of the most popular trails in the park, the Dark Hollow Falls Trail will give you a nice view of the beautiful waterfall. The trailhead starts at mile 50.7, just north of Big Meadows and the Byrd Visitor’s Center. There is a large parking area across the street from the trailhead. The trail is only 1.4 miles round trip, but it is quite steep (downhill on the way out, uphill on the way back). This 70-foot cascading waterfall is a popular spot in the park, so try to plan your hike at a time when it won’t be as likely to be crowded. Beyond the waterfall you can continue on the trail for a short distance to reach Lower Dark Hollow Falls.
→ Related reading: 10 Tips for Fabulous Waterfall Photography

Dark Hollow Falls by Good Free Photos / Public Domain
Old Rag Trail
Old Rag Trail is a popular, and challenging, day hike that provides amazing views. If you have limited time at the park and you want to photograph as much as possible you will be better off sticking to the shorter trails and Skyline Drive, but for serious hikers Old Rag Trail is a great option. Unfortunately, it is not accessible from Skyline Drive (get directions at this page). This 9-mile hike includes narrow passages and a rock scramble, which makes it not ideal for carrying photography gear.
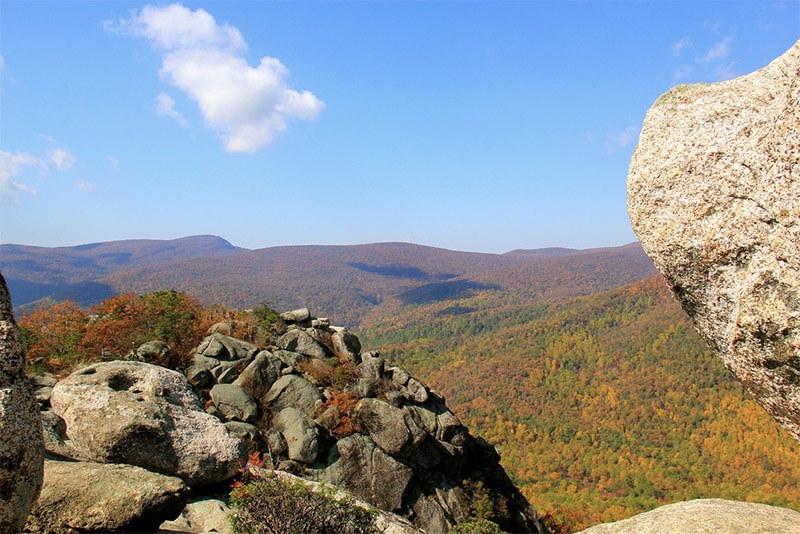
Old Rag – photo by daveynin / CC BY 2.0
Bearfence Trail
Bearfence Trail is another challenging hike that is worthy of being mentioned because of the views that it provides. It starts at mile 56.4 on Skyline Drive and is only 1.2 miles round trip. The scramble over a rocky section can be difficult for some hikers, especially if you have photography gear with you.
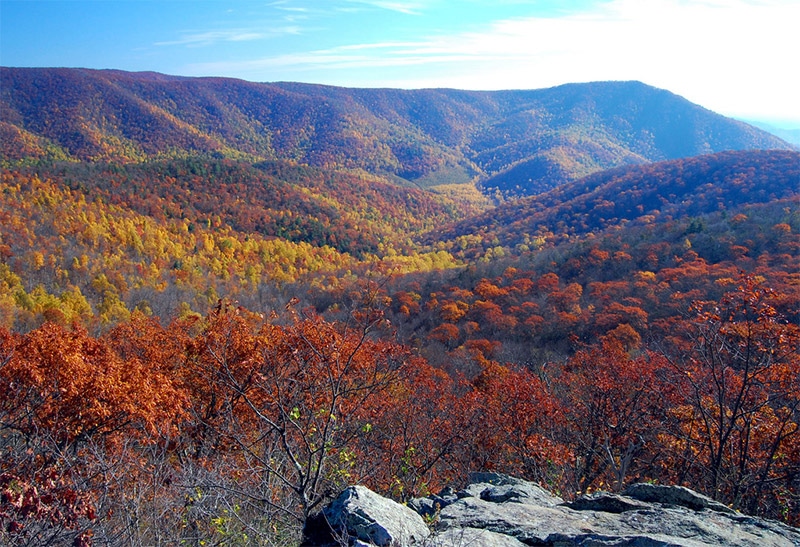
View from Bearfence Trail – photo by Mark Levisay / CC BY 2.0
White Oak Canyon / Cedar Run
The White Oak Canyon and Cedar Run Loop combines two trails to make one spectacular day hike. It is almost 8 miles round trip with a good bit of elevation change, but you’ll be rewarded with views of several different waterfalls. The trailhead is between mile markers 45 and 46 on Skyline Drive.
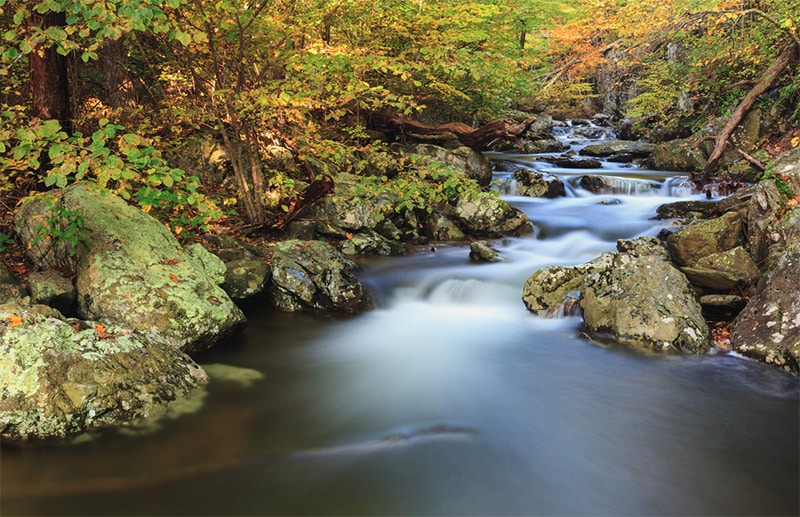
White Oak Canyon – photo by N. Lewis / CC BY 2.0
Where to Stay
There are a few different places to stay right inside the park. Skyland Resort and Big Meadows Lodge are located at miles 41.7 and 51. Both of those areas also have restaurants and provide easy access to great spots for sunrise and sunset photography. Some of the most popular trails (including Dark Hollow Falls, Stony Man, and Hawksbill) are also in this area of the park. I stayed at Big Meadows Lodge and found it to be a great location. Another option is Lewis Mountain Cabins at mile 57.5. Reservations at any of those three places can be made at GoShenandoah.com. There are also several campgrounds to choose from.
There are also some towns outside the park, like Harrisonburg, with accommodations available. For convenience, and for getting up early to photograph a sunrise, staying inside the park is preferable.
When to Visit
The best seasons for photographing Shenandoah National Park are spring and fall. Spring brings lush greens and heavier flow for waterfalls. Fall colors make the park even more beautiful than it is in other seasons. Winter is also a great time for some unique photographs, but the weather can be more challenging and accessibility may be an issue (hiking is not ideal). Like other popular tourist destinations, visiting on weekdays and during the school year can help to avoid the largest crowds.
Tips for Photographing Shenandoah National Park
Here are some quick tips to help you get the most out of your time at the park.
Buck Hollow Overlook – photo by Marc Andre
Don’t Rely Exclusively on the Overlooks
The overlooks along Skyline Drive are great, but don’t let them overshadow the other photographic opportunities around you. It’s easy to get caught up with the overlooks and driving from one to the next, but on Skyline Drive there are opportunities all around you for great photographs, and many of them do not involve the overlooks. At some times of the day the lighting won’t be great for photographing from the overlooks anyway. The trails, plants, and wildlife along Skyline Drive will give you countless subjects for photos.
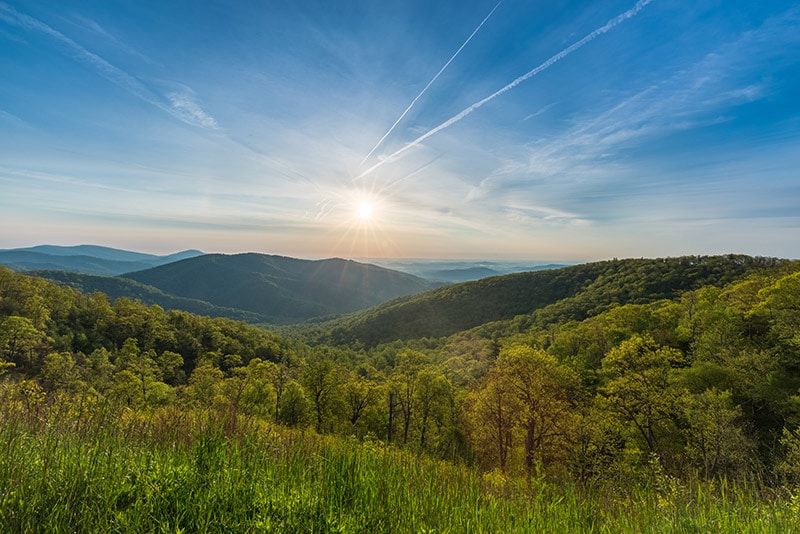
Focus on the Golden Hours
Like most landscape and nature photography, your photos from the overlooks are likely to be much more interesting when taken around sunrise or sunset. These are the best times to get amazing photos from the overlooks, so set aside time for the views that you want during the golden hours and use the other times throughout the day for hiking or photographing other things along Skyline Drive.
Focus on the Details
The overlooks are the main attraction, but don’t forget to look around you for other details that are great for photographs. Most of my time on Skyline Drive was spent driving from one overlook to the next, but some of my favorite photos from my time at the park are the few that I took along Skyline Drive focusing on details like trees and rocks. When I go back I will put less emphasis on photographing from the overlooks and spend more time parking in random places along Skyline Drive and exploring on foot to find interesting details to photograph.
Near the Ivy Creek Overlook – by Marc Andre
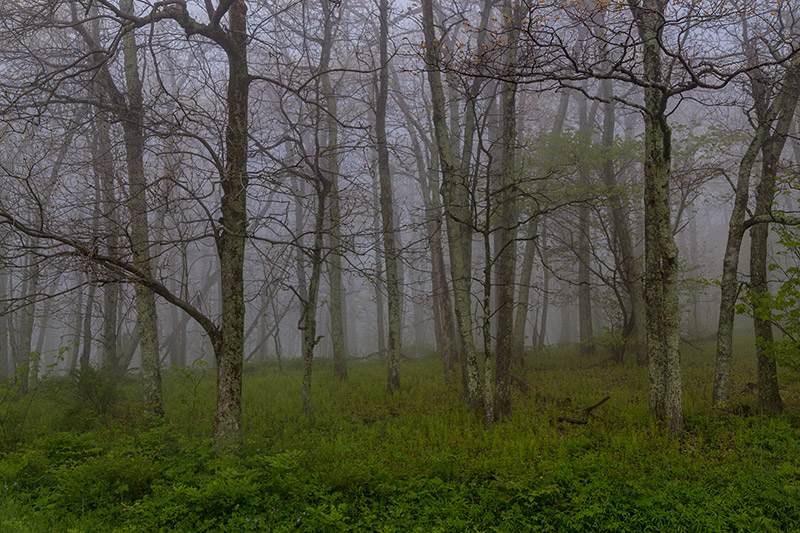
Be Prepared for Clouds and Haze
Clouds and haze will often present challenges for photographing from the overlooks. In some cases the clouds and fog were so thick I couldn’t see anything at all from the overlook. While this presents a challenge for getting photos of mountain vistas, it can be great for getting moody photos of trees and other details.
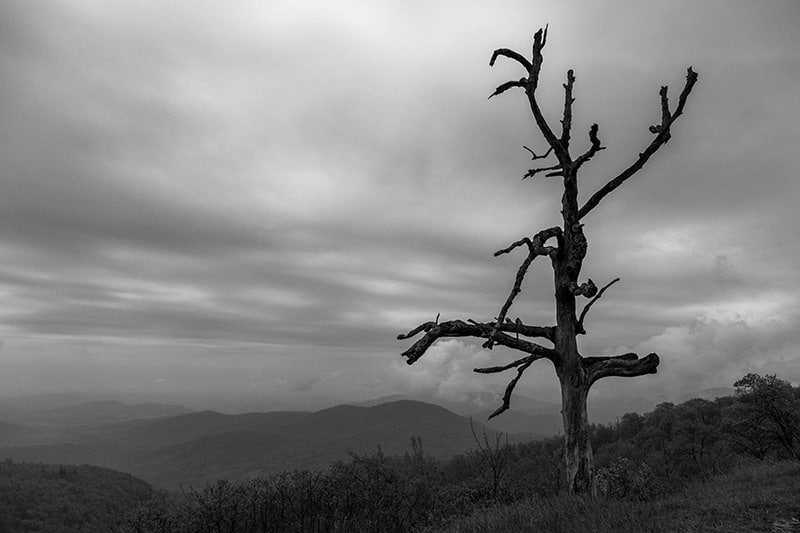
Little Devil’s Stairs Overlook – photo by Marc Andre
Have a Compass with You
As you travel along Skyline Drive you should be scouting locations that you would like to photograph at sunrise or sunset. Because Skyline Drive winds around a lot it can be difficult (especially on cloudy days when you can’t see the sun) to know from what direction the sun will be rising or setting. I used a compass app on my phone around wrote down the overlooks that seemed to be good options for sunrise and sunset. My preferred locations for sunrise are Thorofare Mountain Overlook, Hemlock Springs Overlook, Hazel Mountain Overlook, and Tunnel Parking Overlook. For sunset I preferred The Point Overlook.
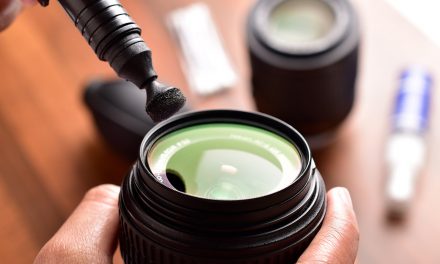
Recommended Gear
To get the most out of your trip to Shenandoah, here is some gear that you should have with you.
Sturdy, Lightweight Tripod
Some of the best photos from your trip are likely to be waterfalls and sunrise/sunsets. Most of those shots will require a tripod. Any time you are hiking in the mountains you will want to carry as little gear as possible, or choose the lightest gear possible. I recently started using a Sirui carbon fiber tripod that is very lightweight, sturdy, and affordable.
Wide Angle Lens
To capture the vastness of the mountains and valleys it is recommended that you have a wide angle or ultra wide angle lens in your bag. My lens of choice is the Canon 16-35 f4.
Telephoto Lens
While a wide angle lens will help for capturing the big mountain views, you’ll likely want a telephoto lens for capturing details or wildlife. The focal length needed will depend on what you want to photograph, but something like the Sigma 150-600mm is a good option.
Circular Polarizer
A polarizer can be helpful for cutting down on glare and for increasing contrast in cloudy skies.
Remote Shutter Release
When you are using a tripod a remote shutter release will allow you to photograph without touching the camera, helping to get the sharpest photos possible.
Landscape Legend Lightroom Presets
For processing your landscape photos please try our own Landscape Legend Lightroom Presets. This is the most extensive collection of presets created exclusively for landscapes and includes one-click presets as well as stackable workflow presets.


This article is awesome and so accurate. Thank you thank you thank you!!
You’re welcome Rachel!
Great site! thank you for your time and efforts.
Thanks Angelina!
Great article. I am returning to SNP this Fall after a previous trip in 2014,summer.
I will definitely check out the locations you mentioned.
Would recommend Rose River Falls hike as good place to see bear. Last visit I watched mother with 3 cubs!
Also worth mentioning to less fit or disabled that there is the Limberlost Trail. I have seen a lot of wildlife there including bear, at a distance,deer right beside me,ground squirrels etc.
Annie,
Thanks for your feedback and suggestions. I hope you have a great trip this fall.
Wow!!!! Loved your article. I am not a photographer but I was just looking for good spots to visit and this is going to be my guide.
Thanks once again.
You’re welcome Ruturaj. Have a great trip!
Thanks for the excellent details. Very very helpful