Photo by William Warby / CC BY 2.0
Waterfalls present natural beauty that makes a great subject for landscape photos. The rushing water of a powerful waterfall or the gentle trickle of a smaller fall can lead to amazing photos that viewers will love. Although there are several famous waterfalls that are well known around the world, you don’t have to go searching very far to find a great subject for your own waterfall photography. Lesser-known falls can provide opportunities to get great photos and chances are there are a few waterfalls within driving distance of wherever you live.
In this article we’ll look at 10 tips that can help you to get the most out of your waterfall photography.
→ Related reading: Water Photography: Composition & Creativity Ideas
1. Watch the Weather Forecast
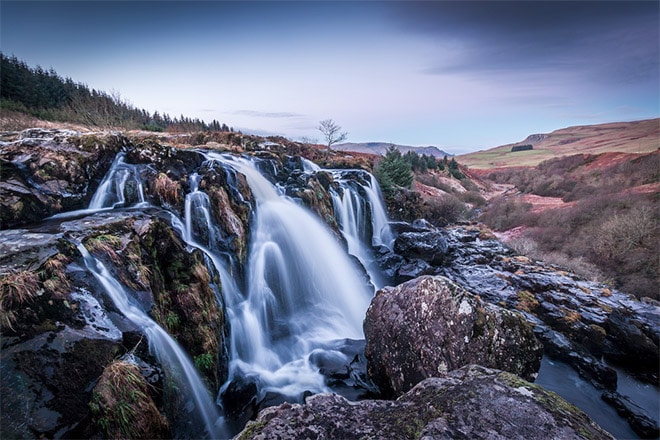
Photo by Paisley Scotland / CC BY 2.0
Weather is always a factor for landscape and nature photographers, but weather can have an even bigger impact for photographing waterfalls as compared to some other subjects. Generally, waterfalls will not photograph well on bright, sunny days as the highlights in the water can be easily blown out and harsh glares and reflections present obstacles. Cloudy, overcast weather will usually produce better results and allow the colors of the landscape surrounding the waterfall to look better.
2. Know the Layout
Photo by Peter Rivera / CC BY 2.0
Many waterfalls are surrounded by high rock walls or cliffs, and many will also have a lot of trees that block much of the incoming light. As an outdoor photographer you will, of course, want to work in the best light, which generally means in the hours around sunrise and sunset. However, when the sun is low in the sky the rock walls, cliffs, and trees surrounding the waterfall will have an even bigger impact on your photography. This isn’t necessarily a bad thing since you’ll generally want light that is softer rather than harsh.
Make an effort to get to know the layout of the waterfall that you will be shooting so you can anticipate how the lighting will be impacted when you plan to visit. If it is your first time visiting a particular you may need to do some research online to learn what you can about the surroundings of the area.
You’ll also want to be aware of the direction that the waterfall is facing, as it can have an impact on the lighting as well. If the waterfall is facing east or west you may want to avoid sunrise or sunset as the light shining directly on the waterfall will not be as pleasing as softer lighting.
3. Be Properly Equipped
Photo by Dennis Jarvis / CC BY-SA 2.0
When photographing waterfalls the most important piece of gear, aside from your camera and lens, will be your tripod. With the surrounding cliffs and trees blocking a lot of light you are likely to need a shutter speed that will require a tripod for a steady and sharp photo. Also, you may want to use slower shutter speeds to blur or soften the moving water.
→ Related reading: 11 Steps to Tack-Sharp Landscape Photos
If you plan to use slow shutter speeds or long exposures you may also want to have a neutral density filter that will reduce the amount of light reaching the senor. Getting the blurred look is popular with waterfalls, so having a good ND filter is helpful if this is your goal. However, you can often use a slow enough shutter speed that will soften the water even without an ND filter. You can use the lowest ISO that your camera will allow and a small aperture (like f/16 – f/22) to slow down the shutter speed enough to blur the water. Of course, all of the exposure settings that you’ll use and their impact on blurring the water will depend on the lighting conditions, but since many waterfalls are in darker areas you may not even need an ND filter for a soft blur.
A polarizer is also a good filter to have on hand because you may want to cut down on reflection or glare coming off the water. And depending on how close you are to the falls and how much water is flowing you may want to protect your lens from mist by using a polarizer or UV filter. It’s also a good idea to have some lens wipes, a microfiber cloth, and maybe a towel with you to keep you gear clean and dry in misty conditions.
For specific recommendations see our page of recommended gear for landscape photography.
4. Determine if the Sky Should Be a Part of Your Composition
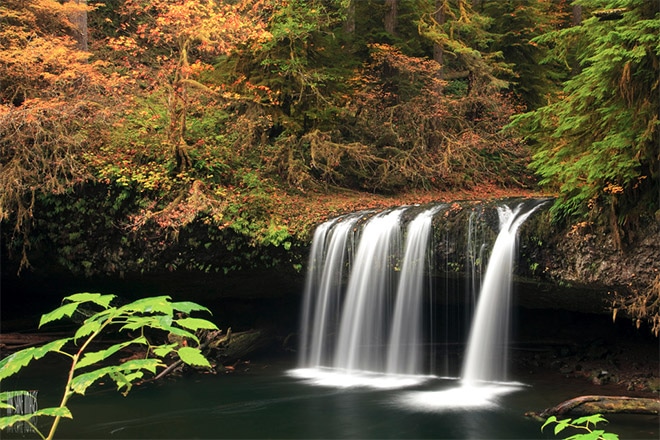
Photo by Ian Sane / CC BY 2.0
One of the downsides to shooting on cloudy or overcast days is that you may be working with very boring skies. If the sky is not adding to your photo you can compose your shots to focus more closely on the waterfall itself and avoid having the sky in your composition at all. Depending on the fall and it’s surroundings you may have options for shooting it from head on, from the side, from above, and in some rare cases you can even get behind the falls.
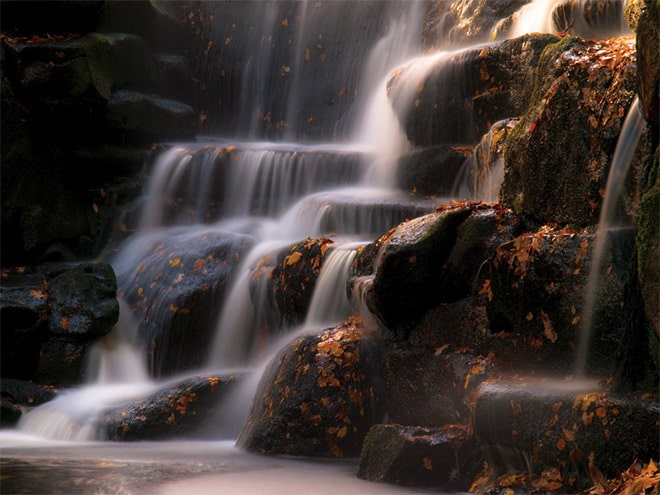
5. Look for Foreground Interest
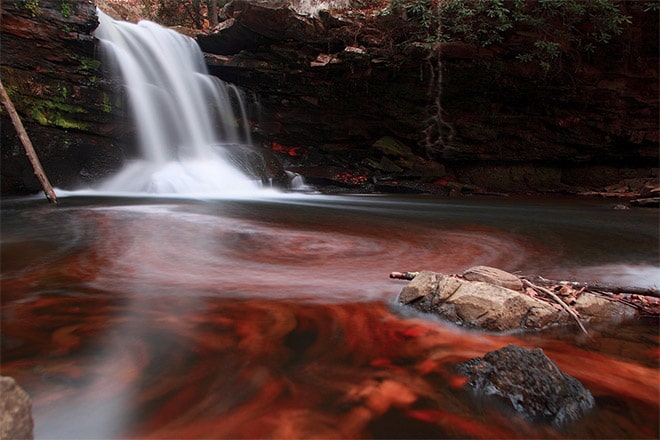
Photo by Forest Wander / CC BY-SA 2.0
Including foreground interest in your compositions is a good practice with landscapes in general, but when photographing waterfalls it’s easy to get consumed by the falling water and forget about the possibility or the need for foreground interest. At many locations you can include rocks, fallen trees, autumn leaves, or winter ice for foreground interest. Getting these elements in your foreground is easier if you are shooting from the bottom of the falls. Obviously, you don’t need to include foreground elements in every photo, but it is one option.
6. Experiment with Different Shutter Speeds
One of the most common questions about photographing waterfalls is what shutter speed should be used. Anytime you are photographing a scene that includes moving water your shutter speed choice will have a big impact on the end result. There is no shutter speed that will work well for all waterfall shots, but in general you may want to start with a shutter speed of 1-2 seconds for a soft blur and then work from there. In bright light a shutter speed that slow will overexposure your photos, but on an overcast day at a waterfall that has additional shade from tree cover and surrounding cliffs, shooting at 1-2 seconds may be possible without using a neutral density filter. View the results of your photo and adjust the exposure as needed.
If you want to freeze the water’s movement, which often works well with strong rushing falls, use a fast shutter speed and adjust as needed. If you really want to blur the movement of the water you may need to lengthen the shutter speed beyond two seconds.
→ Related reading: Guide to Long Exposure Landscape Photography
7. Bracket Your Shots
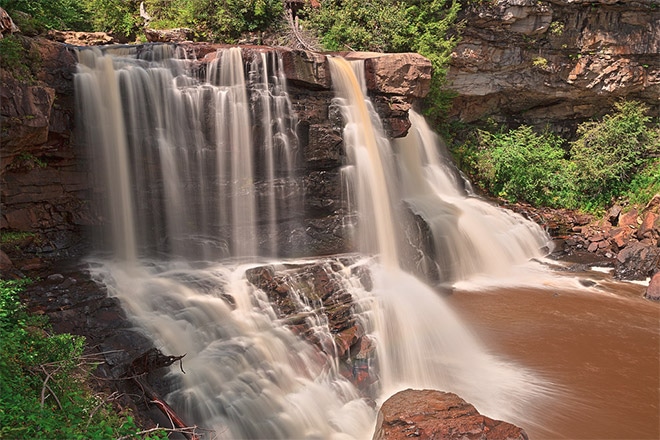
Photo by Nicolas Raymond / CC BY 3.0
Using exposure bracketing will help you to ensure that you get a quality exposure, and it also gives you the option of creating an HDR image if you choose. HDR photos of waterfalls also tend to blur or soften the movement of the water due to the blending of multiple exposures.
In addition to using your bracketed exposures to create an automatically generated HDR image, you can also manually combine the exposures to get the best results. For example, the waterfall may be located in an area that is in deep shadow and if you expose for the falls it may overexpose some other areas of the photo. You can use multiple bracketed exposures and manually combine them using layers in Photoshop to get a balanced exposure.
8. Don’t Be Afraid to Get Close

Photo by William Warby / CC BY 2.0
Sometimes to get the best shot you may need to get into the water (of course, only do this if you are prepared with the right clothes and gear). You may want to get a pair of waders that can be used for fishing so you can easily get closer. Also be sure that your tripod will be able to handle the conditions.
9. Protect Your Camera and Gear

Photo by Joe DeSousa / Public Domain
If you are getting up close and personal with the falls you will need to be extra careful about protecting your gear. In extreme conditions you may need some sort of rain gear to protect your camera. You’ll may also want to use a filter to protect your lens. You may want to avoid using an expensive filter that can get damaged.
10. Re-Visit in Different Seasons
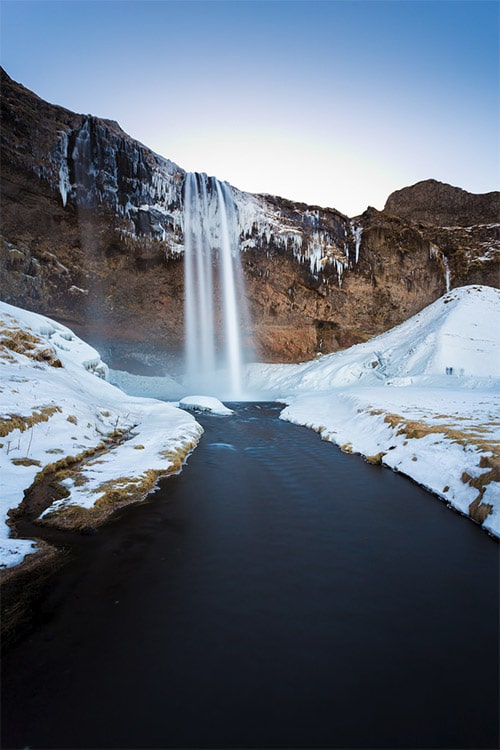
Photo by David Phan / CC BY 2.0
Just like other landscapes, waterfalls will look drastically different throughout the year. In the spring you may find lush growth and rushing water from melted runoff. In the fall you can capture beautiful autumn colors and fallen leaves on rocks and in the water. In the winter you may find ice and snow around the falls, and in some cases the falls may even totally freeze over. So make an effort to visit the same waterfalls at different times of the year and you’ll find that your photos can be quite different.
Photo license links: CC BY 2.0, CC BY 3.0, CC BY-SA 2.0


i love this post very informative and great content. A cheeky ask if i may how do you insert the Amazon ads into your site and keep them relevant to your subject – appreciate your help and keep up the great site – thanks James
Hi James,
They are custom ads, so we pick the specific products to be displayed.
Marc, you do some great waterfall shots. That’s what I do on the weekends here in Oregon. I never shoot when the skies are clear. I love overcast and even light showers , the wetness and soft light, and Adobe Lightroom adds the finishing touches. Like you, I use an ND 4 filter and polarizer filter, sometimes 2 polarizes to really stop down. I like the slow timed exposures becaus I am creating an image that was not there. Any way, nice article.👍
Amazing photos, love it