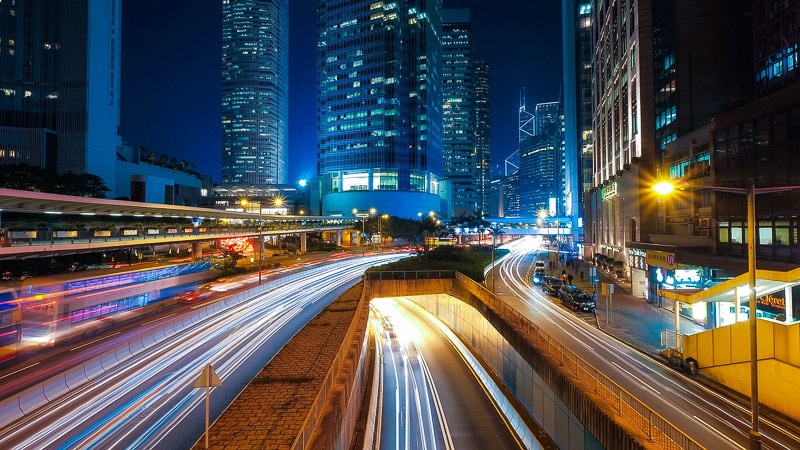
Photo by 12019 / CC0 1.0
Few photos create a big city nightlife flavor better than streaking car lights highlighting a busy road. The technique is simple enough. And you can get great results with proper gear, location choice, and a bit of technical know-how. Let’s explore what it takes to get the best car light streaks.
Camera Gear and Recommended Modes
The most important thing to bring besides your camera is a tripod. A tripod is mandatory when shooting car light trails because of the long exposure times needed. Because you’ll be using long shutter speeds of 2 seconds or more, any sort of shaking or instability will cause blur in your final image. And even with image stabilization, no hand holding technique will keep the camera perfectly stable. Even if you think you’re still, the sensor will pick up motion blur.
A remote shutter release is a second tool to bring, if you have one. Even clicking the shutter by hand will jostle the camera ever so slightly, adding an element of blur to the final image. But if you don’t have one, most major DSLR and mirrorless camera brands offer proprietary smartphone apps. These apps allow you to sync your smart device to the camera and act as a remote control shutter and are usually free. Another option is to set the timer to 2 seconds, so you will press the shutter button and the camera will fire 2 seconds later.
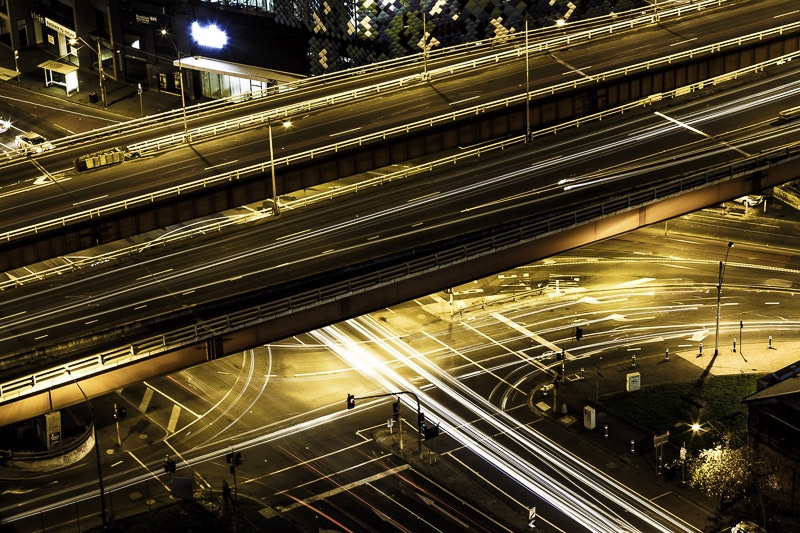
Photo by Pexels / CC0 1.0
You’ll also need to make sure you’re at least passingly familiar with Manual mode, Shutter Priority (TV) mode, or if your camera has it, Bulb mode. Bulb mode, for those who may not know, allows the photographer to keep the shutter open for as long as they wish. Usually, Bulb mode is used in conjunction with a remote control shutter release. Standing with the camera holding down the shutter is impractical and uncomfortable. Plus, any movements by the photographer will be another source of image blur.
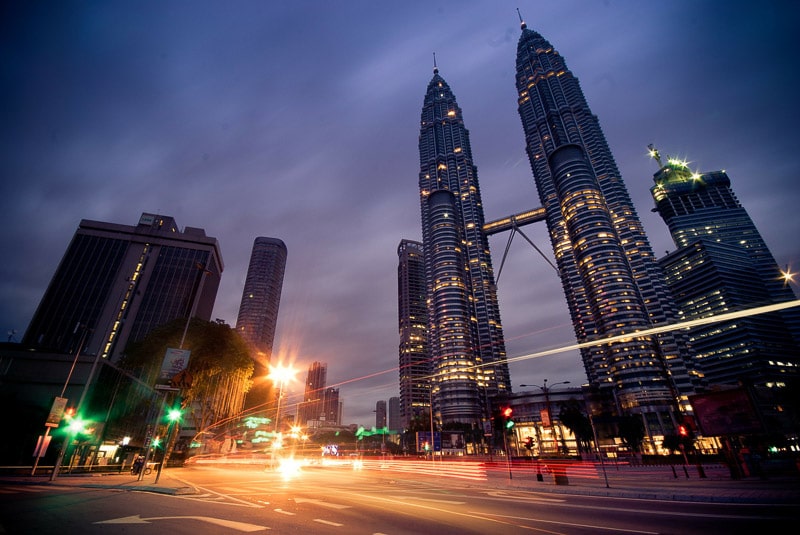
Photo by Peternguyen11 / CC0 1.o
Shutter Speed and ISO Factors
Shutter speed and ISO are the prime considerations when attempting to create light streaks. How long and bright those streaks are will depend on a large range of factors. The brightness of the street and building lights will affect this. As does the time of night, how fast the cars are moving, and your distance from those car lights. Say you’re far from your subjects as if you were on top of a building looking down on the city. A shutter speed of 10 to 20 seconds is a good starting place in this situation. If you’re standing on a street corner at a busy intersection, 2 to 5 seconds may be plenty of time. But the foundation to all of this is keeping your shutter speed as slow as possible. And while doing so, you ensure your ISO provides proper exposure of the background without overwhelming the light streaks.
Long shutter speeds mean the camera continues to collect light over an extended period. Depending on your ISO value, you’ll have either faint suggestions of light reflected off the moving cars or nothing but the trails created by the much brighter head and tail lights. How slow the shutter speed needs to be depends on a given scene. But start with the values suggested above, and start increasing or decreasing it from there. Your ISO value will also need adjustment as you calibrate your shutter speed for the effect you want.
Where do I shoot?
If possible, choose a location where the car traffic will be constant, like highways or major roads and intersections. That way, you’ll won’t have to work as hard at finding the right shutter speed and ISO for a given scene. When the traffic is inconsistent it makes all of this much more difficult.
If traffic is a bit sluggish and you really like your location, you can try doubling the shutter speed, while halving the ISO to compensate. That way more cars can contribute by overlapping their light streaks without the overall exposure of the photo being affected. However, the lower light sensitivity of the halved ISO value also means each individual light streak will not be as bright. As mentioned earlier, there’s a lot of experimentation that goes into creating car light streaks.
Elements of Composition
Don’t forget to consider composition elements as you experiment with each scene. Points of interest such as iconic and impressive buildings are well worth including in your final image. Street lights can add even more flavor as they’re a constant source of bright light. When photographed from fairly close using the long exposure techniques discussed here, they tend to form bright starburst patterns.
Also, use leading lines such as the road surface and bridges in conjunction with the flow of your light streaks. Allow the traffic and surrounding structures to draw the eye towards vanishing points in the distance, like in the image below.
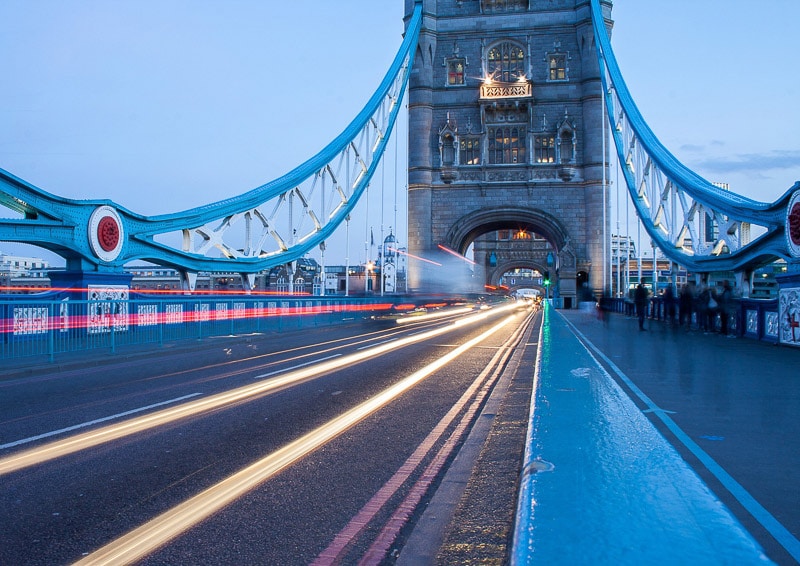
Photo by Pexels / CC0 1.0
Conclusion
Photographing light streaks from moving cars at night is a great subject for any skill level of photography. The techniques here teach the beginner about how exposure is affected when adjusting shutter speed and aperture. And for the intermediate and advanced photographer, the results are undeniably striking. Especially when given a prime location like a busy highway leading from the mountains into a city. And regardless of skill, it will definitely heighten one’s love for landscape or urban photography. So bring some warm clothes and a tripod and go give it a shot already!
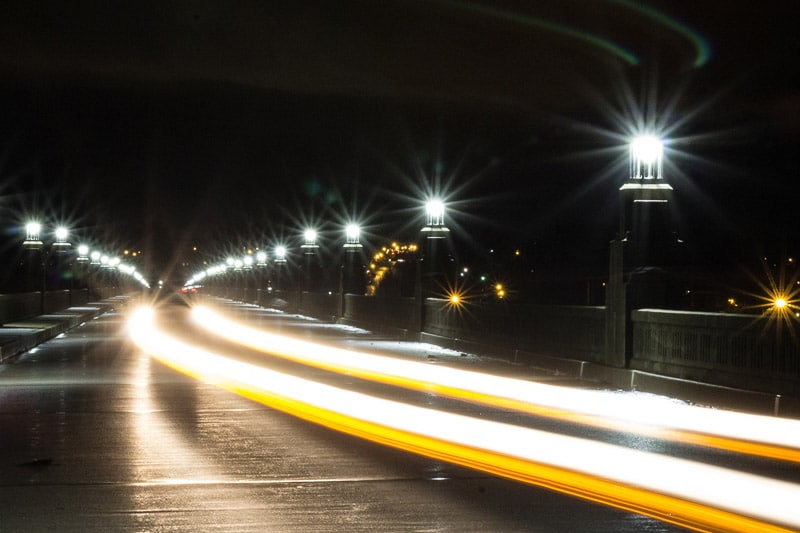
Photo by reneeellisdesigns / CC0 1.0
Photo license link: CC0 1.0


Good on you for sharing.
Great blog. Cheers for posting.