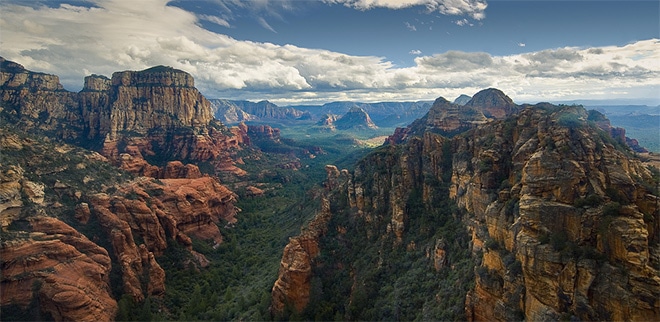
Canyons by Daniel Weinand / CC BY 2.0
Sedona, Arizona is one of the most beautiful places in the United States and a popular destination for landscape photographers. The gorgeous landscape of red rocks is both unique and impressive. The red rocks are a classic icon of the American southwest, and Sedona is one of the best places to catch these views.
Although Sedona is an amazing place to photograph, it does present a few challenges. The most significant is that many of the best views are reachable only by unpaved forest roads that require a four-wheel-drive vehicle. The good news is that there are many jeep tours that you can take, you can rent a vehicle, and there are also a lot of hiking trails that can get you to some amazing photo opportunities.
In this article, we’ll take a detailed look at Sedona, Arizona to help you plan ahead and get the most out of your trip.
→ Related reading: Photographer’s Guide to the Grand Canyon
Location

The Road by Daniel Weinand / CC BY 2.0
Sedona is located south of Flagstaff, and about a 2-hour drive from the south rim of the Grand Canyon. This proximity to the popular south rim makes Sedona a common destination for people who are already visiting the Grand Canyon. Sedona is also about 2 hours north of Phoenix and about 4 hours southeast of Las Vegas, so it’s not difficult to reach if you are flying into either of these cities.
The surrounding area is also quite scenic, so you’ll have plenty of great views just getting to Sedona, especially if you come from the north via the Oak Creek Canyon scenic drive.
→ See more of the best places to photograph in Arizona
Getting Around Sedona
I mentioned in the intro that getting around in Sedona can be a bit of a challenge. The town itself is fairly small and not that difficult to get around, although traffic can get a little heavy at times. The outskirts of the town include several different forest roads that provide the passageway to most of the best views in the area.
These forest roads are unpaved and can be quite rough in some places. Sometimes they are steep, sometimes they are rocky, and in general, you will need a vehicle like a jeep or a truck to navigate the forest roads.
If you don’t have a four-wheel-drive vehicle all is not lost. There are several different operators of Jeep tours, like the Pink Jeep Tours, that will take you.
There are a few different tours that will take you to different places, so be sure to look at the details before booking to get the specific tour that you want. There are also some operators that specialize in photography tours.
Another option, and the one that I chose when I was in Sedona, is to rent an off-road vehicle (I rented from this place, although there may be others with similar options). While renting the off-road vehicle is a little bit more expensive than the Jeep tour, there are several advantages to doing this. My wife and I had the Tomcar for 6 hours, while many of the Jeep tours are only about 2 hours.
With renting the car you can obviously choose where you want to go and you’re not limited to the itinerary of a guided tour. You can also take as much or as little time as you’d like at any one location, which is obviously a big advantage for photography. While almost everyone on the Jeep tours will be taking snapshots, you may not get the time you need at a particular location to satisfy your needs as a serious photographer.
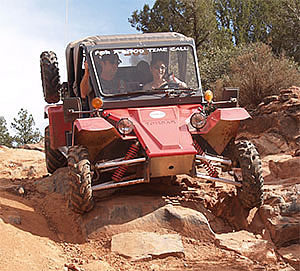
Another significant advantage of renting a Tomcar is that they can go much faster on the forest roads than the Jeep tours. The Tomcar only goes a max of about 35 mph (you can drive it on regular roads), but it does quite well on rough terrain. We were constantly passing Jeeps on the forest roads and we were able to get around much quicker.
In six hours we covered the same ground that would have required 3 or 4 different Jeep tours. For all of those reasons, I would definitely recommend renting over the Jeep tour if your primary purpose is photography, or even if you just like to explore on your own. We were given a map of all the forest roads, or at least the major ones when we rented the vehicle and we had no trouble getting around on our own.
The only thing we had to be careful of was making sure that when we were on roads we stuck to the town area where 35 mph is an appropriate speed. At the edges of town, the speed limits get much higher and it’s not safe to be on the road at only 35 mph, so be sure that you use the forest roads when you are not in town.
One thing to be aware of is that you will need a Red Rock Pass to park in many locations, like on the forest roads and many trailheads. You can buy a day pass for $5, a weekly pass for $15, or an annual pass for $20. The fees from the passes go towards the costs of maintaining the area.
In general, you won’t need the pass for a quick stop to take a photo (defined as 15 minutes or less). Passes can be purchased at the Coconino National Forest South Gateway Visitors Center at 8375 State Route 179, or the visitors center in uptown Sedona. You can get all of the details about the Red Rock Pass here.
Sedona is also a great place for hiking. Obviously, you won’t be able to cover as much ground on foot, but there are some nice parks and trails that make it possible to get great views without paying for a tour or renting a vehicle. I’ll talk about some of these trails a little later.
→ Related reading: Photographing Zion National Park
Best Photography Locations in Sedona
Here are some of the notable locations that you will want to consider when photographing Sedona.
Schnebly Hill Road
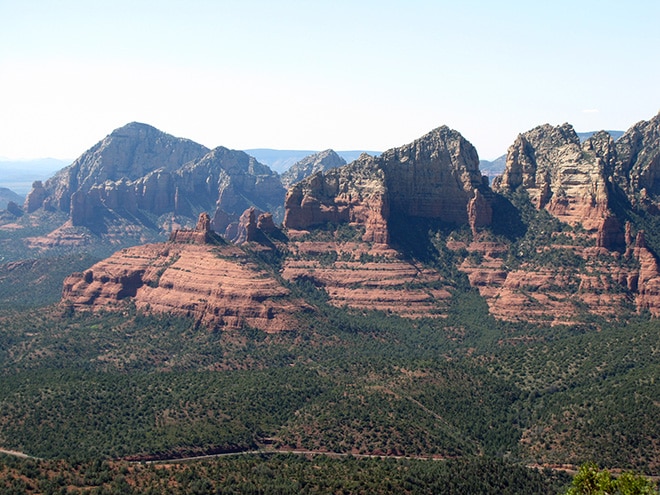
View from Schnebly Hill Road by Loaded Landscapes
Schnebly Hill Road offers some of the best views of the Sedona area. You can access it from route 179 in Sedona. The first mile or so is paved, then it becomes unpaved and you will need a four-wheel-drive vehicle with some clearance. The road is rather rocky/bumpy and the elevation increases pretty quickly.
As you’re driving up the road you’ll have a spectacular view and you can pull over in many places to photograph. “Schnebly Hill Vista, at 6,000 feet, overlooks the Verde Valley and Sedona below the summit, Steamboat Rock at the mouth of Oak Creek, and the mineral-rich Mingus Mountains to the west” (source).
Traveling up and back down Schnebly Hill Road will take some time, of course, depending on how frequently or how long you stop. Some of the Jeep tours spend all of their 2 hours or so on Schnebly Hill Road, and really you will likely need more for photography.
Another option is to rent a four-wheel-drive vehicle. This is what I choose when I was in Sedona, and I would highly recommend it. It’s a little more expensive than a Jeep tour, but you can move at your own pace have much more freedom than you will have on a tour.
I think there are a few different businesses that rent 4-wheel-drive vehicles, but this is the one I used. I had it for six hours and was able to cover Schnebly Hill Road and a few other areas of Sedona at that time.
Schnebly Hill Road provides plenty of great views right from the roadside, but there are also several hiking trails that are accessible from the road. Schnebly Hill Trail is a popular option that provides even more views. Casner Canyon Trail is a challenging hike that also rewards your effort with some outstanding views.
Please note that the trails in this area can be quite difficult due to the steepness and elevation gain. Research a trail thoroughly before beginning a hike.
See more in our Guide to Schnebly Hill Road.
If you’re going to be in Sedona be sure to see our Guide to Photographing Sedona, which includes plenty of detail about the best places to photograph.
Red Rock State Park
Red Rock State Park by Wendy / CC BY-SA 2.0
Red Rock State Park is a great place to hike. It is located southwest of the town of Sedona and is easy to get to, no four-wheel drive needed. Red Rock is a relatively new state park, being officially opened in 1991.
Prior to becoming a state park the land was privately owned and part of Smoke Trail Ranch. Fortunately, this beautiful area is now publicly-accessible as part of the state park system. The park includes several miles of trails that provide stunning views and plenty of photographic opportunities.
There is an entrance fee to the park, although I cannot find the fee listed on their website. I think it was around $10 per car when I was there a few years ago. Hike any of the trails in the park and you’ll come across beautiful views and excellent places to photograph.
I’d recommend a few hours for hiking and photographing here, if possible.
Some places in Arizona will require a four-wheel-drive vehicle to access, but at Red Rock State Park you can simply use your legs and the available hiking trails to get awesome views. You can even catch a view of Cathedral Rock, one of the most popular formations in the Sedona area.
There are several different loop trails that you can hike, and some of them connect to each other. Most of the hikes are easy to moderate in difficulty. The Eagle’s Nest Loop takes you to the highest point in the park and provides nice views of the surrounding area.
It is only a 300-foot elevation gain, so it is not a grueling hike. Other popular trails include the Apache Fire Loop Trail, Coyoter Ridge Trail, and the Javelina Trail. You can see a map of all the trails here.
See more in our Guide to Red Rock State Park.
Cathedral Rock
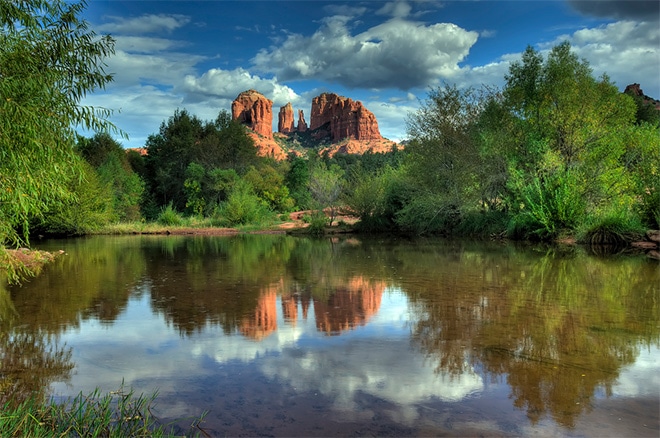
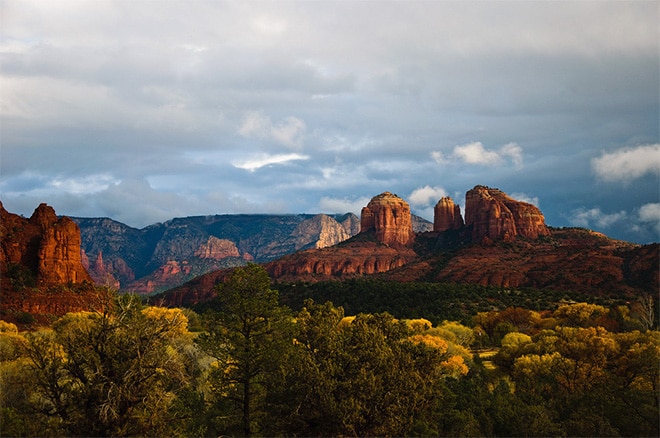
Cathedral Rock Reflections by Anita Ritenour / CC BY 2.0
Cathedral Rock is one of the more well-known landmarks of Sedona, and it has been photographed countless times. There is a trail that will allow you to hike/climb to the various saddle points or gaps of Cathedral Rock that will give you a sensational view of the surrounding area, but most photographers are more interested in photographing Cathedral Rock itself.
You won’t need to be extremely close in order to photograph it, and there are several different vantage points available. Cathedral Rock is located about a mile west of route 179 and about 2.5 miles south of the Y of route 179 and 89 in Sedona.
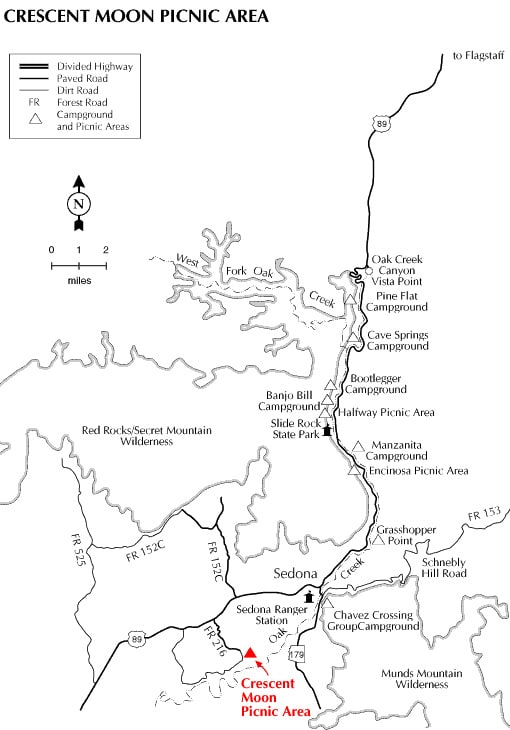
One of the best views of Crescent Rock is from the Crescent Moon Picnic Area within Red Rock Crossing (GPS: N34° 49′ 33.78″, W-111° 48′ 26.7114″). From here you will be able to shoot across the creek to Cathedral Rock. The creek can also serve as a foreground for your composition. This is a good location for a sunset view of Cathedral Rock.
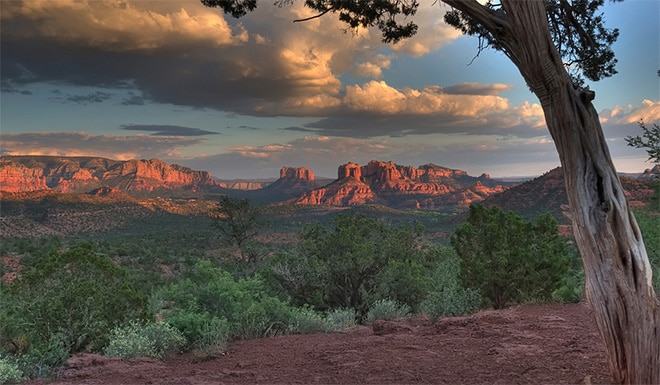
Airport Mesa
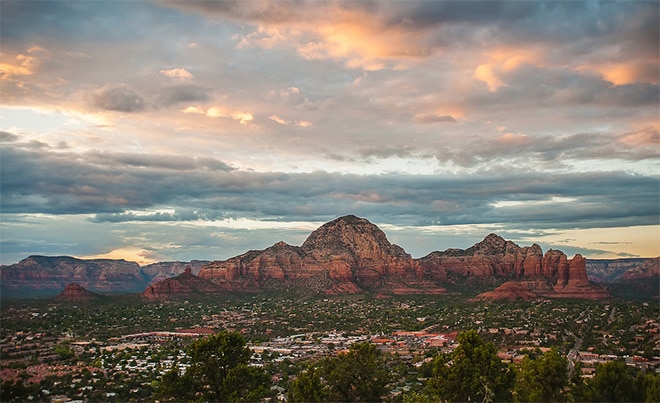
Sedona Sunset by Anita Ritenour / CC BY 2.0
Sedona’s Airport Mesa offers one of the best, and most well-known, views in the area. Take airport road up the hill and there’s a parking lot and an excellent visa for taking photographs. This is an especially popular location at sunset and it does get quite crowded, so be sure to get there early.
The parking lot can also fill up at sunset. When I was there the majority of people arrived shortly before sunset and left the moment the sun hit the horizon. The sunset view from here is amazing as the red rocks turn a beautiful color.
From Airport Mesa you will have views of Coffee Pot Rock, Chimney Rock, Bell Rock, Courthouse Rock, and Cathedral Rock. There are also trails from Airport Mesa that will give you panoramic views of the area.
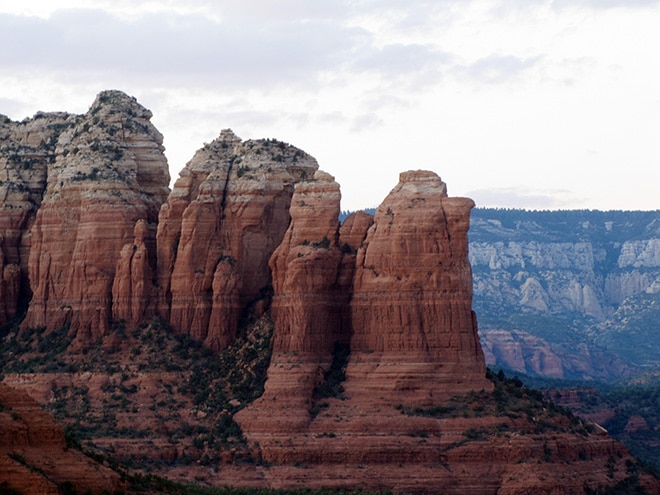
Coffee Pot rock photographed from Airport Mesa by Loaded Landscapes
Chimney Rock Loop Hike and Sugarloaf/Thunder Mountain Trail
The Chimney Rock Loop Hike is a two-mile hike around Chimney Rock. From the trail you will have a nice view and plenty of photographic opportunities. The trailhead starts at the Thunder Mountain Trailhead.
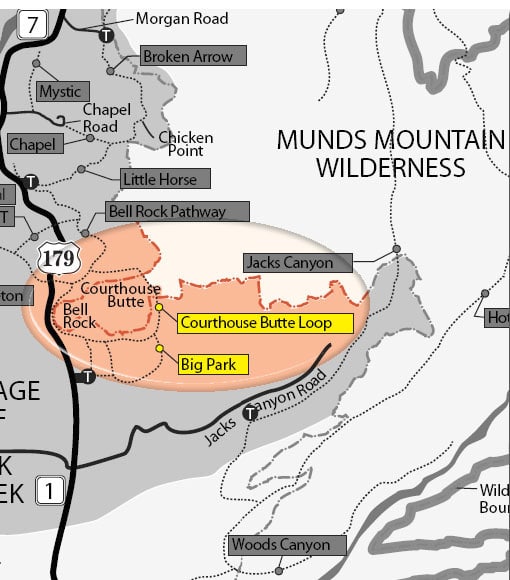
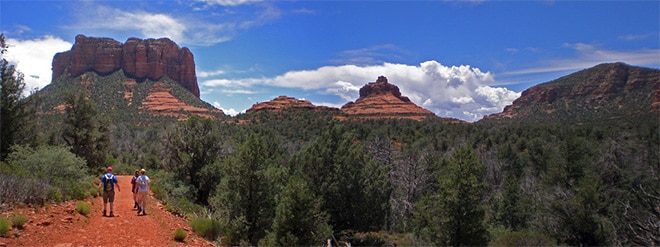
Courthouse Butte Loop Trail
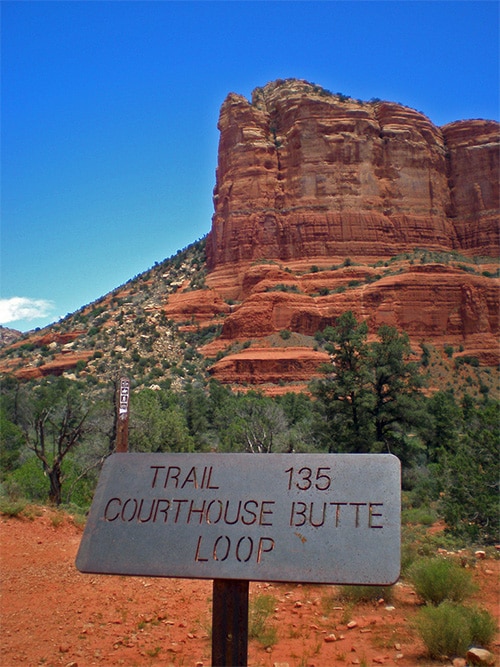
Courthouse Butte Loop / CC BY-SA 2.0
The Courthouse Butte Loop Trail allows you to hike around Courthouse Butte and Bell Rock. Like any of the other trails or vistas I’ve mentioned, it provides plenty of stunning views. Directions are available here.
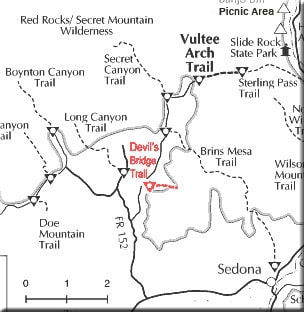
Devil’s Bridge
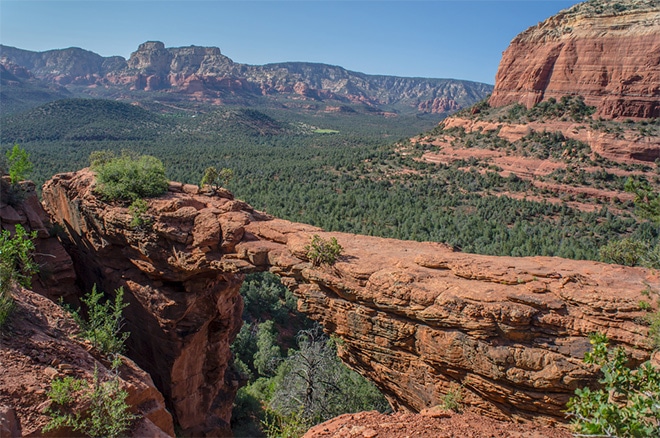
Devil’s Bridge by Denny Armstrong / CC BY 2.0
Devil’s Bridge is a natural stone arch that you can walk across. The arch is a great subject for a photograph, and from the arch itself you will have a great view of the surrounding area. There is a trail that you can hike to get to Devil’s Bridge (1.8 miles roundtrip), but in order to reach the trailhead you will need a four-wheel drive vehicle. That trailhead is located on Forest Road 152.
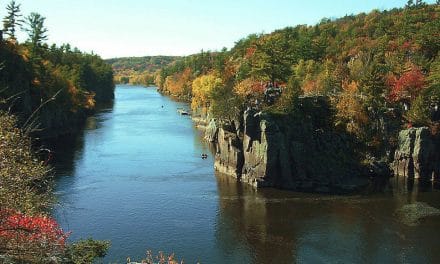
Oak Creek Canyon
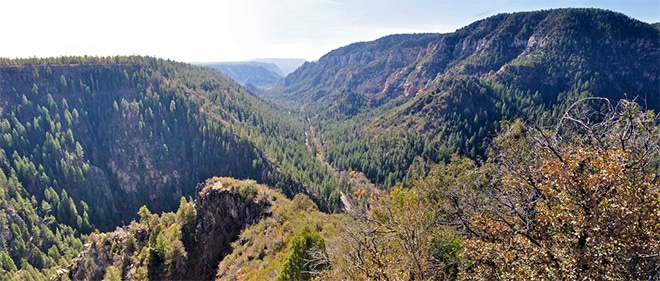
Oak Creek Canyon / CC BY-SA 2.0
Oak Creek Canyon is a gorge located between Sedona and Flagstaff. If you travel to Sedona by taking State Route 89A through the canyon you will have great views along the way. There are some viewpoints where you can get out and take photographs, and the view from the road is spectacular.
Soldier Pass / Brin’s Mesa
This five-mile loop trail leads to a few locations of note, including the Devil’s Sinkhole and Seven Sacred Pools. Directions to the trailhead can be found here.
When is the Best Time to Visit?
Sedona by John Fowler / CC BY 2.0
The most popular seasons are March-May and September – December, which means you can avoid some crowds by visiting at other times. I was there in September and didn’t find it to be crowded. Most of your time will be spent on trails and forest roads while many tourists will be in town or somewhere else, so there is really not a bad time to visit Sedona.
Spring temperatures usually range from mid 60’s to low 80’s, which is ideal for hiking and being outdoors. Summer temperatures are usually more like 90 degrees. Fall temperatures usually range from the mid 60’s to low 70’s.
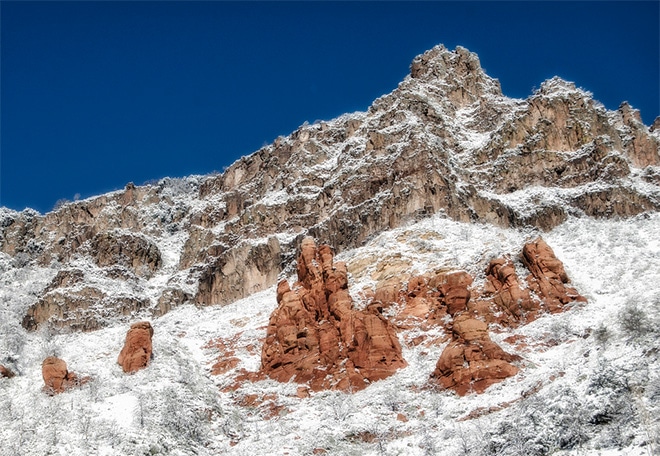
Sedona can get some snow and ice in the winter, but winter temperatures can also go up to the 50’s or 60’s. See this page for average highs and lows for each month.
Tips for Photographing Sedona
Here are some tips to get the most out of your time in Sedona.
1. Rent a Four-Wheel Drive Vehicle
I’ve mentioned it a few times throughout this article, but it is really important to stress the fact that you will not be able to reach many of the best locations in Sedona with a two-wheel-drive vehicle. If you don’t have a four-wheel-drive vehicle of your own, or if you will be flying in and leaving your vehicle at home, you can either take a tour or rent a vehicle. Renting will give you more flexibility and freedom, so that is my recommendation.
2. Be Ready to Hike and Explore
Hikers on the Bell Rock Pathway / CC BY-SA 2.0
Even with a four-wheel-drive vehicle, there will still be plenty of great trails and locations that you can only reach by foot. Several trails have been mentioned throughout this article and you can also get more information about the various trails and hikes available here. Just about anywhere you go in or around Sedona will give you a great view, and the open vistas provided by many of the trails will give you some of the best vantage points.
3. Arrive Early for Sunset
Red Rock Sunset by Anita Ritenour / CC BY 2.0
If you’re going to the popular Airport Mesa for sunset be sure to get there early because of the crowds. Another reason to plan ahead and be early when shooting at sunset in Sedona is that the mountains and rock formations can block the sun as it gets low, so in some places, the ideal times will be a little while before sunset. Finding the right spot and the right composition can take some time, so be prepared and don’t plan to arrive just ahead of sunset.
4. Pack Light
Since you’re likely to do a good bit of hiking it is helpful to pack light and leave any unnecessary gear behind. The trails come in a wide variety of difficulty, but even the easy ones can be rather long. Carrying a heavy bag or backpack is not too much fun on a long hike, so only take what you are likely to need.
5. Get a Good Map
The forest roads are pretty easy to navigate if you have a map. Without a map, it would probably be pretty easy to get lost, and you’re kind of out in the middle of nowhere on many of these roads. There are visitors centers in town where you can get a map, and if you are renting a vehicle the rental place will probably provide you with a map.
The guy working at the rental place gave us a quick five minute rundown of the forest roads along with his own recommendations and tips. That was really helpful, so don’t be afraid to ask for some advice.
6. Visit Other Nearby Locations
Sedona is located just about two hours from the south rim of the Grand Canyon, so planning a trip to both locations is a great idea. The southwest is obviously filled with plenty of other amazing parks and destinations if you want to extend your trip even further. While you’re in Sedona consider heading to the town of Jerome, Arizona if you have the time.
Jerome used to be a mining town in the mountains, and now it is an interesting ghost town. It is about a 45-minute drive to Jerome and as you get near the town the road is quite steep.
Gear for Photographing Sedona
Here is a look at some of the gear you may want to have in order to get the best results with your photos of Sedona.
1. Lightweight Tripod
You’re likely to need a tripod, especially around sunset and sunrise. The lighting can be a bit tricky with shadows on and around the rocks, and at times you may need slower shutter speeds and a tripod. Since you’ll be hiking and off-roading it is ideal to have a tripod that is lightweight.
Tripods from Manfrotto, Gitzo, Really Right Stuff, Oben, Slik, and Vanguard are solid options.
2. Neutral Density Filters
For some shots you may want longer exposures even in the daylight. An example would be shooting Cathedral Rock with a silky smooth creek in the foreground. B+W makes quality filters that are still affordable.
3. Graduated Neutral Density Filters
The rocks and mountains can cast shadows that may make it a challenge to get the right exposure. Graduated neutral density filters can help. Filters from Lee Filters, Cokin, Hoya, and Singh-Ray are all excellent options.
4. Polarizer
The red rocks can look amazing on their own, but when they are paired up with a striking sky they can be even more impressive. A polarizer can help to get more contrast between the blue sky and the clouds. B+W, Hoya, Tiffen, Lee Filters, and Singh-Ray produce quality polarizers.
5. Panoramic Bracket Tripod Head
Sedona’s panoramic views rival those that you will find just about anywhere else. If you want to capture panoramics it is helpful to have a tripod head or bracket specifically for that purpose.
6. Lens Wipes
There is a lot of dust and dirt that is bound to get on your lens. Keep the lens clean is a lot easier with the help of some inexpensive wipes, like the Zeiss pre-moistened lens wipes.
7. Remote Trigger
Since you are likely to be working with a tripod, having a remote trigger or cable release is also helpful. You can get one from the manufacturer of your camera, or from a compatible third party.
8. Bag or Backpack
You’ll need a bag or backpack that will allow you to comfortably carry your gear while your are hiking. Since some of the trails are a little steeper and more strenuous it can help to have a backpack that will keep your hands free. Those from Case Logic or Lowepro are good options.
9. Landscape Legend Lightroom Presets
When it comes to processing your landscape photos, the Landscape Legend Lightroom Presets can be a huge time saver. The set includes more than 290 presets, which includes 100 one-click presets and loads of stackable workflow presets that give you countless options.
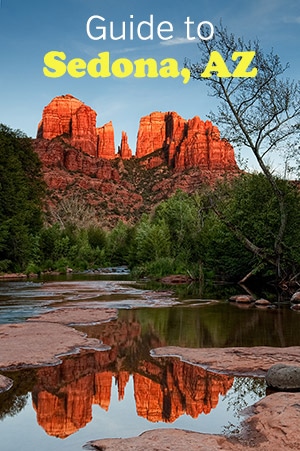
Photo license links: CC BY 2.0, CC BY-SA 2.0


This was so helpful and pretty much just mapped out my entire weekend in Sedona. And thanks for the tip on Jerome, AZ, too! After just checking out Rhyolite, NV a few weeks ago, I’ve want to find more “ghost towns”!
Chris,
That’s great! I’m glad to hear that it helped with your planning. Enjoy Sedona.
My wife and I haven’t decided on our trip to Sedona yet, but I had to write you and say how awesome this page is. Very informative with tons of relevant links. This is how information should be presented.
Thanks,
Mark
Mark,
Thanks for your comment. This type of article takes a long time to put together so it is always good to know that it is helpful to readers and worth the time.
Hi Mark,
We are heading to Sedona and saw your 2015 article Photographing Sedona Arizona . Any chance you know where the photo at the top by Daniel Weinand was taken? We’d love to go there as well.
Best,
Daniel Kern
California
Hi Daniel,
The photo info says it is Dead Man’s Pass. I haven’t been on that trail so I don’t know exactly where you would need to be to get that perspective. That trail connects the Boynton Canyon Trail and the Long Canyon Trail, so if you research those three trails you may find something that you like. If you Google those trails there is a good bit of information available, as well as some photos people have taken along the trails.
Great article and I’m sure it will be very helpful on my trip to Sedona this weekend! Thanks so much for making this information available 👍
Thanks John! Have a great trip and enjoy your time in Sedona.
Great article, I will be staying in sedona for 2 nights in this fall. what will be your top location picks for these slots? 2 Sunrises, 2 sun sets, 2 nights
and a full day in sedona
In Sedona sunrise and sunset photography can be done just about anywhere. You can either face the sun and include it in your shots, or face away from the sun and capture the glowing rocks. For sunset I would probably recommend Airport Mesa and Cathedral Rock. Airport Mesa will probably be crowded, but if you can deal with that it is a good location. Be sure to get there early to find the spot that you want.
Both of those spots are also good for sunrises. With two sunrises I would recommend Airport Mesa and the Courthouse Butte Loop trail. From there you can photograph Courthouse Butte and Bell Rock.
I haven’t done any night photography in Sedona so unfortunately I don’t have any recommendations.
For a full day I would rent a 4 wheel drive vehicle and explore the forest roads. Schnebly Hill is my favorite, but you if you have a full day you can get to several other places as well.
This is a really informative site. My husband and I are staying in Sedona late February early March. I like to think of myself as a serious amateur photographer. I definitely will follow your suggestions!
Flo,
Thanks for your comment. I’m glad the article is helpful. Enjoy your trip to Sedona (I’m sure you will)!
Excellent suggestions and information for photographing around Sedona and what to expect.
thank you for the time you put into this
Planning a trip for a few days in March
Jon, have a great trip!
Thank you for some great ideas where to catch some good shots! I grew up in AZ and finally going home to spend 2 months in Sedona. All my photos from my twenties disappeared so I need to start anew. Any ideas if there are photographers who teach and take folks out to shoot? Older now so can’t run up and down the trails like I used to! I do have 4wd pickup for access. Thanks for any help!
Hi Julianne,
Yeah, there are definitely photographers in Sedona that can help you. I don’t personally know any of them or have experience with any of them, so I can’t recommend anyone in particular. If you do a Google search for photo tour in Sedona or photography workshop in Sedona you’ll find several options.
Hi Marc,
I lead private photo tours in Sedona. My most popular are my sunset and astrophotography tours. Most people say I take them to places they’d never find. I provide photo instruction to those who want. I work with photographers of all levels who use a wide range of gear. I think of Sedona as a photographers paradise. I’ve been taking pictures in and around the area for over 25 years and still love doing so. You can see some of my photos and learn about my tours on my website at susiereedphotos.com.
Hi Marc,
Great article! I am definitely interested in renting the four-wheel you suggested. Do you have a recommended itinerary on spots to hit up with a full day rental? Thanks!
Hi Isaac,
We started with Scnhebly Hill Road and that was our favorite part. That took up the morning and we got out at a bunch of places for photos. I forget some of the other roads that we took, but the rental place gave us a map with the different forest roads on it. After Schebley Hill Road we just started going to whatever was close and worked our way down. The area around the Seven Sacred Pools was fun and had some rough areas that were fun to test out the vehicle a little. There was one area that was basically live driving up steps. Pretty much anywhere you go in and around Sedona you’ll have amazing scenery.
Where were you when you took the picture above with the title Guide to Arizona?
Which picture?