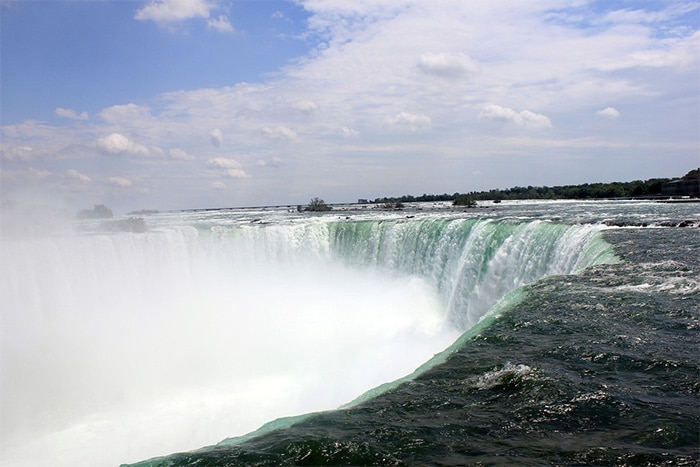
Horseshoe Falls by Archbob / CC0
Niagara Falls is not only a popular tourist destination, it’s also a great place for landscape photographers. However, with all of the tourists it can be a bit of a challenge. In this article we’ll take a look at Niagara Falls from a photographer’s perspective so you can effectively plan a trip that will allow you to come home with some amazing photos.
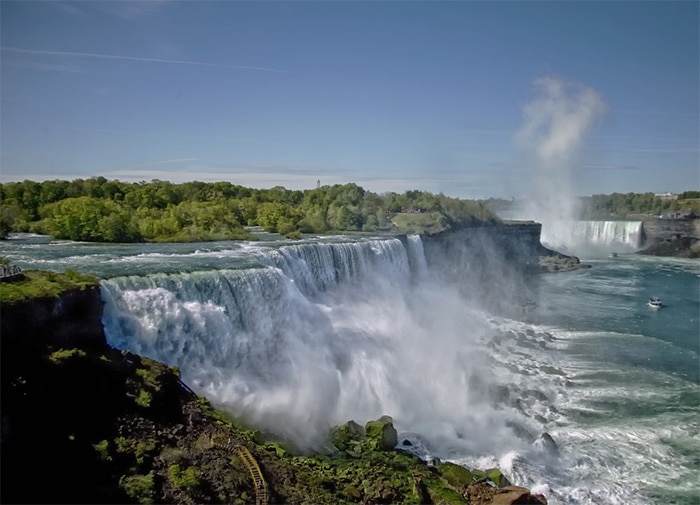
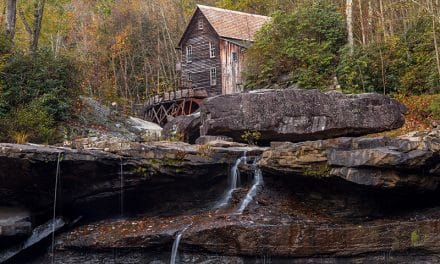
Located on the border between the United States and Canada, Niagara Falls can be accessed either by New York or Ontario. The Canadian side is more popular for tourists, is more commercialized, and in general will provide the best views. There are actually 3 separate falls that make up Niagara Falls. The Horseshoe Falls are the largest and most popular an lie mostly on the Canadian side. The American Falls and Bridal Veil Falls lie on the U.S. side. Goat Island separates the Horseshoe Falls from the American and Bridal Veil Falls.
→ Related reading: 10 tips for Fabulous Waterfall Photography
Points and Views of Interest
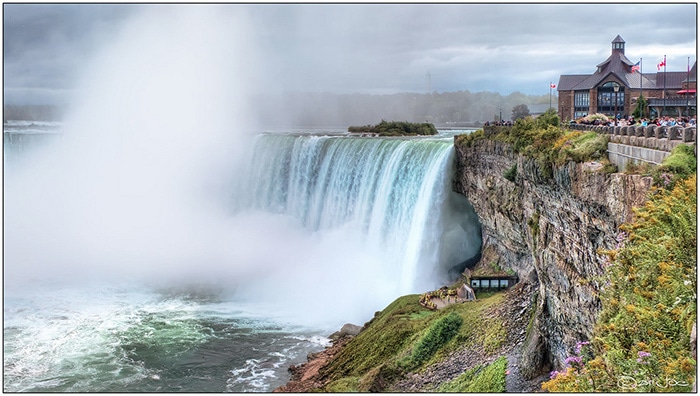
The best views of the falls are from the Canadian side. From the sidewalk you can get different vantage points, including very close to the Horseshoe Falls.
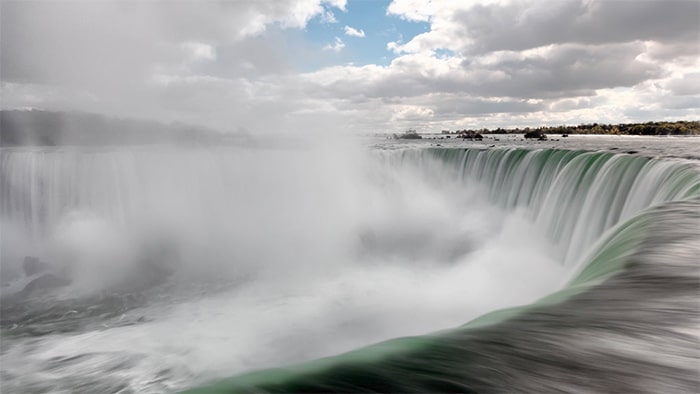
Horseshoe Falls by Joe deSousa / Public Domain
In the summer and during peak hours this area gets very crowded and even finding a spot to get up to the railing can be a challenge. Using a tripod is going to be almost impossible during these peak times, but monopods can be more practical. Here is a look at some of the best locations and places for photographers.
Horseshoe Falls photographed by Eva Blue / CC0
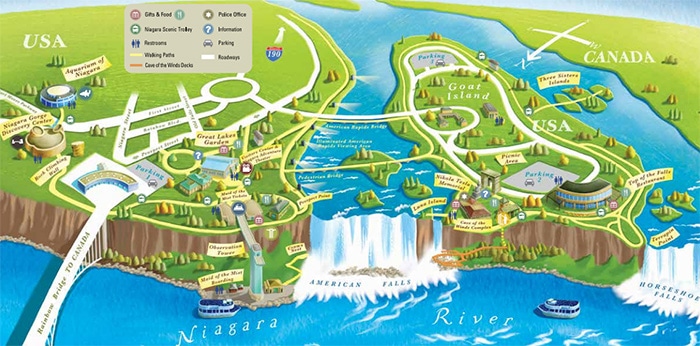
Niagara Falls State Park
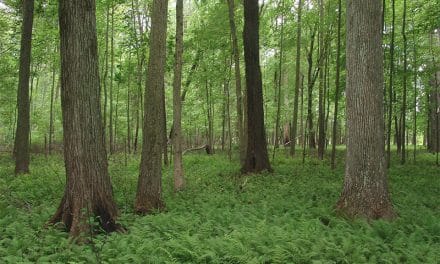
Starting on the United States side, Niagara Falls State Park covers more than 400 acres of land at the falls and Goat Island. While the best views of the falls are from the Canadian side, there are still plenty of reasons to include Niagara Falls State Park as a part of your trip.
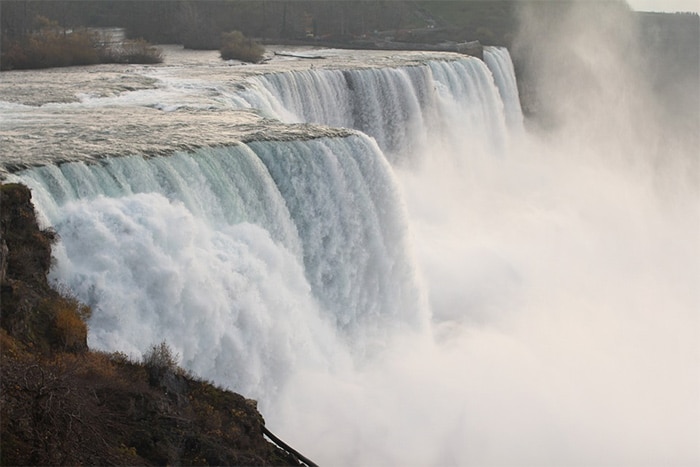
The American Falls by moodesigner / CC0
The park includes the area surrounding the American Falls, as well as Goat Island. There are several miles of hiking trails within the park that are worth exploring if you have the time. The park also includes an observation tower, the Cave of the Winds, and access to the Maid of the Midst (each of those are covered in more detail below).
The American Falls by tpsdave / CC0
The map below shows the state park. Click on the image to view the full-size brochure (after you click you will need to scroll down to see the map).
Terrapin Point
Located within the state park, Terrapin Point provides on of the best view of Horseshoe Falls from the American side. Terrapin Point is located right at the edge of the Horseshoe Falls on Goat Island.
Cave of the Winds
Within Niagara Falls State Park you can get up close to Bridal Veil Falls with the Cave of the Winds tour. An elevator will take you 175 feet down the Niagara Gorge near the level of the Niagara River. From there you will be able to walk on the wooden walkways to get very close to the falls. While this does provide some photographic opportunities, the conditions are very extreme. The winds are very strong and you will get soaked, so use judgement when it comes to your gear and the risk that you will take at this location. Please note that every November the wood decks and walkways are taken down for the winter and they are re-built each spring. So Cave of the Winds is closed during the winter months.

Photo by Sujit Kumar / CC BY-SA 3.0
State Park Observation Tower
The park includes an observation tower that extends over the gorge to give you a view of the American Falls and the Horseshoe Falls. Although it is one of the best views from the American side you will not be very close to the Horseshoe Falls and better views are available from the Canadian side. Looking in the other direction away from the falls you will have a view of Rainbow Bridge.

Observation Tower by buffaluteran / CC0
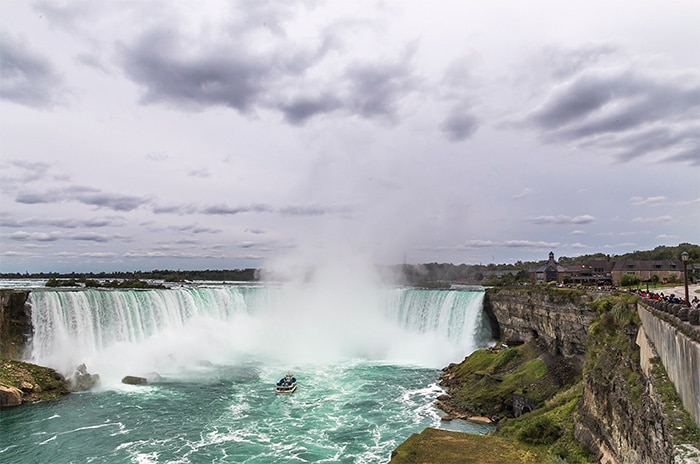
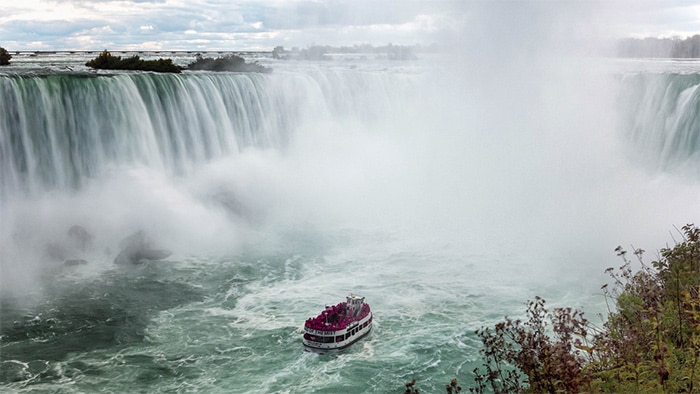
Maid of the Mist
The Maid of the Mist is a very popular boat ride that will get you as close as possible to the powerful falls. The ride begins and ends at the U.S. side. It is accessible at the base of the observation tower. The ride will take you past the American Falls and Bridal Veil Falls, and lead you very close to the Horseshoe Falls. You’ll get close enough to the falls that you’ll get quite wet from the mist, so you’ll need to take precautions to protect your camera and lens. You’ll be given a poncho, but you may also want to bring some additional rain gear. The boats are two decks and for photographic purposes I would recommend the lower deck as it will get you closer to the river and show the height of the falls a little better.
Maid of the Mist photographed by Joe deSousa / Public Domain
Niagara Cruises
Niagara Cruises offers an experience that is similar to Maid of the Mist, but from the Canadian side. I was a bit confused when I was researching for this article because when I was there I took the Maid of the Mist from the Canadian side, but it seems that the Maid of the Mist operation from Canada ended in 2013 and Niagara Cruises took over.
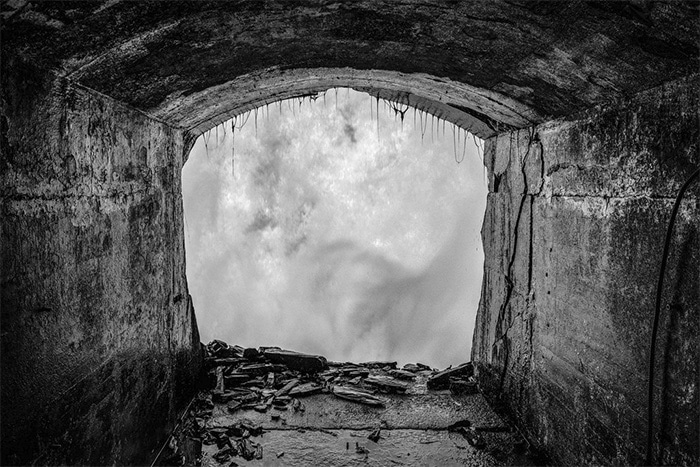
Journey Behind the Falls
Journey Behind the Falls is run by Niagara Parks on the Canadian side.
Journey Behind the Falls by Marcela / CC BY 2.0
It will get you very close to the Horseshoe Falls. Much like Cave of the Winds and the Boat Tours, you will get very wet if you get near the falls using the observation platform at Journey Behind the Falls, so use caution with your gear.

Journey Behind the Falls by Share Bear / CC0
Skylon Tower
The Skylon Tower is on the Canadian side. It rises nearly 800 feet, includes restaurants and other attractions, and there is an observation deck that provides a nice view of the falls from above.

Skylon Tower / Public Domain
Other Photo Opportunities
Although the beautiful waterfalls are obviously the main attraction, there are other photographic opportunities to consider while you are in the area.
Queen Victoria Park
Located right at the falls on the Canadian side is Queen Victoria Park, which includes various gardens and flowers.
Rainbow Bridge
Rainbow Bridge connects the United States and Canada just down river from the falls. You can get a nice view of the bridge from either side of the river.
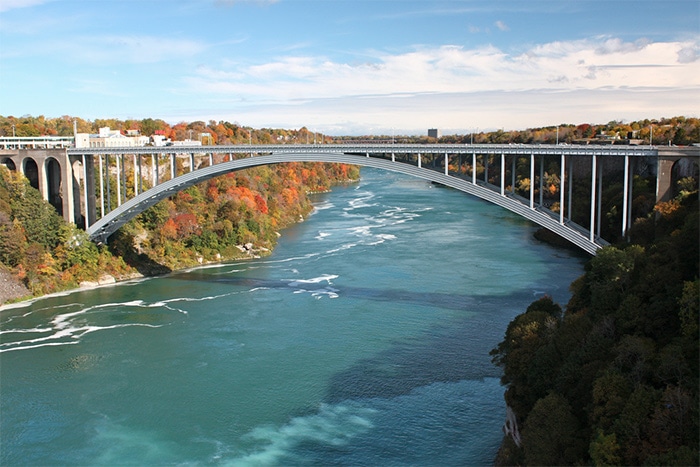
Rainbow Bridge by Scazon / CC BY 2.0
Botanical Gardens and Butterfly Conservatory
Located just 10 minutes north of the falls is the Botanical Gardens run by Niagara Parks. Entrance to the Botanical Gardens is free, although there is a fee (currently $5) for parking.
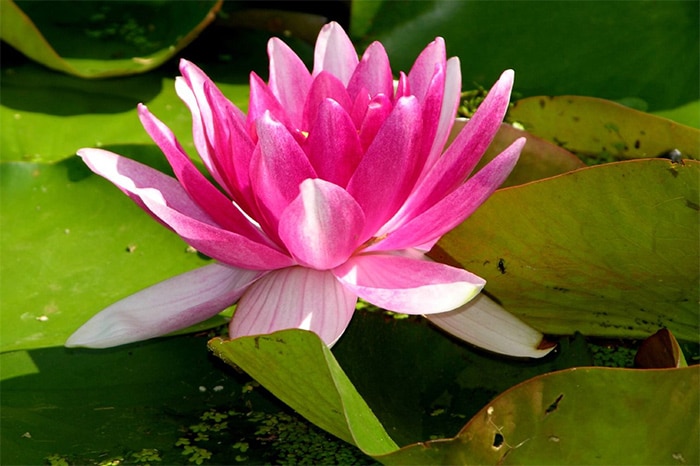
Botanical Garden photographed by Peter Beens / CC BY-SA 2.0
Also located at the Botanical Gardens is the Butterfly Conservatory. Here you can photograph 45 different species of butterflies on a self-guided walking tour.
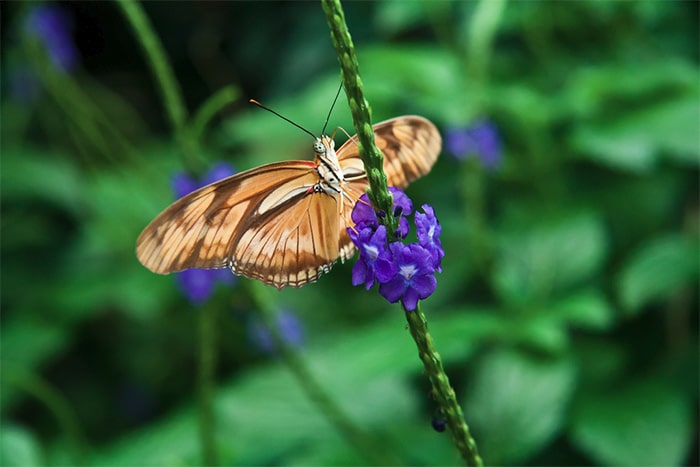
Butterfly Conservatory by Jason Pratt / CC BY 2.0
Bird Kingdom
Bird Kingdom is an indoor aviary and a great place to photograph colorful, beautiful birds. It is located near Rainbow Bridge on the Canadian side.
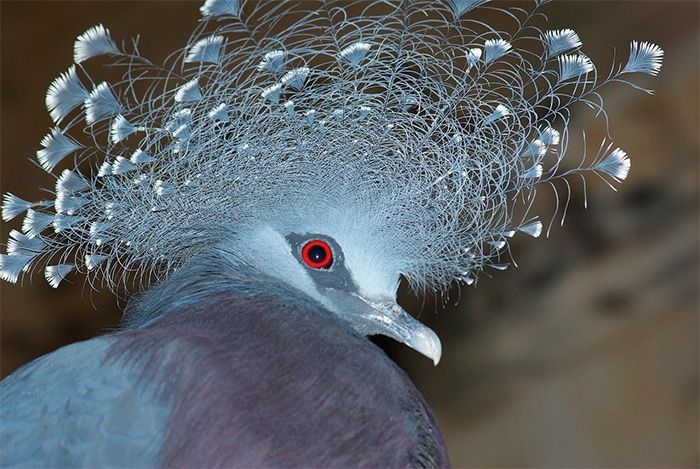
Bird Kingdom by John Piercy / CC BY-ND 2.0
Niagara-on-the-Lake
Niagara-on-the-Lake is a small Canadian town located where the Niagara River meets Lake Ontario, just a short drive from Niagara Falls. While the town itself is nice to photograph, for landscape and nature photographers the vineyards and wineries in the area probably are the most appealing subject.
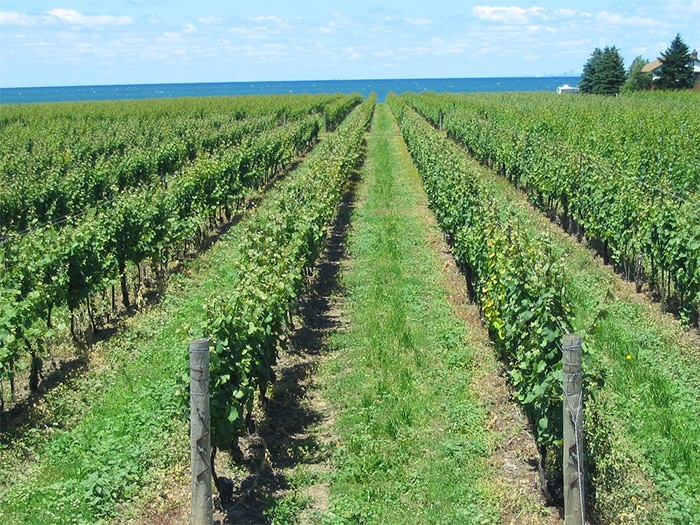
Vineyard photographed by NatashaG / CC0
Tips for Photographing Niagara Falls
Here are some tips to get the best photos and the most out of your time in the area.
Protect Your Camera and Gear
One of the challenges to photographing Niagara Falls is getting close to the falls without doing any damage to your valuable gear. If you are getting close to the falls you, and your gear, will be getting wet. When going on any of the tours (Cave of the Winds, Maid of the Mist, Journey Behind the Falls), only take the camera and lens that you need and leave all other gear behind. Use adequate rain protection any time you are near the falls and use your best judgement to decide just how careful you need to be. You should also avoid changing your lenses anywhere near the falls because there is a great deal of moisture in the air.
Visit in Different Seasons
If you live close enough to visit multiple times, make an effort to visit in different season. Summer is the busiest time of year. Winter is a great time to photograph the falls in the surroundings of snow and ice.
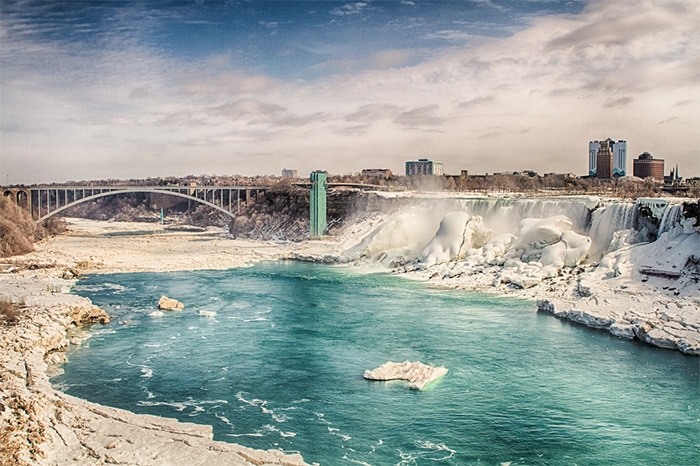
Niagara Falls in Winter by Rain0975 / CC BY-ND 2.0
Photograph at Different Times of Day
Getting out early is a good idea for photographing the falls from the popular Canadian side, as you will find much more open space and no crowds early in the morning (not to mention the benefits of morning light). At night the falls are lit up, which is a great opportunity for photographs.
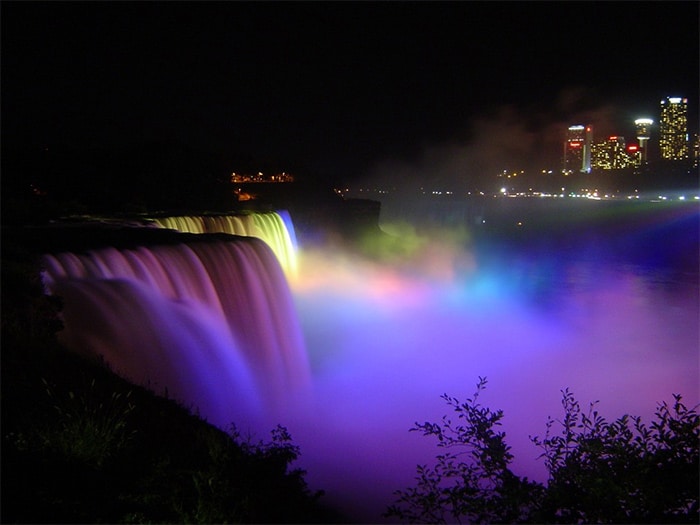
Niagara Falls at Night by skeeze / CC0
During the summer you can photograph fireworks over the falls a few times each week. Generally the fireworks are every Friday and Sunday from mid May to mid September.
Get a Room with a View
If it fits in your budget get a hotel room with a view. This will require staying on the Canadian side and the prices of rooms with a view are not cheap, so you’ll have to decide if it is worth the price. But having a view from your room makes it easier to get photos from a unique vantage point, and you won’t need to fight the crowds to do it. There are several hotels including the Marriott and the Sheraton that have nice views of the falls. However, if you want to save some money you can get a room much cheaper just by going into town and away from the falls. There are many small inns and bed & breakfasts that offer much cheaper rooms that are walking distance to the falls.
Recommended Gear for Photographing Niagara Falls
Here is a quick look at some of the gear you should have with you.
Wide Angle Lens
In order to capture the totality of the falls you will need a wide angle lens, or an ultra wide angle lens. It’s very common for rainbows to occur at the falls, and with a wide angle you’ll have a better chance of capturing the entire rainbow and the falls.
Horseshoe Falls by Joe deSousa / Public Domain
→ Related reading: Reviews of the Best Wide Angle Lenses for Canon and Reviews of the Best Wide Angle Lenses for Nikon
Telephoto Lens
It’s also not a bad idea to have a telephoto lens with you for capturing details. Wide angles are great for getting a photo that shows the entire falls, but a telephoto lens will add to the diversity of the photos that you are able to take.
Polarizer
It’s not a bad idea to have a polarizer to help cut down on the glare when the sun is out.
Graduated Neutral Density Filter
Depending on the time of the day and the lighting conditions, you may find that a graduated neutral density filter is helpful for balancing the exposure and avoiding deep shadows.
Tripod or Monopod
A tripod is highly recommended for photographing the falls, especially at night. However, due to the crowds it won’t always be practical or possible to set up a tripod. In these situations a monopod may be a suitable replacement that will give you some added stability.
Rain/Water Gear
Bring some rain sleeves or whatever protection you have for your camera and lenses.
Cable Release
If you’re using a tripod it’s also helpful to have a cable release.

Photo license links: CC0, CC BY 2.0, CC BY-ND 2.0, CC BY-SA 2.0, CC BY-SA 3.0


Hi Marc, I’m grateful for your advice that having a wide angle lens or an ultra wide angle lens really help in capturing the entire falls. Such a very amazing image here, I’d love to take a picture of it as lovely as this! I will definitely bookmark this post so I can go back on it when needed, thanks!