by Sheen Watkins
For those of us who are inherently control freaks, shooting in manual a good thing. If you are getting started with photography, it can be a bit overwhelming deciding which settings to use for a given shot or with changing light conditions. Each of the shooting modes including manual, aperture and shutter priority have their strengths. When shooting in manual, the photographer has control over all the settings.
Shooting in manual mode will speed up the learning curve in learning how to manage and optimize exposure.
Knowing how to optimize exposure does make you a better photographer!
Exposure Defined
With all shooting modes, our objective is to optimize exposure for that image. Exposure is the amount of light that reaches the sensor. This light is managed through shutter speed, your aperture setting and ISO (sensor speed). The three shooting modes use all of the same settings, it’s how the photographer chooses to use them that makes the difference.
There is one more feature that is used in managing exposure – Exposure Compensation.
The use of Exposure Compensation will slightly increase or decrease the overall exposure you’ve selected in either Aperture or Shutter Priority. For more on Exposure Compensation: Add A Little Something Extra with Exposure Compensation
by Sheen Watkins
How the Three Shooting Modes Work
The three shooting modes mostly widely used by professional photographers include Aperture, Shutter and Manual.
Aperture Priority – With aperture priority you select the desired aperture setting (known as the f-stop) and the ISO. The camera will then set a shutter speed based on the available light combined with your settings to optimally expose the image. Why Shoot in Aperture Priority?
Shutter Priority – The photographer selects the shutter speed, ISO and the camera will use the aperture based on how it reads the scene. I have personally used this setting just a few times as I prefer to control my depth of field first. One of the occasions I used shutter priority was when my tripod was in a bag that was on a different flight. The shooting opportunity was active monkeys in the wild. Since I was working with a long lens and low light, any shutter shake was going to be a problem. I switched to shutter priority to ensure that I had a fast enough shutter speed to get a sharp image.
Manual Priority – In manual mode, the photographer manually chooses shutter speed, the aperture setting and ISO speed.
NOTE: There are other built in modes that are standard on many cameras. They are indicated by the symbols for sports, portrait, landscapes, etc. These modes can produce some good images. However, they are reading the scene, not your mind or creative intent.
The Advantages of Shooting in Manual
As a nature photographer, I primarily shoot in aperture priority mode when photographing wildlife and birds. When I shift to landscapes or macro photography, I often switch to manual mode.
The following highlights some of the advantages manual mode offers:
Control, creativity, consistency – when shooting in manual mode, you control aperture, shutter speed, ISO to effectively manage light and depth of field. The settings remain static until you change them even in changing light conditions.
Elevated skill/knowledge – Spend a day immersed in manual mode and your knowledge of how to manage light and quickly adjust settings will increase. Shooting in manual will also assist in understanding the impact of a given adjustment in any of the shooting modes.
Compositional planning – When shooting in manual, it encourages forethought and planning which can lead to better images overall.

by Sheen Watkins
Examples of When to Shoot in Manual
If you ask three photographers why they choose to shoot in manual mode, you’ll probably get three different answers. Here’s a few scenarios of where manual shooting may be an optimal choice.
You want the settings to be consistent – Consistency of settings is needed when shooting for panoramas or when blending photos in Photoshop that are of the same scene but with different focus points (see the mushroom image below) .
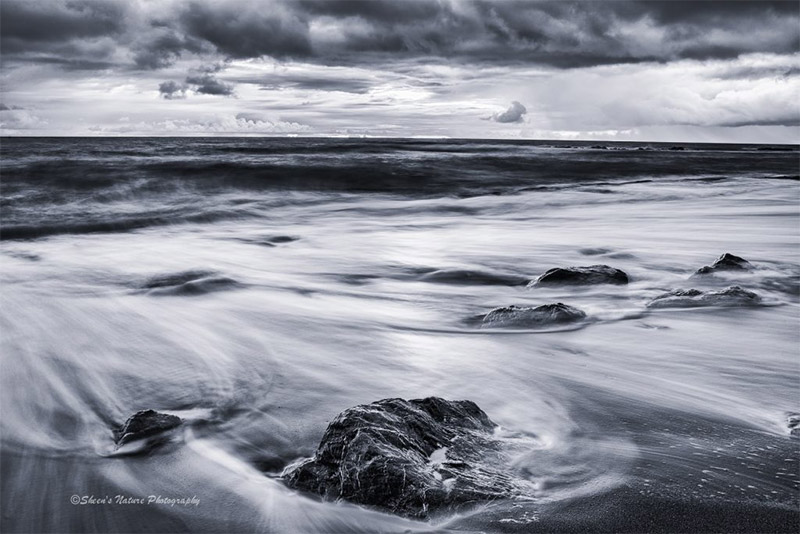
Shooting with neutral density filters – When photographing with neutral density filters, (or longer exposures), the amount of light passing through the sensor is reduced by the density (darkness) of the filter. Manual mode provides the photographer with flexibility in managing all the settings to achieve the desired exposures. The image is too shallow? Adjust the aperture f/stop. The image is too dark? Slow down the shutter speed.
Landscapes – When photographing landscapes, it’s not always a ‘take a few snaps’ and move on. Quite the contrary. Landscapes have a foreground, a middle ground and a background. There’s a story or a theme. There’s a feeling. Shooting in manual helps you as a photographer slow down and concentrate on the artistry of the moment.
The gooey mushroom below was taken with a 70-200mm 2.8 lens at a relatively short distance from the subject. Using a tripod, I took three or four images using different focus points but with the same exposure settings. I wanted to frame the mushroom with a soft background and have a few of the dewdrops in focus.

by Sheen Watkins
4 Helpful Tips
- Bracket exposures so that you’ll have more to choose from or if you want to do exposure blending in Lightroom or Photoshop in post processing.
- Take advantage of your camera’s live screen. The live screen provides a better view of how big scenes will look versus looking through the view finder.
- Pay attention to the guide in your viewfinder as it is your reader of the scene in manual mode. When shooting in aperture or shutter priority, this guide reflects how much you have increased or decreased the amount of light using the exposure compensation button. In manual mode, the exposure compensation button becomes inactive and the guide indicates if the image is over or under exposed.
- Histogram – Commonly mentioned and commonly used, the histogram should be reviewed throughout your shoot as the conditions change. The histogram is a good indicator of your exposure. It is also a reducer of the ‘oh no’ moments that happen when you load your images for post processing.
When shooting in manual mode, your management and knowledge of how to effectively use the camera’s settings increases. Manual mode slows you down and makes you consider the shot more. Shooting in manual also improves your innate management of shutter speed, aperture and ISO. The result is optimization of the light that leads to more beautiful images.