By Sheen Watkins
Shutter speed represents the amount of time the sensor is exposed to light. We use shutter speed to freeze motion. We use shutter speed to create movement and emphasize the feeling of motion. The various shooting modes of manual, aperture priority and shutter priority impact and manage shutter speed. Each mode goes about it a little bit differently.
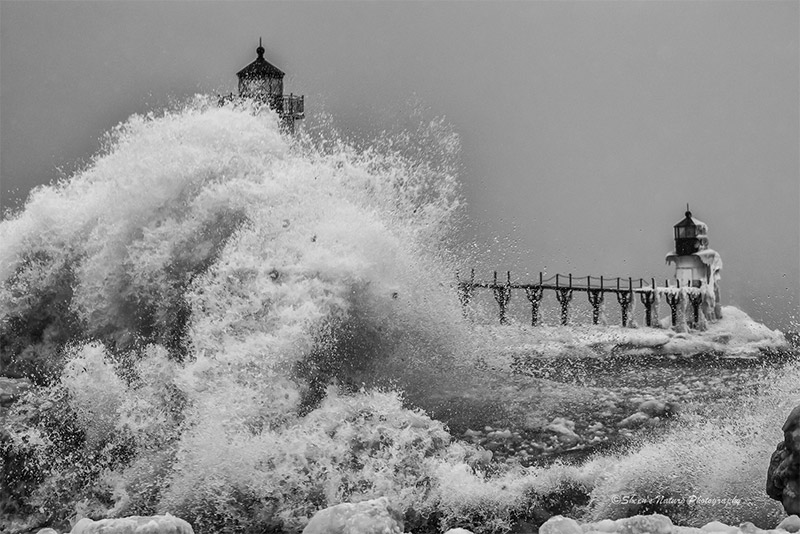
The St. Joe’s Michigan lighthouse above was taken amidst a wicked winter day. A big depth of field was used to capture the power of the water breaking against the shore. The lighthouse was the anchor in the image. I applied a significant amount of contrast and left the digital noise in for an overall harsh effect.
The effective use of shutter speed combined with your other settings will determine how well your image was exposed. If the image is too dark, the shutter speed was too fast. If the image was too bright, the shutter speed may have been too slow.
Is one shooting mode better than the other? Absolutely. Just ask 10 photographers and you’ll get multiple opinions on which one is best. The best mode is the one that works for you.
We’ll share how to control shutter speed using Shutter Priority, Aperture Priority and Manual shooting modes. Before diving in to these modes, there are two additional elements that can impact your shutter speed for better exposure. This includes ISO and Exposure Compensation.
ISO
ISO (International Standards Organization) is the level of the camera’s sensor sensitivity to available light. In the days of film, ASA 100, ASA 200, etc. represented film speed. The larger the number, the faster the film speed. The larger the ASA number, the film grain also increased.
With ISO, the sensitivity to light can impact shutter speed and also digital noise (similar to graininess). The more the ISO number is increased, the faster the shutter speed and more digital noise. With today’s advancing technology in both the camera and with post processing software, photographers have more flexibility in working with higher levels of ISO when needed.
Note: You can manually adjust ISO or switch it to auto ISO if you want the camera to make the ISO decision for you.
By Sheen Watkins
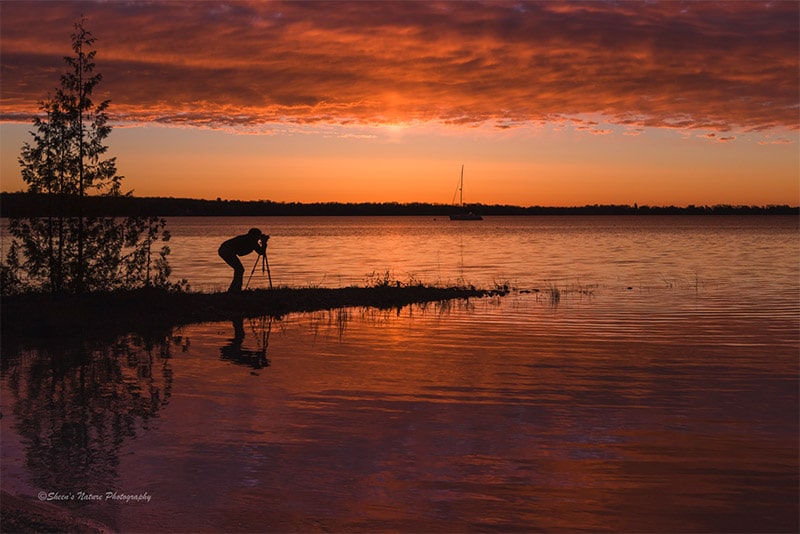
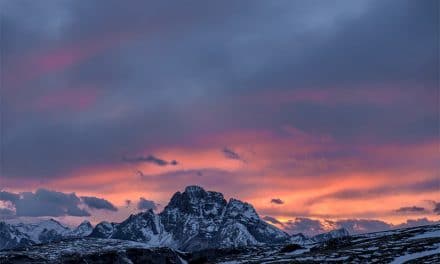
Photographers shooting photographers! We were out for a sunrise shoot in Northport, Michigan. We arrived a bit late as the sun was very close to the tree line and brighter than desired. I moved my exposure on the meter to the left by two markers (-) to tone down the light and enhance the silhouette.
Exposure Compensation
Exposure Compensation allows the photographer to tweak the exposure based on how your camera’s light meter reads the scene in both Shutter and Aperture Priority modes. In aperture priority mode, exposure compensation adjusts the shutter speed. With shutter priority, exposure compensation adjusts the f/stop number.
In manual mode, exposure compensation becomes inactive. Changing shutter speed, f/stops and ISO will adjust the Exposure Compensation meter you used when shooting in aperture or shutter priority.
Check out How to Use Exposure Compensation to Create that Little Something Extra for additional tips.
Shutter Speed and Three Shooting Modes:
1. Shutter Priority
When using shutter priority, the photographer increases or decreases the shutter speed by by rotating the camera’s dial (check your camera manual). The camera will then determine which f/stop number or aperture value to use based on how the camera reads the scene.
The camera harnesses the light and directs it to the focal point/area. A smaller f/stop number equates to a depth of field that is shallow or small. With an f/2.8, the majority of the light is directed on the focused subject. Conversely, with an f/16, the light is spread across the frame giving the appearance of everything in focus.
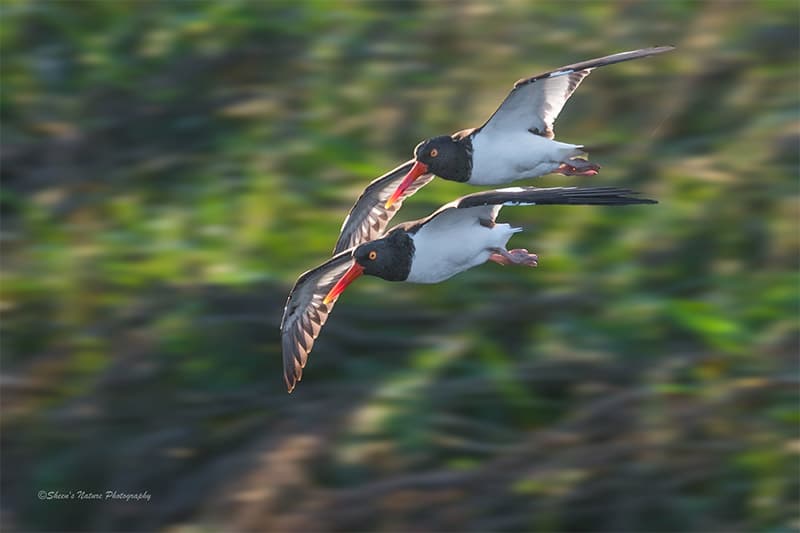
Shutter priority is used when photographing fast moving subjects and you want to freeze the subject. Shutter priority is also frequently used when photographing fast moving subjects while moving the camera. This keeps the subject in focus with a directionally blurred background often referred to as panning. Birds in flight, car and boat races, sporting events are all examples of when shutter priority is a go-to for many photographers.
Settings used for the birds in flight: 1/800 sec, f/10 and ISO of 320.
By Sheen Watkins
When shutter priority is selected, what is happening in the camera?
If there is a lot of light, the f/stop number the camera selects will be larger to prevent too much light. If there is less light, the f/stop the camera selects may be smaller to direct more light to the focus area.
Aperture Priority
Aperture Priority manages one of the most valuable creative compositional tools we have at our fingertips, the depth of field. When in aperture priority mode, the aperture value is selected by rotating the dial (see your camera manual).
By Sheen Watkins
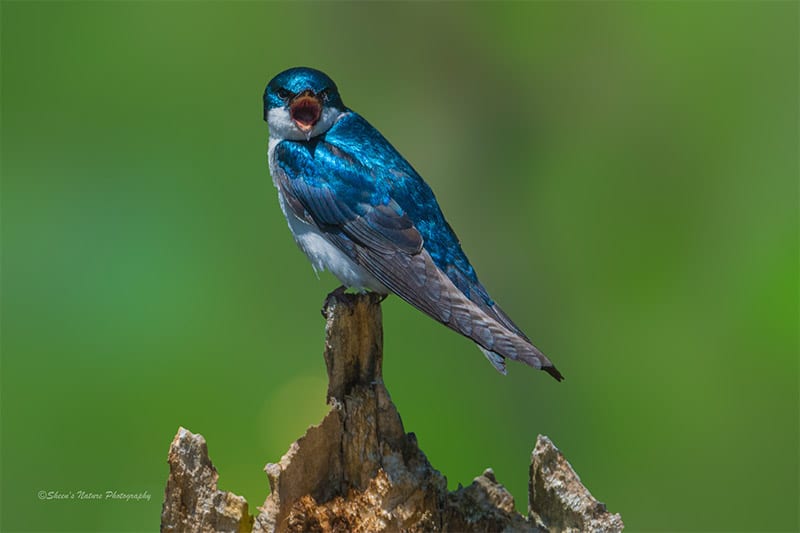
When shooting birds, flowers, wildlife and nature, my go-to shooting mode is aperture priority. I prefer to control the depth of field. I manage my shutter speed by adjusting my f/stop and also ISO. When shooting flowers, bees, birds I like to soften the background and be in a position to capture action or movement.
The green tree swallow below was preening, singing and fussing. I needed my capture the birds’ contrasting dark and light feathers in the morning sun. I used an f/8 with a shutter speed of 1/500 and ISO of 320. My exposure compensation was one “-” to the left.
By Sheen Watkins
When selecting a small aperture value for a shallow depth of field, the aperture is opened wide. This allows a larger amount of light to reach the sensor. The result is a faster shutter speed Conversely, when selecting a larger value such as f/16, the depth of field becomes larger. Less light reaches the sensor and more of the image is in focus.
What is happening in the camera?
The shutter speed is automatically adjusted based on how the camera reads the scene.
Read Why Shoot in Aperture Priority Mode for more suggestions on using aperture priority.
Manual Mode
The photographer chooses all of the elements when shooting in manual mode. Shutter speed, aperture setting and ISO are adjusted using the meter (and your histogram) as a guidepost. If the settings are too bright, the marks on the meter will be to the +. If the settings are too dark, the marks on the meter will be to the -. Manually adjust your shutter speed, f/stop (depth of field) and ISO settings until your desired exposure is achieved.
The good news is that there are no hard and fast rules. The key is to practice each of these modes before the situation requires the need. When I started shooting more in manual, my confidence in managing overall exposure using the other modes increased. Manual Mode elevates attention to all of the elements and how they work together.
Want to learn more about shooting in Manual Mode? Check out When to Shoot in Manual Mode.


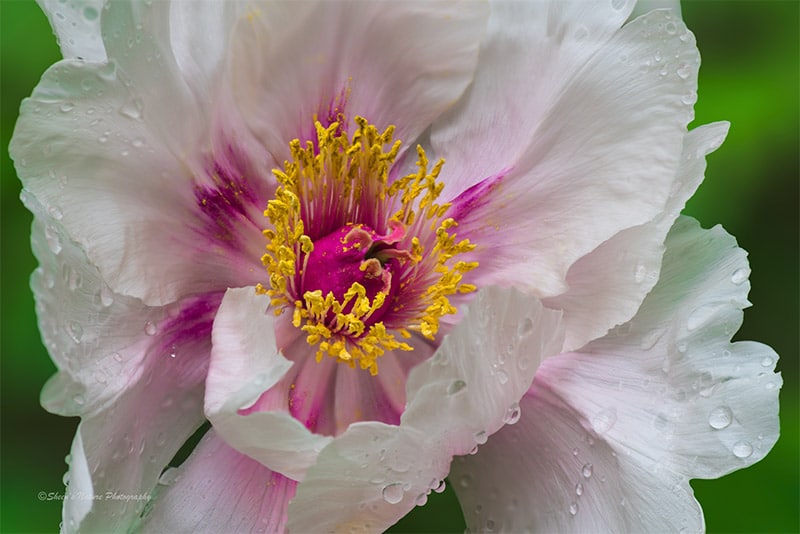
What lens did you use for the flower photo? I can’t seem to get the whole flower in focus no matter what f-stop I use, since the depth of field is just so narrow at that short distance. Did you use a tripod and really long exposure? Thanks.
Hi Connie – I used my Nikon 105mm macro along with a tripod. The f/stop was f/14 so I could get all of the flower and detail in focus. With big flowers I use a big depth of field. The background leaves and light were fairly distant from the flower which helped. Had the background been to close it could be softened/blurred in PS by masking and using the blur gallery OR using the brush in lightroom and moving the contrast and clarity sliders.