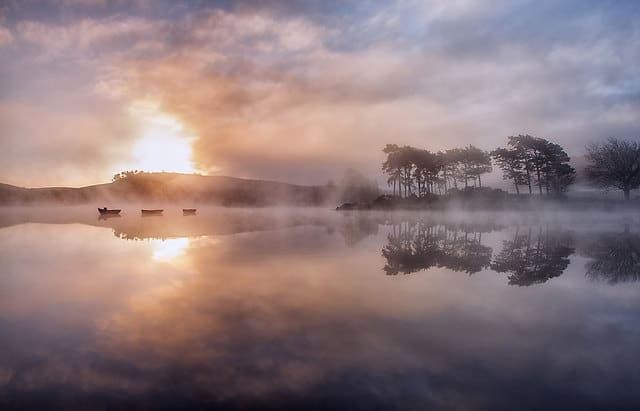
Morning on Fire by Sheen’s Nature Photography
What do most people do an hour before sunrise? While others are catching “z’s”, photographers are active participants in watching the sunrise cast its brilliant morning shine. Some of the most delicate and beautiful hues of the day happen before sunrises and right after sunsets. During this ‘blue hour,’ the sky has a deep blue hue. Rich, saturated colors paint the landscape and sky.
The transition from the blue hour to the golden hour happens quickly. An array of colors appears from blues, lavenders, pinks, reds to oranges.
→ Related reading: Tips for Better Sunset Photography
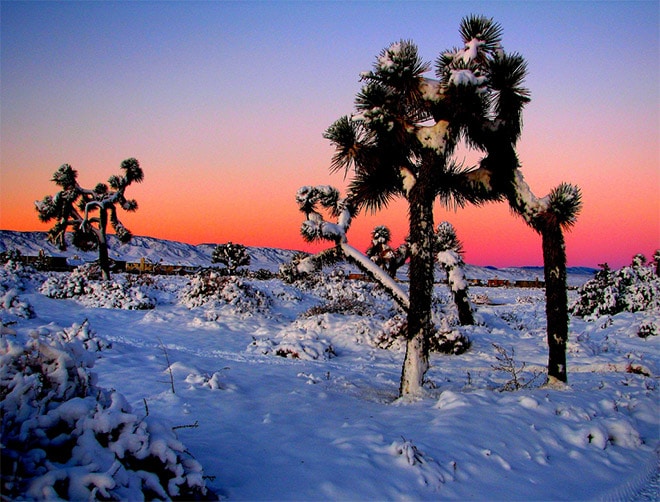
Joshua Trees in Winter by Rennett Stowe / CC BY 2.0
When the sun crests the horizon line, it’s a different color display as the ‘golden hour’ emerges. This magical hour lingers for a brief time after sunrise or before sunset. The golden hour’s light transitions from soft reds and oranges to golden tones. Shadows are softer with less contrast which lends well to landscape photography.
By Sheen’s Nature Photography – Settings: 14-24mm, f/13, ISO 250, 1/60 sec
We’ll look at three ways of capturing the sunrise’s brilliance. These include: 1) Before the sun officially rises, during the blue hour, 2) Crossing the horizon line into the golden hour and 3) Framing the sunrise. We’ll also highlight using both Aperture and Manual settings to maximize the moments.
In early morning and landscape, a tripod is needed as shutter speeds are slower due to the soft low light and smaller aperture settings (bigger f/stop number). A remote shutter release to further prevent movement when the shutter button is pressed is also recommended.
→ Related reading: How to Edit a Sunrise Landscape Photo in Lightroom
Before Sunrise: The Blue Hour
Before sunrise, consider switching back and forth between Aperture Priority Mode and Manual Mode based on the surrounding lighting. If it is dark, start with Manual to more effectively control shutter speed, ISO and aperture settings. If there is a bit of lighting, such as lights on a pier, you may want switch to Aperture Priority instead.
→ Related reading: Guide to Blue Hour Photography
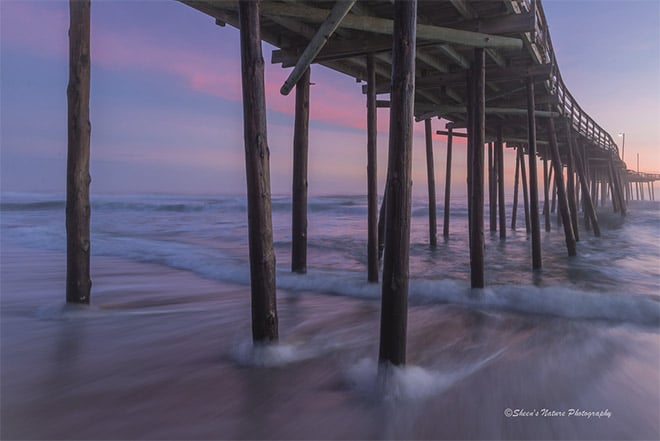
Under the Pier by Sheen’s Nature Photography
Continually adjusting settings as the lighting changes controls the right balance that provides enough light without losing the color intensity.
Switch between the viewfinder and the live view screen when composing images. The viewfinder shuts the rest of the world while zoning in on the area, image and feeling you want the image to convey.
After determining the scene in the viewfinder, it’s time to go to the live screen. This gives a bigger picture view of the composition and the horizon line. By pressing the “INFO” button twice (read camera manual instructions for your specific make/model), the camera’s virtual horizon appears and minor movements to get the camera level are made. Pressing the “INFO” button a couple of times again and you’re able to view the screen with the settings and focus point.
As sunrise images tend to be larger landscapes, a larger depth of field from f/11 to f/22 brings more into focus. Before sunrise the exposures are longer, examples can range from 1/10 of a second to several seconds depending on the lighting. ISO settings should start at 100. After taking a few shots, assess the result. If more light is needed, slow things down by using a slower shutter speed or larger f/stop number. If less light is preferred, move to a faster speed, bigger aperture/lower f/stop number.
Some may consider this ‘work’. I think this is play time, exploring both technique and the technical at the same time.
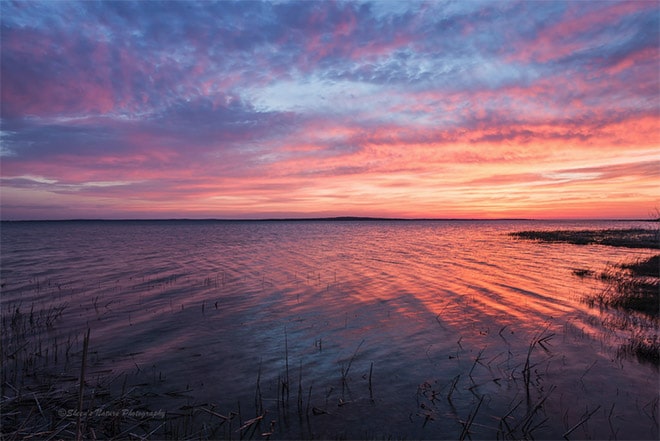
Morning on Fire by Sheen’s Nature Photography
The photograph above was taken several minutes before sunrise. The sky burned with changing colors and cloud formations. The result was many images to choose from. Captured in RAW and processed in Lightroom 5, only minor, standard adjustments were applied. Lens and settings: 14-24mm, f/11, ISO 125, 1/5 sec. Tripod and shutter release used.
One other tool is exposure compensation. By taking it down by 1/3 stop, the colors can appear a bit more saturated. This also speeds up the shutter speed. Conversely, for more light, adjusting exposure compensation by +1/3 brightens resulting from slowing the shutter speed.
Crossing the Horizon Line: The Golden Hour
The blue hour fades as the golden hour emerges. The creativity opportunities with the rising sun are endless and change every day. Rays, starbursts and bright, shiny reflections and vibrant hues fill the frame.
Working in Aperture Mode with large depths of field (larger f/stop number), colorful images await. There is more light and the shutter speed allows for both photography from the tripod and handheld. The tripod allows more freedom in compositional planning and accuracy as indicated above. Handheld works with faster shutter speeds. Photography on the fly images can be equally as rewarding.
Sunrise, starbursts, sun reflections and rays add that ‘something extra’ to images.
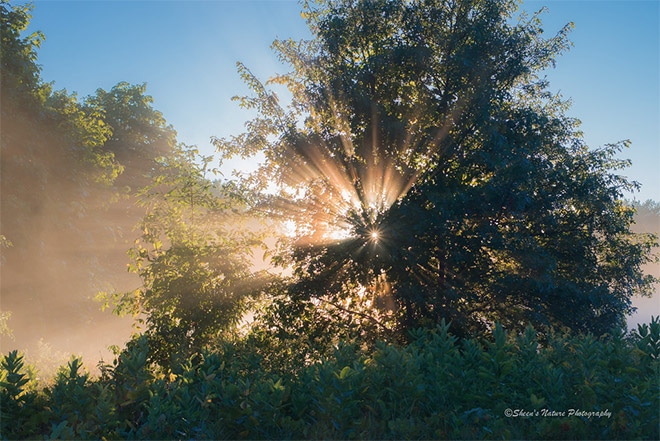
Golden Morning Starburst by Sheen’s Nature Photography – Settings: 50mm 1.8G, ISO 400, f/7.1, 1/160 sec
Starbursts are created when using f/16 and larger f/stops and the sun is peaking through branches, leaves, around piers and lifting above the clouds. The starburst above was taken handheld at the edge of the woods right at sunrise when the light filtered through the trees. This particular starburst was so strong that it was visible from where I was standing. (An amazing moment indeed!)
Framing the Sunrise
Sunrises with cloud formations, reflections and vibrant colors may be able to stand on their own. Another technique is to frame the sun. From branches, to piers, and using shadows, finding ‘sun frames’ adds more dimension and depth.
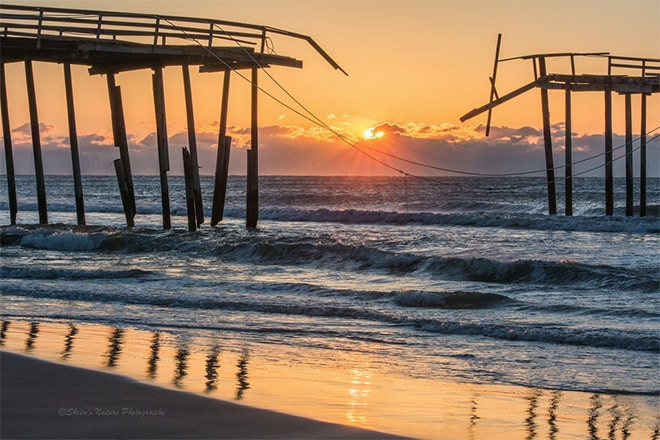
Abandoned Pier Provides a Stark Frame, by Sheen’s Nature Photography – Settings 70-200mm, f/20, ISO 250, 1/160 sec
The phrase rise and shine should have been created for photographers. We’re the crazy ones that set the alarm, grab the coffee and eagerly rush out the door to be at our destination at least 30 minutes before sunrise.
→ Reminder Tip: Scouting your location for parking, your photography spot at least the evening before prevents losing precious photography time.


Very nice article! I also love using those larger f/stop numbers to get those starbursts which always add something to a picture. And do you use Google Map for help with scouting locations? I’m in Tokyo, so for me it is one of my most-used accessories, especially street view.