HDR photography tends to be a somewhat sensitive topic. Many people either love it or hate it. The purpose of using HDR and exposure blending is not to create unrealistic or fake-looking images, but rather to simply increase the dynamic range of the photo. Many of the best uses are HDR and exposure blending are subtle and can still produce realistic images.
In landscape photography HDR techniques can be especially effective. Perhaps you need to use multiple exposures the shadows being cast by a mountain are much darker than a bright sky. There are all kinds of scenarios in landscape photography where an increase in dynamic range will help the photo.
Dedicated HDR software can help you to merge multiple bracketed exposures together to create one HDR image (it can be done in Photoshop too, and it looks like it will be included in the upcoming Lightroom 6), but you may not always have multiple exposures of every shot that could benefit from an increase in dynamic range. Lightroom’s develop module settings can help you to create an HDR-like look with any photo, and that is what we’ll be covering in this tutorial.
Want to learn step-by-step how to effectively process your landscape photos in Lightroom? See more about our video training course Lightroom for Landscapes.
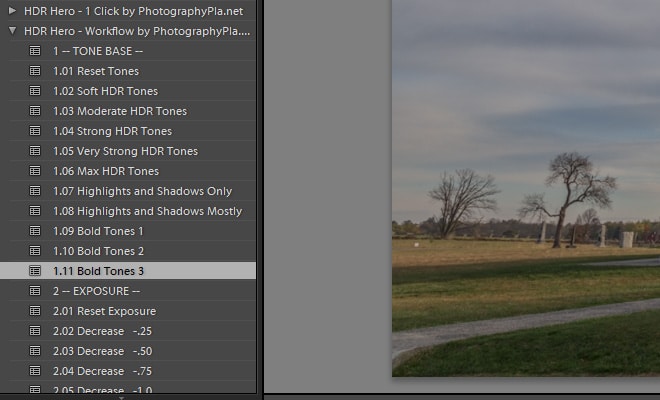
Throughout this tutorial I will be using the HDR Hero Lightroom Presets, but even if you don’t have the presets you can still follow along as I will be showing the specific settings used throughout the tutorial. HDR Hero includes 25 one-click presets that will give your photos an HDR-like look quickly. It also includes more than 50 stackable workflow presets that give you a great deal of flexibility and allow you to quickly create your own custom effect. In this tutorial I will be using the stackable workflow presets.
HDR in Lightroom
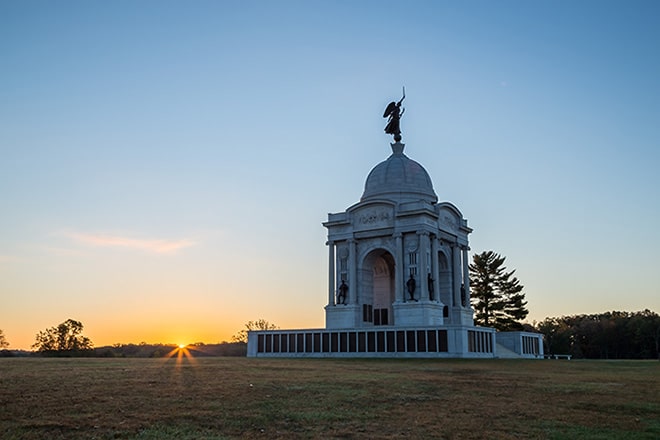
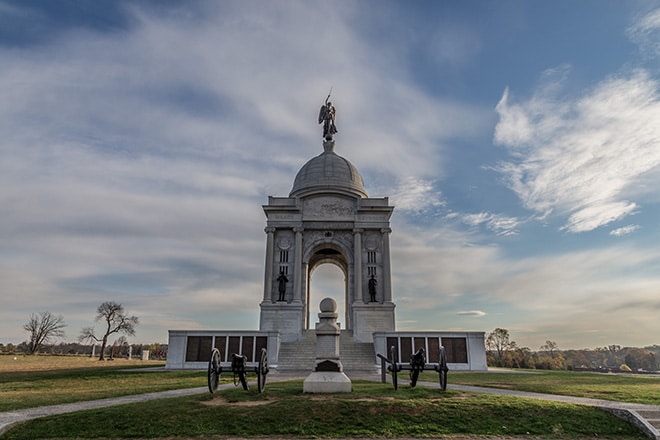
I’ll go through the process of using HDR Hero with two different sample photos taken at the Civil War battlefield in Gettysburg, Pennsylvania. Here is the before version of the first photo:
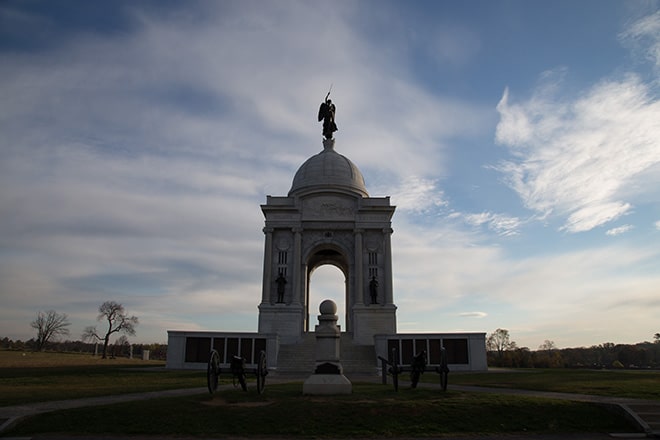
This photo was taken shortly after sunrise. It’s underexposed and the shadows are very dark. Increasing the exposure can help a little bit, but lightening the shadows will help more. Let’s get started.
The workflow presets for HDR Hero are broken down into different sections, and each preset will only impact the settings in its particular section. The first section is toning, and these presets impact highlights, shadows, whites, and blacks, so they serve as the foundation for the HDR effect. There are several different presets to choose from and each one will give you a different look, with several different levels of strength included. For this photo I will be using the preset called “Bold Tones 3”.
If you don’t have the HDR Hero presets you can manually adjust the settings to these:
- Highlights -100
- Shadows +100
- Whites -35
- Blacks -20
These adjustment have a drastic impact on the highlights and shadows, and also set a strong black point for the photo, helping to give it a bold look. Here is the photo after applying this preset:
The next set of presets is for exposure. I will be using the preset to increase exposure by +.50. If you don’t have the presets you can adjust this setting manually.
Next up is clarity, and I will be using the preset called “Clarity Strong Boost”. If you don’t have the presets you can manually set clarity to +60. This clarity setting will boost mid tone contrast and give the image a sharper look. After the clarity adjustment the photo looks like this:
The next section of presets is for contrast adjustments, and I will choose the preset for “Moderate Contrast Boost”, which sets the contrast at +20.
The next section is for vibrance and saturation, and I will be using the preset “Strong Boost”, which applies a vibrance setting of +25 and a saturation setting of +12. At this stage the photo looks like this:
Section 6 is for black & white conversion, which I don’t want to do for this photo, so I’ll move on the sections 7 and 8 for sharpening and noise reduction. I will be using the presets “Strong Sharpening” and “Moderate Noise Reduction”.
The sharpening settings are:
- Amount 100
- Radius 1.5
- Detail 65
- Masking 25
And the noise reduction settings are:
- Luminance 50
- Detail 60
- Contrast 30
- Color 40
- Detail 50
- Smoothness 50
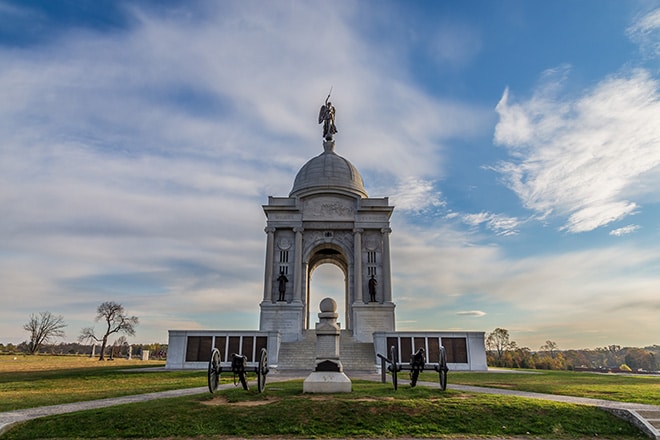
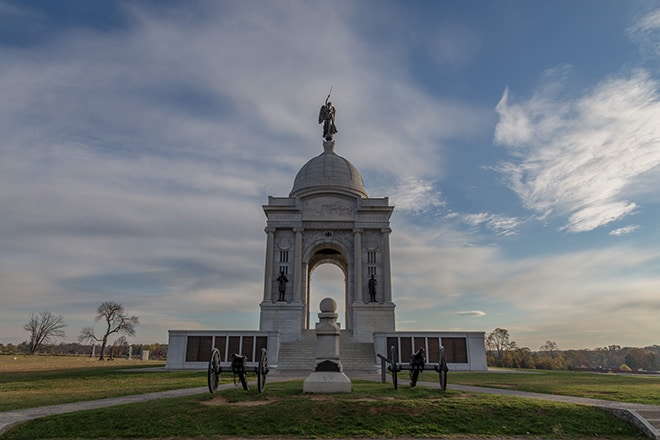
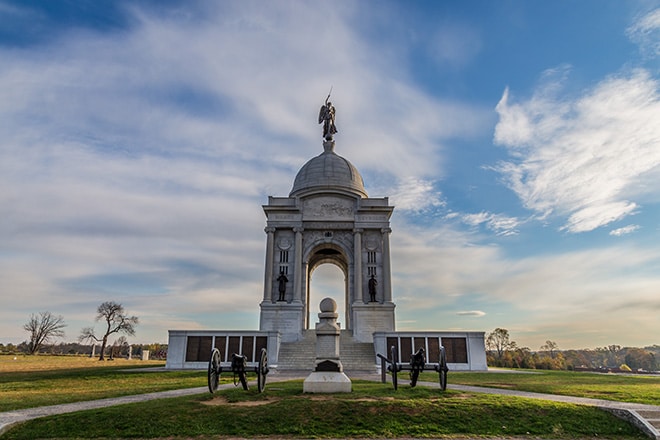
The last section is for adding a vignette, which I am also going to skip for this photo. So the end result after 7 clicks is this:
That’s how easy it is to use HDR Hero!
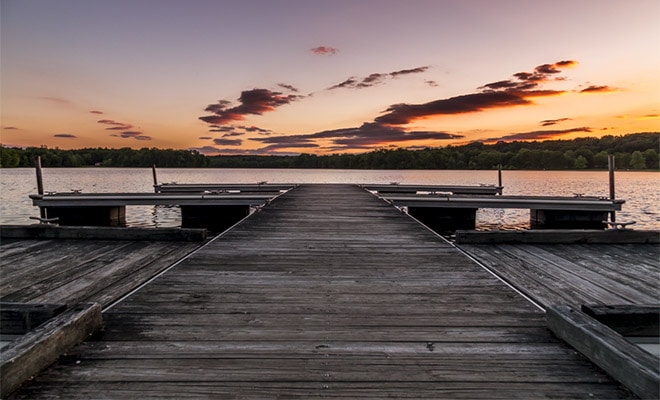
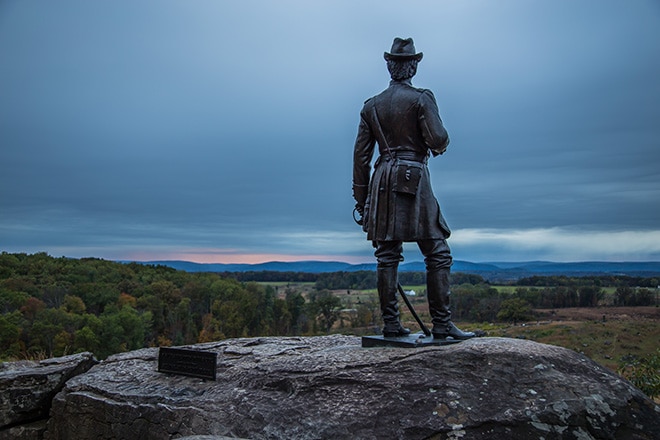
Now, let’s take a look at another sample photo also taken in Gettysburg. This photo was also shortly after sunrise looking out from Little Round Top, which overlooks part of the battlefield. Here is the before version:
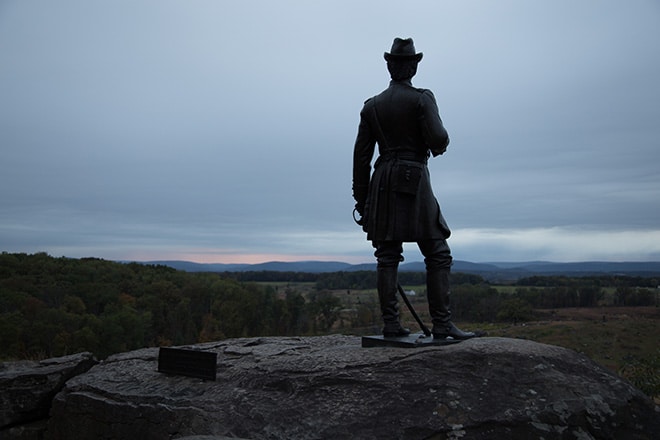
I’ll start this one by using the preset called “Shadows and Highlights Only”. It will give the highlights a setting of -80 and the shadows a setting of +80, and it leaves the whites and blacks settings untouched.
After applying this preset the photo looks like this:
Next, I’ll skip the presets for exposure because I don’t want to make any exposure changes, and I will apply the preset called “Clarity Moderate Boost”, which will change the clarity setting to +45.
Next up is contrast, and I’ll use the preset called “Strong Contrast Boost”, which changes the contrast setting to +30.
The next section of for vibrance and saturation and I will use the preset called “Very Strong Boost”, which sets vibrance at +35 and saturation at +12.
Moving on to sharpening and noise reduction, I will use the presets “Strong Sharpening” and “Light Noise Reduction”. The sharpening settings are:
- Amount 100
- Radius 1.5
- Detail 65
- Masking 25
And the noise reduction settings are:
- Luminance 40
- Detail 50
- Contrast 20
- Color 30
- Detail 50
- Smoothness 50
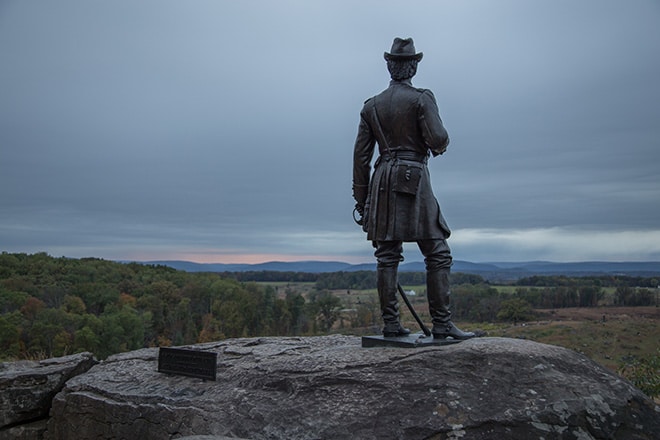
That’s the last of the changes, and the final result looks like this:
You can purchase the HDR Hero Lightroom Presets to use this process with your own photos. Subscribers of Loaded Landscapes also can get 5 of the one-click HDR presets for free just for subscribing.