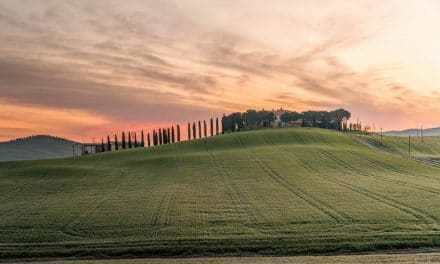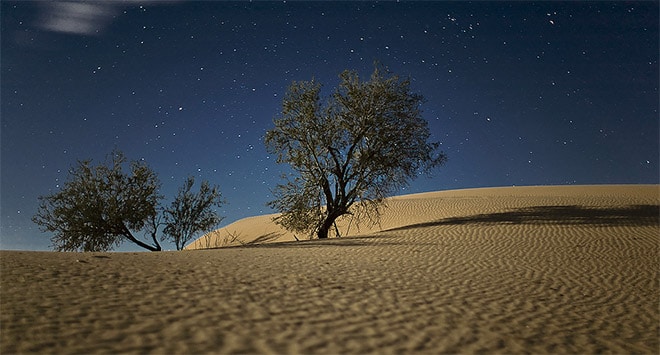
Tree in Dunes by Dan Eckert / CC BY 2.0
Low light photography can be intimidating and sometimes even quite frustrating. But, it’s worth putting in the effort to learn how it’s done, as you can make some pretty incredible photographs once the lights go down. Photographing the stars and the night sky is a popular style of low light photography, but there’s a whole world of photo worthy landscapes waiting to be discovered. You can use the following tips as a primer to get you started capturing them all.
Preparation Is Key
It’s always best to be prepared. Start by scouting potential locations before it begins getting too dark. Once you’ve found a prime location, do a little research–check to see what the moon phase will be. Combined with your local weather reports, knowing what the moon phase is can help you set the perfect day and time to take your photograph. For example, will a bright full moon better served to illuminate your landscape or will it drown out the stars? Is it going to be foggy, cloudy, windy, rainy? If you have some idea what to expect, it will be easier to plan for in the event the weather is unfavorable.
You won’t always have the opportunity to plan your shoot in advance, but it’s a good habit to try to allow yourself a little extra time to set up a game plan!
→ Related reading: Picture Perfect Planning: The Photographer’s Ephemeris
Consider The Time Of Day
Low light doesn’t necessarily mean dark as night. Shooting during golden and blue hours can also be considered low light conditions, even though there is still some brightness from the sun. In fact, these are spectacular hours of the day to practice low light photography in, because the sky is often more vibrant and the temperature of the light is naturally flattering. Plus, the small amount of sunlight you’ll have will make things like setting up your tripod and adjusting your camera settings a lot easier.
Typically, golden hour occurs every day for about one hour right after sunrise and about one hour before sunset. Blue hour occurs during twilight, usually right before the morning golden hour starts and right after the evening golden hour ends. The exact times of day and duration of golden and blue hours will, however, vary depending on your location. Fortunately, there are many apps and websites that offer free golden and blue hour calculators.
→ Related reading: Tips for Better Sunset Photography
Equipment Essentials
When you’re just starting out, it isn’t necessary to purchase a ton of equipment, but there are a couple pieces of gear you’re going to want to have. Obviously, you will need a camera, preferably one which allows you to control exposure settings. You’ll also want to invest in a tripod–as nice of a tripod and tripod head as your budget will allow. A good tripod is just about as essential to making a great low light landscape as having a camera. You’ll want to make sure it’s sturdy enough to easily support the weight of your camera, is easy to adjust, and doesn’t weigh so much that you’ll dread having to carry it on the hike to your shooting location.
Pro Tip: If possible, shoot using your camera’s “Mirror Up” function–it will help minimize the shake caused by your camera’s mirror slapping as it opens and closes.
Lastly, a remote trigger is also a great tool to keep in your bag and especially for shooting in low light conditions. By providing a “hands free” shooting experience, the advantage you gain is in the elimination of camera shake caused by your finger moving the camera as you physically depress the shutter release. There are different methods to trigger your camera remotely, with the most popular being a wireless (or wired) trigger/remote or dongle and phone app such as a Triggertrap.
→ Related reading: Gear and Resources for Night Photography
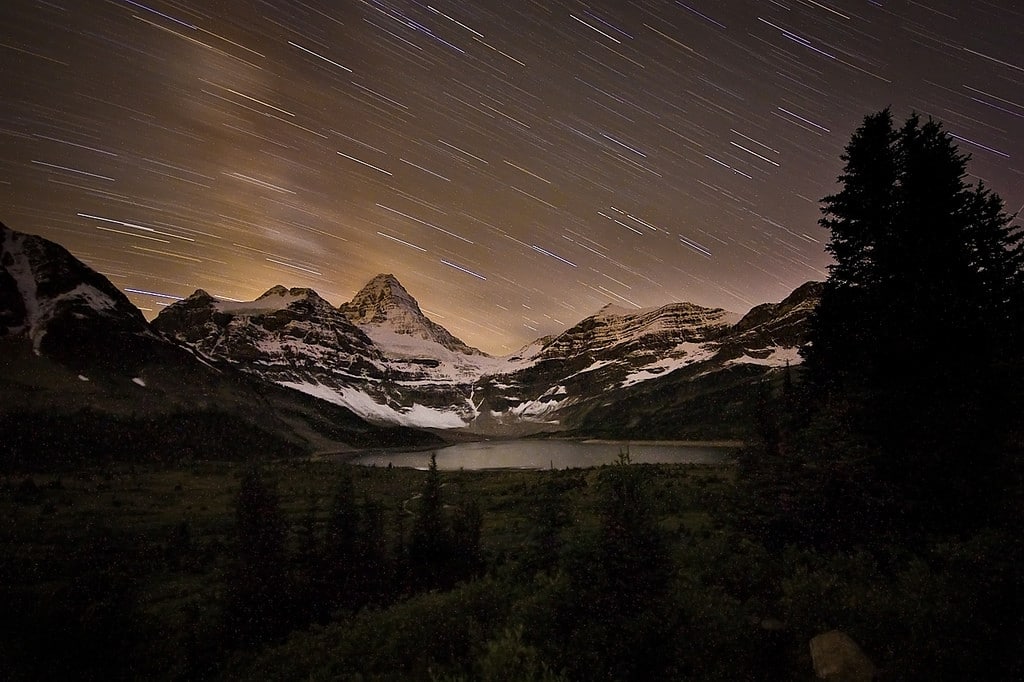
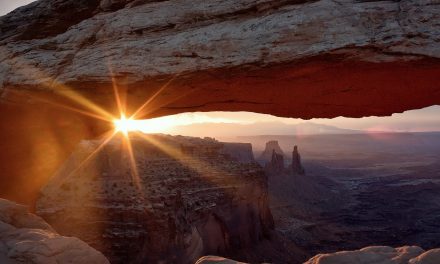
Assiniboine Star Light by Jeff P / CC BY 2.0
If you don’t have a remote trigger, an alternative option is to set your camera’s timer to have a 5-second delay. This will allow ample time for any movement caused by your hand to settle.
→ Related reading: How to Photography Landscapes at Night
Exposure
If you are not already shooting in full manual mode, make it one of your goals and start working towards it on your next low light shoot. Since every shooting situation will vary in terms of which shutter speed, aperture, etc you’re going to be using, it’s a good starting point to know how each setting actually affects your exposure.
- ISO – Higher ISO’s are generally reserved for low light situations, as they will increase the camera’s sensitivity to light. That being said, it’s always best to shoot as low of an ISO as possible because with a higher ISO comes with more noise in the image. Granted, as technology continues advancing noise reduction software and even our camera’s sensors are becoming increasingly better at reducing noise. I like to start by shooting at a low ISO such as 100 or 200 and adjusting upwards if I find I need a faster shutter speed. I rarely shoot above ISO 400.
- Shutter Speed – More than likely you’re going to be using a slow shutter speed to allow for ample light to reach your sensor, thus exposing your image correctly. (This is why a tripod is so essential!) If, however, you find that using a slow shutter speed will compromise the style you’re aiming for due to moving objects in the frame–animals, people, stars, trees swaying in the wind–you’ll have to adjust either your ISO or aperture to compensate. There are instances in which you may want a slower shutter speed. For example, when photographing water with the intention to get the soft, milky look.
- Aperture – The smaller the f number (aperture) you are shooting with, the more light will be let in allowing you to use fast shutter speeds and low ISOs. Unfortunately, it will also shorten your depth of field, which can be especially crucial to a landscape photo. Avoid shooting “wide open” when possible if you want all of your photo to be in focus.
- RAW – If you’re camera allows for it, shoot in RAW to give you ultimate control of your image during post production.
As a landscape photographer, you may already use tools such as PhotoPills or the Photographer’s Ephemeris. These photo planning resources can help you plan and execute your images from start to finish, and in some cases, doing a lot of the prep work for you and keeping you organized along the way. They can even help with you shutter speeds, golden hour, and location scouting. They’re even useful to use on last minute shoots.
One last bit of advice is to practice often. You can still get some shots in if you’re stuck indoors, and with every photograph you take comes the opportunity to improve and learn something new.
Photo license links: CC BY 2.0