Photo by Luke Detwiler / CC BY 2.0
The use of filters when shooting has become somewhat of a debated topic over the past few years, as many photographers are looking towards in-camera color balancing, bracketing, and various other post production techniques to accomplish the look they are going for. While it may be possible to replicate some filter-like effects in post production, certain types of filters have proven to be irreplaceable and are the unsung heroes in many landscape photographer’s gear bags. Here are three of the most common filters used among landscape photographers.
→ Related reading: Recommended Gear for Landscape Photographers
Circular Polarizing Filter

A composite of 2 photographs, one with a polarizer filter turned to its most effective position (the left) and the other with the polarizer at its least effective. (Photo by Angus MacRae / CC BY 2.0)
The polarizing filter is considered an essential piece of equipment for landscape photography. Once it has been screwed onto the front of your lens all you have to do is rotate the filter while looking through your viewfinder. Rotating the filter will block out certain types of light, while letting other light waves through. By rotating a circular polarizer, it allows you to either block out polarized light or allow it in. The effects are instantly visible. You’ll notice reflections on water disappear, greenery become more vibrant, and the color of the sky become more rich.
Neutral Density Filters
A neutral density filter is another important tool you’ll want to keep handy. They are useful when you need to decrease the amount of light that hits your camera’s sensor. This is often the case when your composition requires a very wide aperture or a long shutter speed. If you are shooting in bright sunlight, chances are your photo would turn out over exposed. A neutral density filter, which come in different strengths, block out varying amounts of light to allow you to use your desired exposure settings.
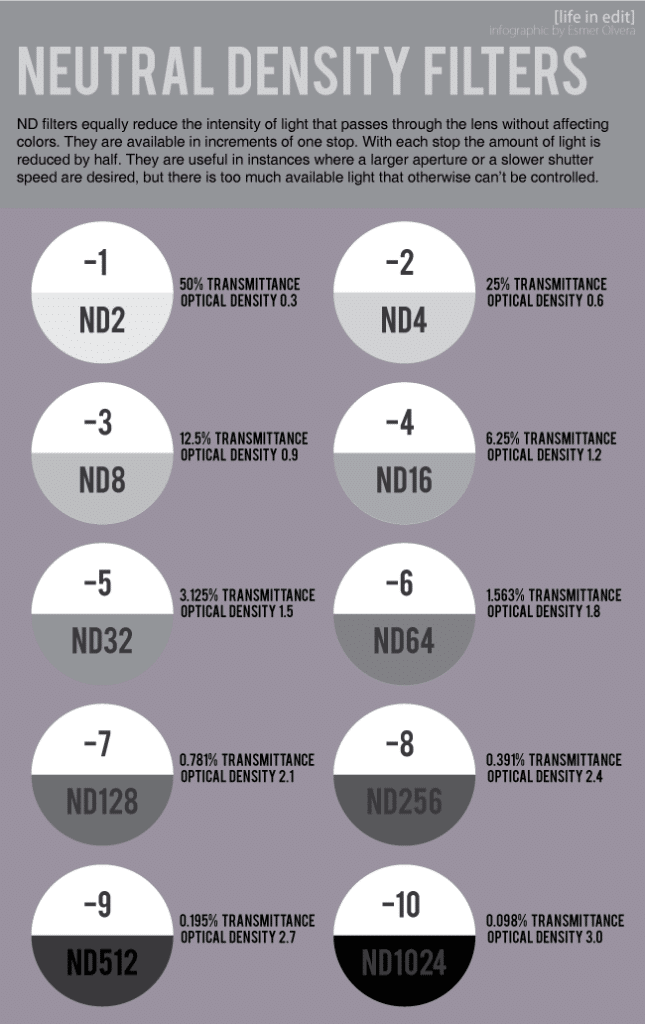
ND Filters by Esmer Olvera / CC BY-ND 2.0
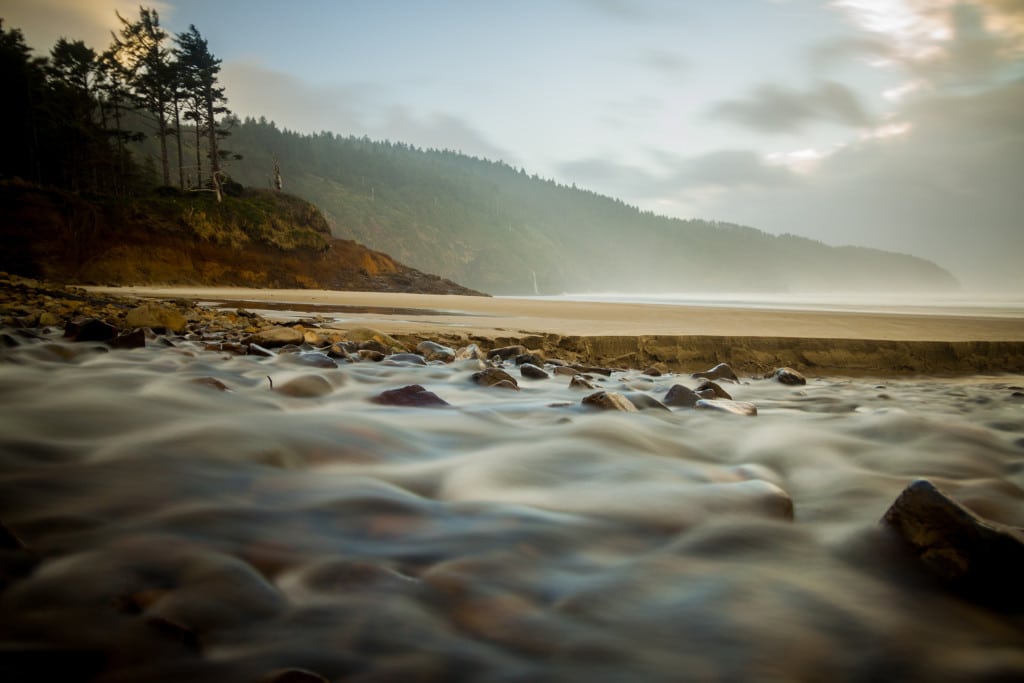
A common instance in which a landscape photographer would call on a neutral density filter is when you are trying to capture motion blur of moving water such as lakes, waterfalls, oceans, etc…
Photo by Luke Detwiler / CC BY 2.0
Graduated Filters
These types of filters, as the name implies, have a graduated effect. The filter effect will start out strong on one half of the filter while slowly fading away as it spreads across the rest of the filter. They can come in a variety of different filter effects, too. Most frequently used are graduated neutral density filters, which are perfect when the scene you are photographing has a bright sky and a contrasting dark foreground. This allows you to properly expose the bright areas of your photograph without underexposing the darker areas.
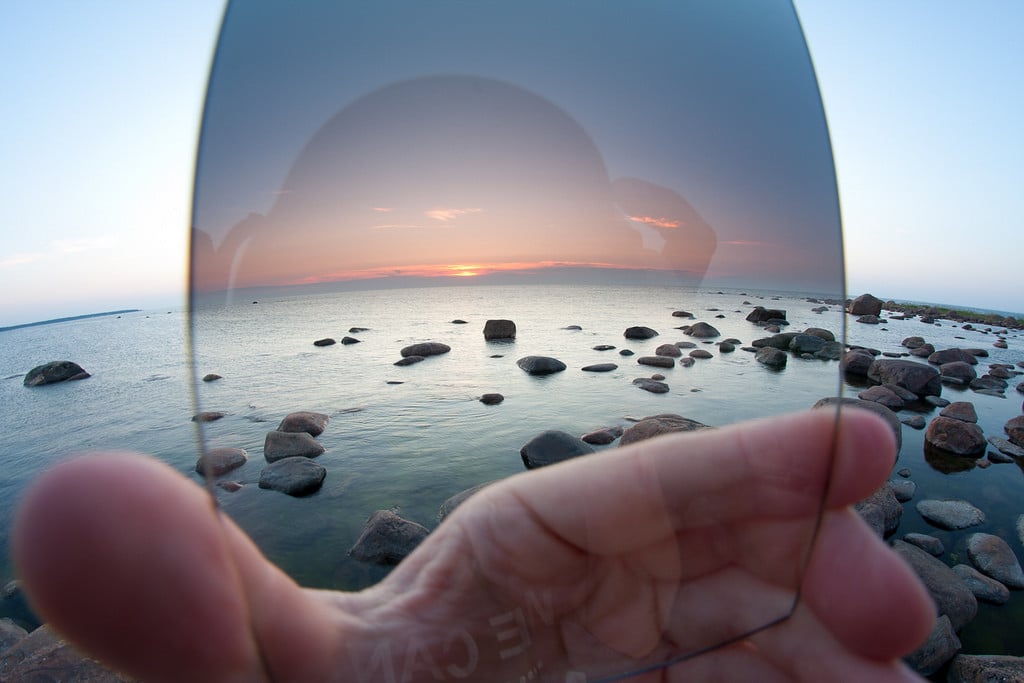
Photo By Kain Kalju / CC BY 2.0
What’s The Best Filter To Purchase
When shopping for a filter, you’ll find they come in a couple different forms: a circular variety that screws onto the front of your lens; or a square or rectangular filter that you can hold in place in front your lens (or purchase a separate filter holder in which you can slide the filter into to hold it in place). With the exception of a circular polarizer, the square filters are especially useful because one filter will work with many different lenses, whereas the screw on type will fit one specific size, you’ll need to purchase step up/down rings or an entirely different filter to use on lenses with different diameters.
Buying filters can be compared to buying a tripod. You should always purchase the best quality filter as your budget affords. Anytime you are putting an additional piece of glass between your lens and your subject, you want to make sure the glass isn’t going to degrade the quality of the image in any way and, truth be told, not all filters are created equally. Expect to pay upwards of a hundred dollars for a decent filter, it’s well worth it in the end.
Photo license links: CC BY 2.0, CC BY-ND 2.0