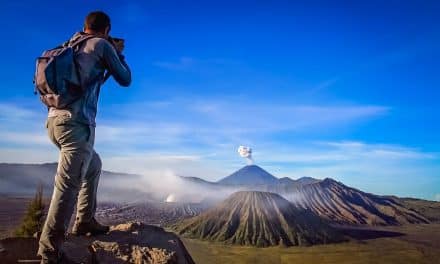
It’s undeniable that night photography, for some, is challenging. If you’re one of those photographers who are used to taking photos during the day, then this is good news for you. Night photography is not that hard to learn.
There are tips and tricks to guide you on how to master this craft. If you’re on a mission to improve your night photography skills, you’re in for a treat. Let this post be your guide and how to master night photography.
[table id=8 /]
What You Need for Night Photography
First of all, you need to gather the equipment you need for night photography. The good news is you don’t need expensive and extra gear. Sometimes your standard camera and lenses are good enough; it just depends on your creative skills.
- Tripod: One of the first and most important things you need is a tripod. In night photography, you need more prolonged exposure and a longer shutter speed. Holding your camera steadily for long periods seems uncomfortable. That is why you need a tripod if you want to have cool effects and play around. Just make sure to have a sturdy tripod to withstand strong winds. The slightest movement of the camera can cause the photo to become blurred.
- Remote Shutter Release: Another highly recommended item for night photography is the remote shutter release. Others call it a shutter release cable. You can keep the camera steady for as long as you want with a remote shutter release. It can prevent the camera from jarring and shaking while pressing the shutter. If you don’t have a remote shutter release, you can use the camera timer to take a picture. Just make sure not to touch the camera during the exposure process.
- Lens Hood: with night photography, it is inevitable that bright lights will come in different directions. There are headlights from cars, street lights, or neon lights, so if you want to keep the flowers to a minimum, a lens hood is a must.
- Flashlight or Spotlight: A flashlight or spotlight is an additional source of light during night photography. It will come in handy during your photoshoots or just for your personal use. It’s always a struggle to fiddle in the dark, so even just a small headlamp is a big help.
- Extra Batteries: In night photography, you’re outdoors, it’s going to be a long night, and there is no source of electricity. So it always makes sense to pack an extra set of batteries. With night photography, especially when using the live view settings, it will drain the battery faster, plus the cold weather too. Without extra batteries, your night will be over.
- Outdoor Gears: If you plan to stay closer to nature and want to spend the night outdoors, you must have the right gears. Aside from a flashlight, make sure to bring camping gear (a tent, sleeping bag, cookware), food, extra clothes, and your other wilderness survival gear. Just a suggestion, do not camp alone if it’s your first time. Bring a friend, hire a tour guide, or tag along with groups.
It’s best always to come prepared; bring an umbrella, raincoat, water, snacks, and other useful things to get you through the whole journey. Preparedness is the key to capture extraordinary photos at night.
What is Night Mode in Photography?
Most DSLR cameras have a night mode feature. The night mode automatically sets a high ISO and long shutter speed. Even though night mode photography is available, shooting with manual mode will always produce the best shots.
The Best Camera Settings for Night Photography
The images captured in night photography are exceptionally stunning. But it will also be incredibly frustrating if you don’t use the best camera settings, and you’re not quite sure what you’re doing.
All skills can be mastered for as long as you have the dedication. Here are some tips and tricks for the best camera settings in night photography.
Shutter Speed
During day photography, the shutter speed used is usually at milli-seconds. The exact opposite happens in night photography. The shutter speed in night photography lasts longer than one second, or most of the time longer than that. The camera needs a longer period to gather light in order to form a proper exposure.
The shutter speed is longer than one second because the shutter needs to remain open for longer periods. Make sure to avoid even the slightest movements during the exposure process because this may cause the image to become blurry.
This is also the reason why a sturdy tripod is must-have equipment for night photography. You can leave your camera’s shutter open as long as you like without worrying that it might move.
Exposure
If the source of light is an issue, there will be a big difference with the exposure settings. That is why day and night photography are the complete opposites because darkness changes every little setting used. This is another reason why a tripod is beneficial.
To understand how exposure settings work, you must know the three factors that affect it; ISO, shutter speed, and aperture are. The first thing to do is switch to manual mode so you can have full control. Taking photos in low light conditions requires a wide aperture, slower shutter speed, and higher ISO.
ISO
If you use higher ISO for night photography, this will increase the noise on your image. The new and advanced camera models nowadays have that feature that allows us to take noiseless pictures. This means very high ISO settings of about 3200 or more.
Older models and standard cameras have lower ISO settings, and there is a limited light sensitivity range. Though this may be a practical approach, it is best to take test shots first to figure out the right ISO.
Get off to a great start by taking photos with one-second exposure and gradually increasing the shutter speed. Then lower the ISO if you want a grainy photo. To capture an image, use the extended shutter speed.
Your camera is like an extension of yourself, and you should be aware of its features and limits. Know your camera’s ISO limits and use different types of ISO settings in night photography until you found the perfect match. Take note of the ISO that produces too much or less noise or make it look too grainy. Once you’re aware of your camera’s limits, you can work from thereon.
Aperture
An aperture is the opening of the lens, which allows the light to enter the camera. The aperture’s size will determine how much light will come into the camera. This will also affect the shutter speed and the depth of field. With the lack of light, there’s always that unique and noticeable definition of a photo.
When it comes to aperture, there’s not much difference between daylight and night photography. The only difference is the struggle to get light into the camera for proper exposure.
A smaller aperture will require long shutter speeds, but you don’t need to worry because the background is usually dark. That is why it is recommended to use a wide depth of field at night because you’ll need more light to come in your lens.
But if you’re caught in a situation where your subject is distant such as in cases of convergence, use a narrow aperture and a wide depth of field. Sometimes you can opt for these settings because you need to rely on the source of light as your subject.
For very dark places, raise your shutter speed and ISO, but reduce the aperture. Usually, the outcome is a creative, grainy, and outstanding photo, that is, if you know what you’re doing.
If you want to master night photography, you have to think before you shoot. Pick a subject, decide on how you want the photo to look like. Ask yourself if you want it to be grainy, have light trails, or the aperture to be used. Once you decide on these details, you can start working from there, like the exposure and ISO settings.
A tip to remember with night photography is to ignore your camera’s exposure meter because it’s irrelevant in low light settings. Do a lot of test settings and find the best settings for the subject and scenery.
Manual Focus
As mentioned earlier, manual focus is preferred for night photography. Autofocus will struggle to adjust to the dark, and you’ll just end up taking crappy photos. On the other hand, with manual focus, you can have more control.
If you want a crisp shot, you can also turn the Live View Mode and then zoom in to the subject you wish to focus on. Avoid switching to autofocus mode at any time of the shoot because it will override the manual settings you placed. If you’re not used to taking photos with a manual focus, you just need more practice. In no time, you’ll get used to it and master this skill.

Best Lens for Night Photography
The camera and lens you own now are good enough for night photography. But in case you need a little upgrade, here are some of the best lenses for night photography.
Canon EF 50mm f/1.8 STM
If you own a full-frame Canon camera, you might want to consider investing in a 50mm prime lens Canon EF 50mm. This is one of the most popular lenses for night photographers thanks to its wide aperture and pocket-friendly price tag.
Key Features:
- Maximum Aperture: f/1.8
- Stepping Motor Technology: Enables the lens to focus smoothly and captures photos fast)fast. This mechanism is slower than auto-focus, which is useful for capturing photos and recording videos. This is a helpful feature for night photography and smooth auto-focus.
- 50mm lens: The 50mm lens is much faster compared to traditional lenses. If the lens aperture is double, it means that there will be more light coming in.
- Lightweight and Easy to Use: This Canon lens weighs only 160 grams, measures 40mm in length, and is easy to use. This is one of the smallest lenses from Canon, and it has an impressive build quality.
It has a rubber grip and overall plastic construction, which is why it’s easy to grip and carry around. Overall, it is a compact, simple, and affordable lens.
Nikon AF Nikkor 50mm f/1.8D
For Nikon enthusiasts, the Nikon AF Nikkor 50mm f/1.8 D will make you happy. It has an f/1.8 aperture and a 50mm prime lens, just like the Canon lens mentioned previously. This is the recommended choice for D3 and D700 cameras. But it can be used for almost all kinds of Nikon cameras since it’s a traditional AF lens.
Key Features:
- Nifty add-ons: This Nikon lens includes an aperture ring, manual focus ring, and a focus distance indicator. The lens has a superb zoom quality, fast auto-focus, and incredibly performs in night photography.
- FX Lens: The Nikon AF Nikkor has a full-coverage FX lens that works great even for filming. It has an integrated coating that helps in preventing ghosting or flares. The physical ring on the 50mm lens enables manual focusing and control of the aperture.
- Reverse Mount: This is also one of the rare lenses that can be used as a reverse mount thanks to its reverse adapter ring and aperture that can be changed. These are the features that make it an excellent lens for macro photography as well.
Sigma 35mm f/1.4 Art DG HSM Lens
Third, on the list of the best lenses for night photography is Sigma 35mm f/1.4. Unlike the Nikon and Canon lenses mentioned above, this Sigma lens has 35mm and f/1.4 maximum aperture. This is one of the first lenses that fall into the “art lens” category and is an excellent choice for low light photography.
Key Features:
- Subject is Isolated: Since this is one of the first “art lenses” in the market, it can isolate the photo’s object. It can capture pictures with a dark background and emphasize the subject because of its shallow depth of field.
- Floating Mechanism: The Sigma lens has a floating mechanism that helps take better shots of close up focus.
- Hypersonic Motor: The hypersonic motor feature ensures quiet and high-speed autofocus.
It uses low dispersion glass elements that help in preventing photo distortion. As for its materials, it’s made with super multi-layer coating to avoid ghosting. The coating helps in producing a sharper and more saturated image.
Tips and Tricks for Night Photography
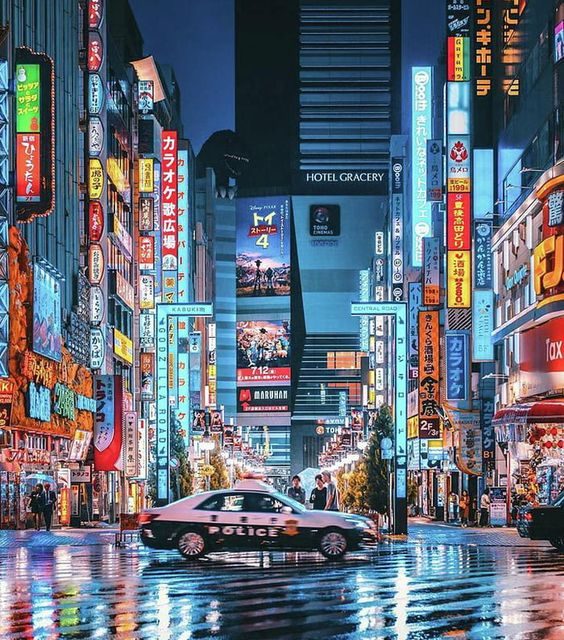
Night photography will make you realize the difference between daylight and lowlight photos. The dramatic effect of night photography is a whole new level, especially with urban scenes. So if you want to master night photography, here are some ideas you can use to become an aficionado in this field.
Shoot Raw Photos
First and foremost, you have to know the recommended file format for night photography. It is obvious the JPEG format is widely used since it doesn’t take up too much space, but it’s not recommended for night photography.
For night photography, the perfect file format is RAW. It may take a lot of space on your memory card, but the quality of your shots will be preserved, unlike the JPEG format. Plus, the quality of images in RAW format is much easier to edit during the post process.
Take Test Shots
Regardless it’s day or night photography, taking test shots will help you find the best method that works. Coming up with a masterpiece shot is a struggle during day photography; what more for low light settings? Your camera is an extension of yourself, and experimenting with test shots gets you to a step closer to coming up with a masterpiece.
Creative shots are not made out of coincidence. It’s made after many test shots, a lot of settings tinkering, and many adjustments. During this phase, you will realize what works best and what’s not. If you’re not satisfied, try different perspectives or angles.
Taking test shots allows you to tune the settings of your camera. If the image is dark, adjust it until you find the right exposure. Play around with different shutter speeds, apertures, and ISO levels.
Try Bracket Exposures
Nailing the perfect shot at night is challenging, especially when finding the right exposure. You can avoid’ guesstimating’ by trying bracket exposures. The bracket exposure technique involves capturing a series of photographs using various exposure settings.
This process should be involved while taking test shots so you can see each picture getting darker or brighter. Then check which photo has the ideal exposure for the scene and the subject.
You can try a manual or automatic exposure. Automatic bracket exposure is just one click away because it’s a readily available function for most cameras under the ‘Shooting Menu’. But ideally, manual settings are recommended for night photography.
For manual bracket exposure, set your camera to Speed Priority or Aperture Priority mode. Try taking one photo; if you’re not satisfied, use the Exposure Compensation button (Symbol: +/-). Keep adjusting the exposure while taking shots until you’re happy with the exposure.
Besides selecting exposure on your camera, you can use bracket exposure to create High Dynamic Range (HDR) images. When combining several images on your editing tool, the technique will create an exposure range that regular cameras cannot capture.
Aperture Priority Mode
In night photography, the savior is the Aperture Priority Mode. You can use this setting when you’re not 100% familiar with Manual Mode or shooting static (stationary) scenes.
When you capture images with the Aperture Priority Mode, you can choose the aperture you prefer, and it will automatically select the shutter speed. Aperture Priority Mode is known as the quickest and easiest way to take pictures at night as long as the subject is not moving.
But this mode has its limitations, and it does not guarantee the creative outputs like those with manual settings. If you want to master night photography, using Aperture Priority Mode in the meantime is helpful, but you really must master the Manual Settings and be one with your camera.
It’s perfect for landscapes and buildings, but for moving objects, it will just produce a sharp or blurry output. Take more control of your photo by switching to manual mode.
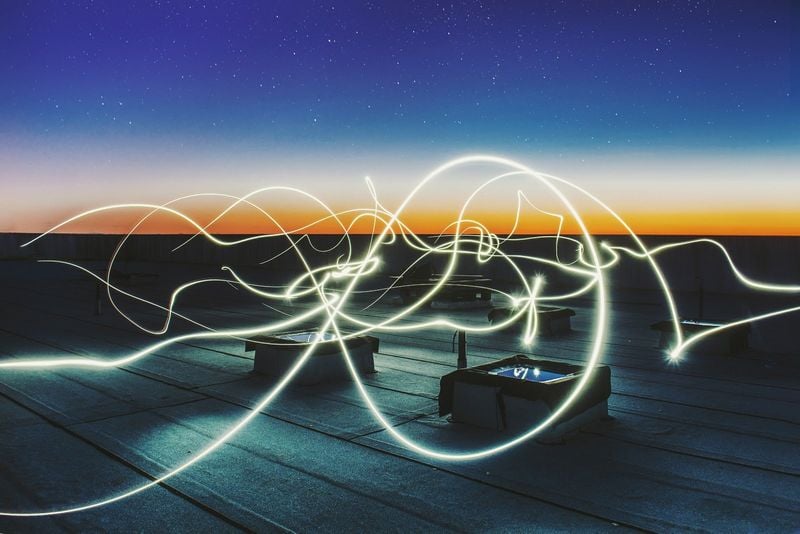
Try Different Shutter Speeds
When capturing moving objects like cars passing or people in motion, switch your camera to Shutter Priority Mode. Simply select the shutter speed, then your camera will automatically select the aperture.
This will also help in producing remarkable light streaks and picturesque landscapes at night. That is why test shots are essential to figuring out the effect that works best for the scenery and the subject.
Suppose you want to shoot colorful trails, set your camera to low shutter camera speed (1/30 to 30 seconds). Keep in mind that when shooting light trails, the slower the shutter speed, the longer the light trails become.
As for the aperture, use the widest aperture setting because you won’t be needing longer exposures. You can combine wide apertures and really slow shutter speeds for overexposure of an image. You’d be surprised by the image’s outcome, which will make you appreciate how your camera gathers enough lighting even in dim environments.
If you’re using the Shutter Priority Mode, take a look at your camera’s select aperture. You will see that it can be as small as f/22 for exposures longer than two seconds.
The Shutter Priority Mode is the perfect setting for capturing the night sky. Suppose you’re shooting the shooting stars or aurora borealis. The typical exposure for night sky photography is exposure time between 10 to 30 seconds. You must opt for long exposure periods because stars move across the sky. In this way, you can see light trails.
Play with Bulb Mode
FYI, the longest shutter speed for many of the cameras available in the market now is 30 seconds. But if you find yourself in a situation where you’ll be needing an exposure of longer than 30 seconds, you can opt to use the Bulb Mode.
The Bulb Mode allows the camera shutter to open as long as you’re pressing the camera button. The Bulb Mode overrides the 30-second automatic function of a camera. That is why mastering the Manual Mode is beneficial in so many ways, including this scenario.
If you open the shutter for more than 30 seconds, it is recommended to use large f-stops (f/8, f/11, f/22). If you use small aperture lenses for an exposure longer than 30 seconds, chances are, you are overexposing a shot. Also, use the lowest possible exposure for extremely long exposure times.
With Bulb mode, you really have to experiment and trust your instincts. It’s more challenging yet more fulfilling because you can expose an image without the time limit.
That is why we take as many test shots as you want. It’s like mixing potions or cocktail drinks, experimenting for the best possible output. The art of photography unleashes the Picasso in you.
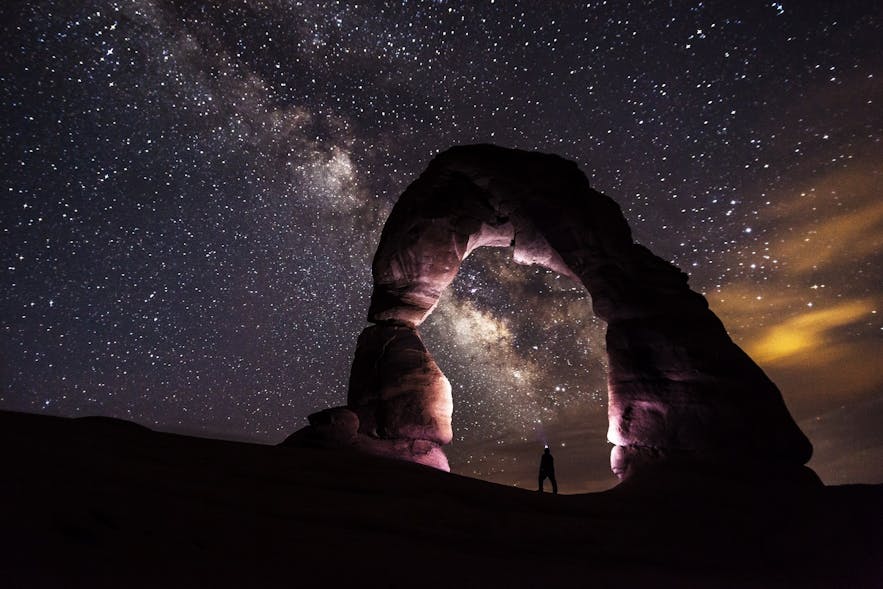
Capture The Night Sky
When long exposure and Shutter Priority modes are combined, you will have the night sky’s stunning results. The world is a photographer’s canvas, and the night sky will amaze you with its different effects.
There’s the movement of clouds, star trails, or even the wonders of the northern lights, the aurora borealis. If you want to include movements or definitions of these objects, take a longer exposure (for about 20 seconds).
If you want to capture the beauty of the stars, start with setting the shutter speed for about 20 seconds to prevent star trails. Set your camera to its widest aperture, slower shutter speed, and highest ISO.
If you expose a photo for as long you can, even the smallest amount of light in the night sky multiply several times to produce that purple to blue color hue.
With night photography, you can use the moon as the focal point of your image and source of light. You’d be surprised by the many interesting effects it can produce for night photography.
When Picking a Subject
By this time, you know what the right equipment to bring during night photography is. You also now have the idea of preferred aperture, shutter speed, ISO, and exposure settings. Now it’s time to talk about tips, tricks, and ideas when picking a subject.
Here’s the thing, a good subject will always be a good subject. But things will look totally different for night photography. Here are some ideas for night photography:
- Night Sky (stars, moon, clouds)
- Museums
- Public Buildings or Architectural Masterpiece
- Bridges
- Cars Passing
- Light Trails from street lights
- Reflections on bodies of water
- Skyscrapers, vistas, or overlooking view
- Christmas decorations (with lights)
- Fountain with lights
- Campfires
- Busy night market
- Fireworks
- Carnivals
- Use sparklers, string lights, car headlights as a source of light
A tip when picking a subject for night photography is: what your naked eyes can see will look different in the eyes of a lens. You can bring your ideas to like by taking several test shots. If it will take you a few hours to capture that single perfect shot, that’s okay.
There will be times where you’ll find yourself waiting for long times for long exposure shots at the same time cranking up the ISO. Other than that, you have to deal with the shutter speed. That one perfect shot can change your life and will define how brilliant of a photographer you are.
Have Fun!
The last tip to create a masterpiece with night photography is to have fun. Enjoy each moment and consider each mistake as a learning moment. If you’re with your friends, let the tripod do its work, and don’t forget to have fun.
Do not spend most of your time sticking your nose in the camera; instead, take time to appreciate the beautiful scenery in front of you. It’s extraordinary to capture a breathtaking photo, but it’s going to be a fantastic experience seeing it in real life. What you see on your night shots will definitely leave a mark.
More importantly, you have to love what you’re doing, so you’ll come back for more the next time. Don’t think of it as tedious and requires a lot of work, be thankful that you found a profession or hobby that makes you happy.
Think of your shots as inspiration for future generations of photographers. Be playful and be creative in everything that you do.
Night Photography Post-Processing Tips
After picking the perfect subject, following the tips, and several test shots, it’s time to master the post process. There’s always room for improvement and make your photos convert into something more magical with minor edits. Here are some night photography processing tips you can use.
Highlights
With night photography post-processing, the major issue to consider is handling highlights. The challenge with night photography is limited light sources and dealing with dark areas; at most times, the highlights (the bright spot of a photo) will blow out.
If you’re lucky, this may turn out as a masterpiece, but there will be times that it will look dull even if it’s not completely blown out. If it’s too bright, then try to tone it down a bit. For older editing software, this will require a High Dynamic Range (HDR). But since RAW editors available in the present can help in bringing back the highlights, this wouldn’t be much of an issue. That is why it is recommended to use the RAW file format instead of JPEG.
If you’re using Adobe Photoshop or Lightroom, simply find the Highlights slider and adjust it a bit to the left. You will then see a significant decrease in the highlights, plus the highlights will appear more colorful.

Shadows and Blacks
After dealing with the highlights (bright spot of your photo), now it’s time to deal with the dark areas. If you think there are parts you need to brighten up, you should consider some parts of your photo to be pure black.
To do this, look for the Shadow slider on your editing software or app, and at the same time, pull down the Blacks slider. If you decrease the Black slider, contrasts are maintained. There’s no point in preserving some areas because it’s already dark; all you want to do is let other parts stand out.
Sharpening
After the highlights, shadows, and blacks photography, you should also master the sharpening process. When sharpening night photos, you’ll have to deal with digital noise. If you think the whole photo is noisy, it is best to give it a reduction.
With ACR or Lightroom, use the Noise Reduction section under the Detail Panel, and pull the up Luminance slider.
But there will be instances that you would only decrease a specific part of an image. Most of the time, the noise of a photo manifests in the darkest parts. If this is the case, simply make local adjustments with an Adjustment brush and Noise Slider.
Be a Master of Night Photography
Is it possible to be a master of night photography? Of course! It’s not going to be easy, but it will definitely be worth it. There will be many trials and errors coming your way. It’s not going to be a one-time craft mastery, but the talent will gradually build.
Will it be hard? Will it be tricky? Will it be easier over time? Yes, it will be. But for as long as you understand the basic concepts of ISO, aperture, shutter speed, and exposure, you are ready to create a masterpiece. Once you have mastered the basics, always go out of your comfort zone, think outside the box, be playful, and try something new.


Night photography is one of the hardest aspects of the art to master. The light sources that you re used to relying on during the day are no longer available, so you re forced to truly
I’ve been reading up on a lot of camera tips, and I found your post the most helpful and detailed, thank you so much. I’m definitely going to save up for a Canon EF 50mm f/1.8 STM, I can’t wait to try my hand at night photography.