Disclosure: Loaded Landscapes is an affiliate of Macphun. If you purchase Aurora HDR through our link we’ll be paid a referral commission, at no additional cost to you.
Post processing is a major part of digital photography. Programs like Photoshop and Lightroom give photographers loads of potential, and although they are extremely popular, there are other software options beyond just what Adobe has to offer. For several years programs dedicated specifically to HDR processing have been available. Photomatix was probably the leading option for quite a while.
For the past few years Macphun’s Aurora HDR has been arguably the most popular option. I had been wanting to try Aurora for a long time, and finally about a month ago I got a copy of it and started testing it out. After using it for a few weeks to edit photos from several outings this spring, I’d like to share my thoughts in this review.
For disclosure, I am not being paid for this review. However, Macphun did provide me with a free copy of Aurora HDR 2017 in order to test it and write the review. Everything expressed here is my own opinion based on my experience with the software.
What is Aurora HDR?
Aurora HDR is software created by Macphun specifically for the purpose of processing high dynamic range (HDR) images. In a situation where a single photo is not sufficient to capture all the light and dark areas of a scene, you can use exposure bracketing to get multiple images of the same scene. Typically there will be 3 or more photos, some underexposed and some overexposed, all taken with the same aperture setting. HDR software will then automatically merge them together to create one image that more accurately and effectively shows the full dynamic range.
Macphun created Aurora HDR a few years ago in collaboration with Trey Ratcliff. It very quickly gained popularity among photographers, and in late 2016 they released an updated version, Aurora HDR 2017.
While there are several other competitors in the market, Aurora HDR leads the way with a user-friendly interface and plenty of powerful options that give you full control.
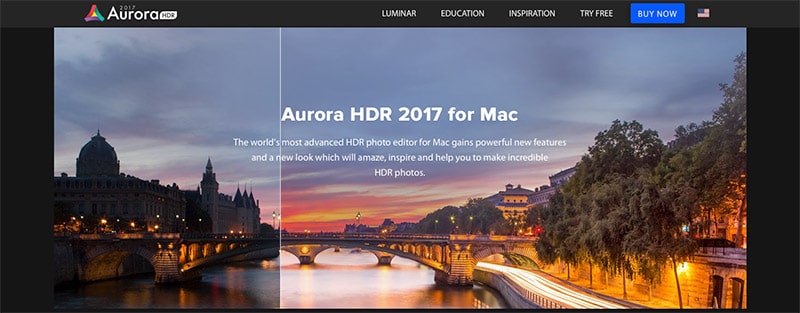
For the moment, Aurora HDR is only available for Mac users. A PC version is in the works and should be available in the not-too-distant future. You can use Aurora HDR as a standalone program, or it can be used as a plugin for Lightroom, Photoshop, Photoshop Elements, or Aperture.
Background
As I mentioned in the intro, HDR software has been around for a while. Photomatix is a popular option and was one of the only choices several years ago. Photoshop has had built-in HDR merging capabilities for a while. Then a few years ago Adobe added the capability of merging multiple exposures into an HDR image from within Lightroom. That was a big change for Lightroom users who previously had no choice but to use a plugin or another program for HDR processing.
Personally, I used Photomatix when I first started working with HDR photography. Then when the HDR merge was added to Lightroom (I believe it was with the release of Lightroom 6/CC) I started using it and never used another third-party plugin or app again, until recently.
There are significant pros and cons to the HDR merge in Lightroom. On the plus side, it’s very convenient if you’re already using Lightroom to manage and process your photos. Any time you can save in post processing is welcomed, so being able to process HDR photos without leaving Lightroom is a big deal. Another plus, in my opinion, is that the HDR merge in Lightroom tends to produce a more realistic look as opposed to an intense, overdone look. In most cases the viewer will have no idea that the image is an HDR merge.
But there are also some major drawbacks to Lightroom’s HDR merge function. First, there are very limited options. It is intended to be a simple tool, and it is. That means it’s very easy to use, but it doesn’t give you much control. You’re able to tell Lightroom if you want it to auto align the images and set the amount of de-ghosting, but that’s about it. Once the HDR merge is created you can edit the photo by adjusting the sliders just like you would with any other photo. The process of the HDR merge will adjust the exposure and tones (highlights, shadows, whites, and blacks) for you, but you can re-adjust them if you’d like.
Second, the HDR merged images tend to come out looking rather flat. You can adjust contrast and clarity, or work with colors to improve the image, but there may be times when you can’t get it quite how you want it.
Over the past few years I’ve had an up and down opinion of Lightroom’s HDR merge. It’s definitely been a welcomed addition to Lightroom, but there are many times where I am just not thrilled with the end result. With that in mind, I decided it was time to give Aurora HDR a shot.
Details of Aurora HDR 2017
After using the program for a while, here are the things that stand out to me.
Improvement Right Away
The first thing I noticed when I started using Aurora HDR is that the photos usually look much better just based on the initial merge, as compared to the merged images created in Lightroom. Unlike the Lightroom HDR merges, the base merge in Aurora HDR does not look flat. In many cases when the merge is done the photo already looks pretty good and just needs a bit more work.
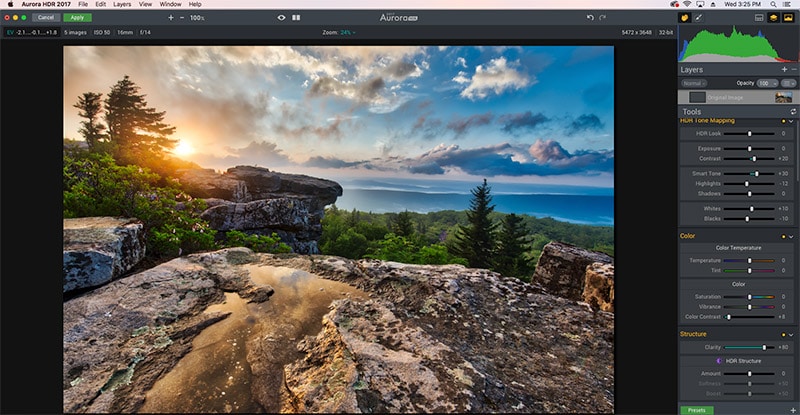
Plenty of Control
I knew Aurora HDR 2017 would offer far more control over the HDR process as compared to Lightroom, but I was surprised at just how much control and how many options there are. Macphun has included a function similar to almost every option or slider available in Lightroom’s Develop Module, plus a few others.
For starters, the “HDR Look” slider allows you to control the intensity of the effect. If you want a more extreme look you can bump this slider up. I typically leave it very low to go after a more natural, realistic look.
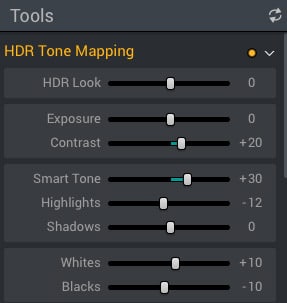
There are sliders for contrast, clarity, exposure, highlights, shadows, whites, and blacks. All of those work pretty similar to the same sliders in Lightroom. Aurora HDR also has a “Smart Tone” slider that is pretty interesting. It lets you lighten or darken your photo, but it automatically prevents highlights from being blown out or shadows from getting too dark. I’ve found this to be a really useful slider.
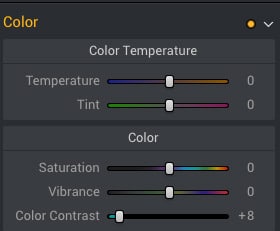
You have controls over colors through the color temperature, vibrance, and saturation sliders. A nice addition is the “Color Contrast” slider, which is great for boosting colors without getting too outrageous. There is also a tone curve and HSL sliders that are similar to Lightroom’s tools. And Aurora’s “Color Toning” settings work much like Lightroom’s “Split Toning”.
Aurora HDR also has sliders for creating a vignette. This tool is actually more useful than Lightroom’s, in my opinion, because it allows you to easily set the center of the vignette rather than forcing you to use the center of the photo as the center of the vignette. In Lightroom you can accomplish the same thing with the radial filter, but it’s a bit easier and quicker without needing to access a separate tool.
Other sliders include “HDR Structure” (which also impacts the intensity of the effect), several “Denoise” sliders, and a series of sliders for controlling the “Image Radiance”. You can use these sliders to control the radiance, brightness, and smoothness of the photo. These sliders have a great deal of potential and allow you to create some different types of effects. There is also a series of “Glow” sliders that can boost your photos as well.
The “Polarizer” slider boosts contrast between clouds and a blue sky, replicating the effect of a circular polarizer on your lens.
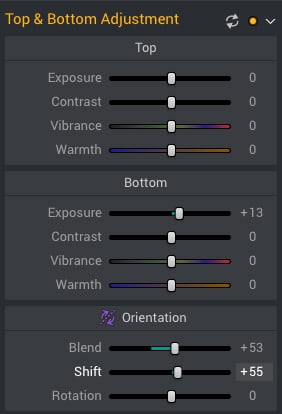
The “Top & Bottom” sliders are pretty interesting. They work in much the same way as a graduated filter in Lightroom. You can shift and rotate it so it is not a perfectly horizontal line, and you can also control the hardness or softness of the transition. The sliders allow you to set different exposure, contrast, vibrance, and warmth for the top and bottom sections of the photo. This can be pretty useful for landscapes.
All of your settings can be saved by creating a preset. This is extremely useful, especially if you’re working with a series of photos and you want to apply a similar effect to many different photos. Just save the preset and apply it to the other photos.
Aurora HDR 2017 even comes with a nice collection of presets already created for you.
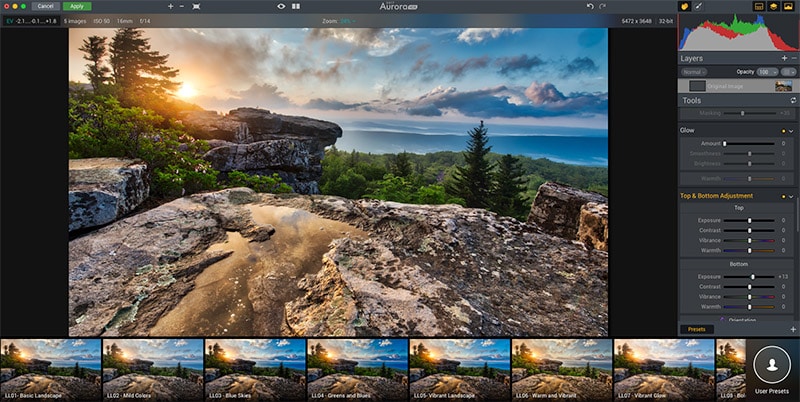
Layers and Local Adjustments
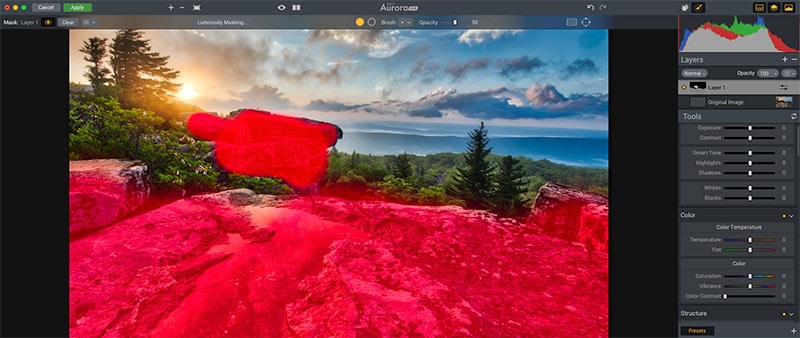
While all of the sliders and presets make Aurora HDR 2017 a very powerful tool for creating HDR images, what really takes the program to the next level is the use of layers and local adjustments. All of the main sliders that I’ve covered so far are for global adjustments, meaning they impact the entire photo. But you actually have far more control with the brush tool and the use of layers.
After you’ve made your global adjustments, you can create a new layer and select the brush tool. Then you can set the sliders that you want to use for a specific area of the photo and use the brush tool to apply it where you want. You can even set the sliders for a layer and then use the brush tool to erase out the sections that you don’t want (just the opposite of brushing the effects where you want them).
In some cases you may want to use a brush to blur the sky or water in a photo. Or you could use a brush to add some clarity or intensity to rocks or other objects. There are all kinds of possibilities, and Aurora HDR 2017 gives you plenty of control.
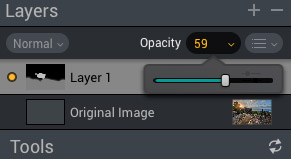
Opacity
Another nice feature is the control over opacity. Say you want to use a preset on a photo, but the effect created by the preset is a bit stronger than you want. You don’t need to dial back each slider individually. You can simply lower the opacity to reduce the strength of the effect.
You can also control the opacity of layers that you create. So if you use the brush tool to add some texture to part of the photo and then you decide it is too strong, just reduce the opacity of the layer.
Room for Improvement
Although I’ve really enjoyed using Aurora HDR 2017, there are a few additions that I would like to see in future versions.
Lens Correction
I often shoot with a wide angle lens, and Lightroom’s lens profile correction comes in very handy. A simple click of the mouse corrects a little distortion and vignetting. I really miss this when using Aurora HDR. Thankfully, since Aurora HDR works as a Lightroom plugin I can use the lens profile correction in Lightroom before exporting photos to Aurora HDR.
Brush Presets
First, I would like to see the option to use presets with the brush tool. You can apply a preset to your photo and then use the brush tool for local adjustments, but there is no option to save or re-use a separate preset for the brush tool. I was using the software to work with some photos from rocky coastline in Rhode Island and Maine. I found myself using the brush tool on the rocks in many photos and I would have loved to be able to save a preset that I could use over and over for those photos.
Folders for Presets
When you save a preset of your own it will be added to the custom user presets folder. Unfortunately, there doesn’t seem to be an easy way to organize your presets with different folders. If you’re creating a lot of presets it would be easier to manage them if you could create folders for similar types of presets.
Selector for the HSL Sliders
HSL sliders give you a great deal of control over the colors in your photos. Lightroom has a tool that allows you to click and drag on your photo to adjust the right color sliders of the area in the photo that you are selecting. For example, if you want to boost the saturation of colors in a sunset you can click on the colored sky and drag the mouse, and Lightroom will automatically adjust the right sliders. That is a useful tool that I would like to see in Aurora HDR.
Conclusion
My overall opinion is that Aurora HDR 2017 is a great program and I definitely plan to use it going forward. I still plan to use Lightroom for the majority of my work, but when a situation calls for HDR I will be looking to Aurora first before trying Lightroom’s HDR merge. I definitely recommend Aurora HDR 2017 to anyone who is looking for a great program to process HDR photos.
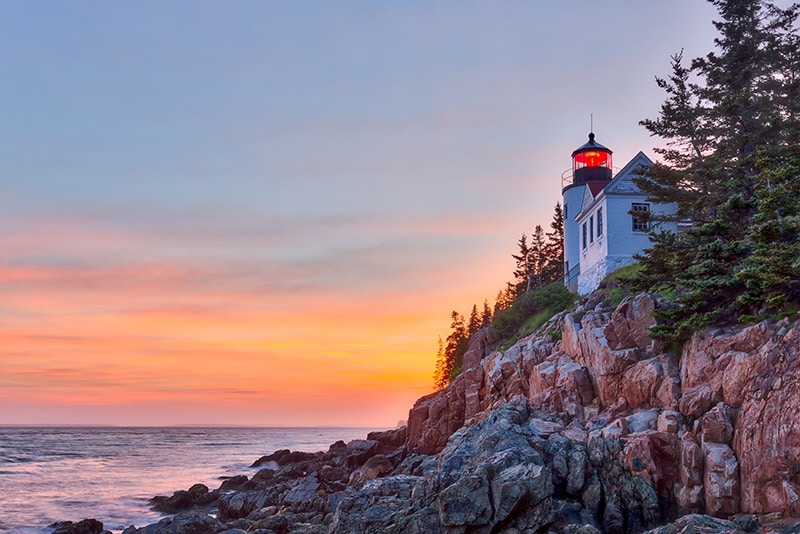
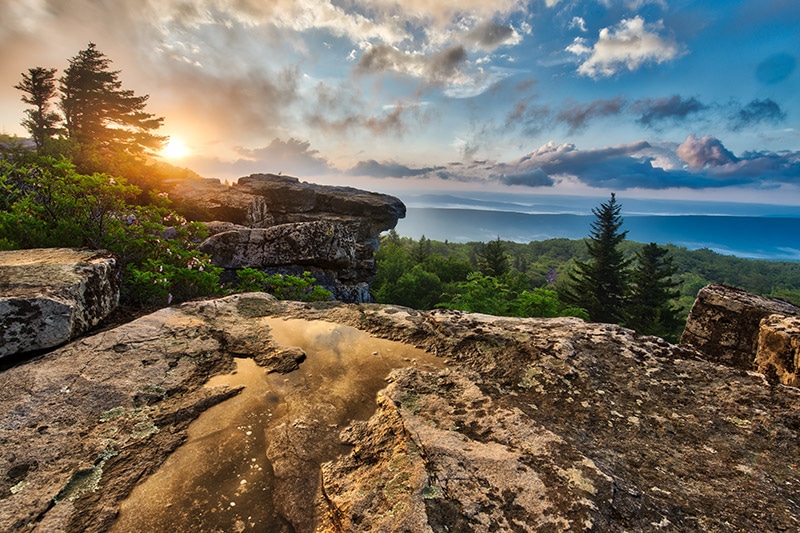
Below are a few example photos of my end results with Aurora HDR 2017.


This post includes affiliate links. If you purchase Aurora HDR 2017 through our affiliate link we will make a commission on the sale, although it does not impact the price you pay.