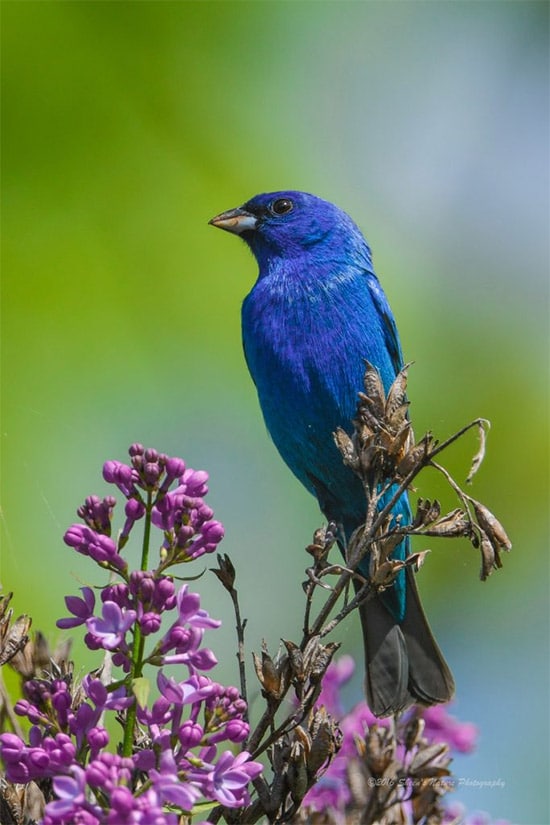
Indigo Bunting by Sheen Watkins
Migration season is here in the Northern Hemisphere. For bird photographers, one could argue that the song “It’s the Most Wonderful Time of Year” could apply to birding migration season. Breeding plumage is in full color. Birds strut their stuff for a breeding mate. Various species can be seen on the migratory flyway passing through to their nesting site. Photographers experience amazing moments with these diverse little and large subjects.
What makes a good bird photo? Sharp eyes, clean feather details balanced with a non-distracting background. A good bird photo may be an identification image where the markings and unique features are the story. Another good photo may be the bird in context surrounded by it’s natural habitat.
Bird photography requires work to master, but you don’t have to be a master to get great shots. Patience, practice and the right tools are the foundational elements of improvement in any hobby or profession. Bird knowledge, such as habitat, behaviors and field markings also makes a difference.
→ Related reading: How and Where to Photograph Song Birds
“Look at Me” by Sheen Watkins
Patience & Practice
Yes, these two sound quite overused and boring. To elevate your bird photography game, this is crucial! When you add in the fact that this practice happens outdoors in nature with color, songs, changing seasons, it’s not boring at all.
Practice in this case implies that you spend time in a location where birds are accessible. This may be viewing wild birds in an area where they are used to seeing people. It may be a migratory hot spot, like Magee Marsh near Oregon, Ohio where birds stop to rest or nest. Photographing birds that are rescued and used in educational events is another option.
Practice is honing your focusing skills. Practice is adjusting your settings. Practice is reviewing your work, ditching what you don’t like. Practice is also reviewing your settings in post processing to better determine optimal settings for a given bird species or situation. A small bird may look better with a shallower depth of field. A large bird, such as an owl or heron may look better with a smaller depth of field so that more of the bird’s details are in focus.
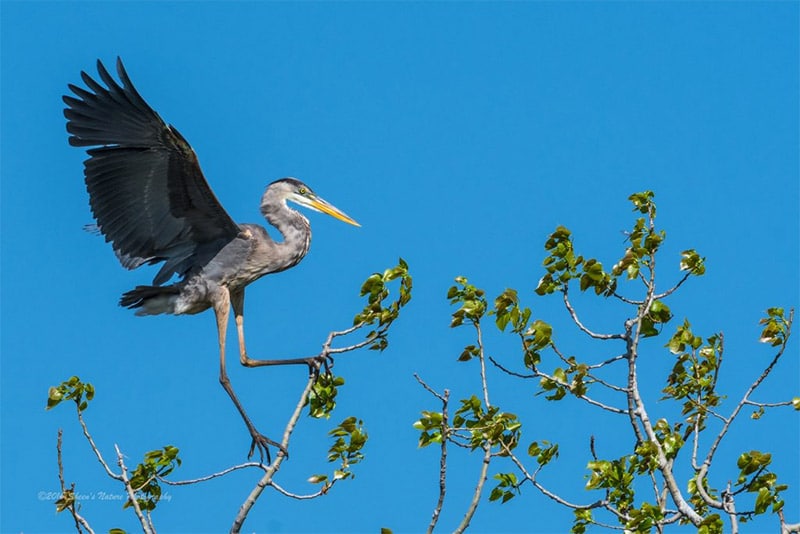
Great Blue Heron by Sheen Watkins
Patience is sticking with your subject. You have three shots and you’re done, right? Maybe, but I wouldn’t count on it. Sure, there’s been occasions where I had the one shot and nailed it. There have been more occasions where it took 10, 20, up to 100 shots of a bird to find the one that I really liked.
If I have a perched poser, I use that bird to apply multiple settings including shallow and larger depths of field. I may also do some exposure bracketing so I can blend exposures in Lightroom or Photoshop.
If I have an active bird, I try to follow the bird to get photos with various backgrounds and behaviors. Eating, birds interacting with other birds, stretching and preening images all bring viewers in a bit more than a a beautiful bird on a branch.
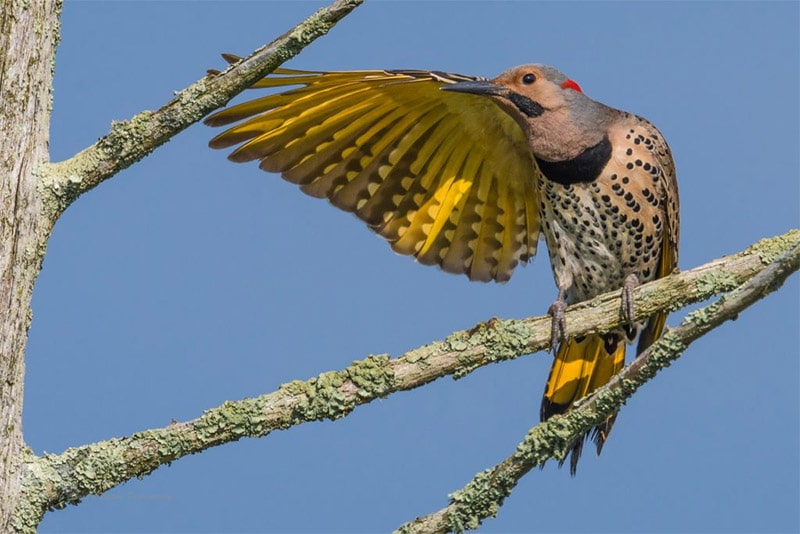
Northern Flicker by Sheen Watkins
With regard to the bird on the stick, some photographers like them, some think they are boring. It doesn’t matter! It’s what you think that counts. One of my favorite birds is the painted bunting. I’ll take a ‘bird on a stick’ any day of the week when it is a painted bunting.
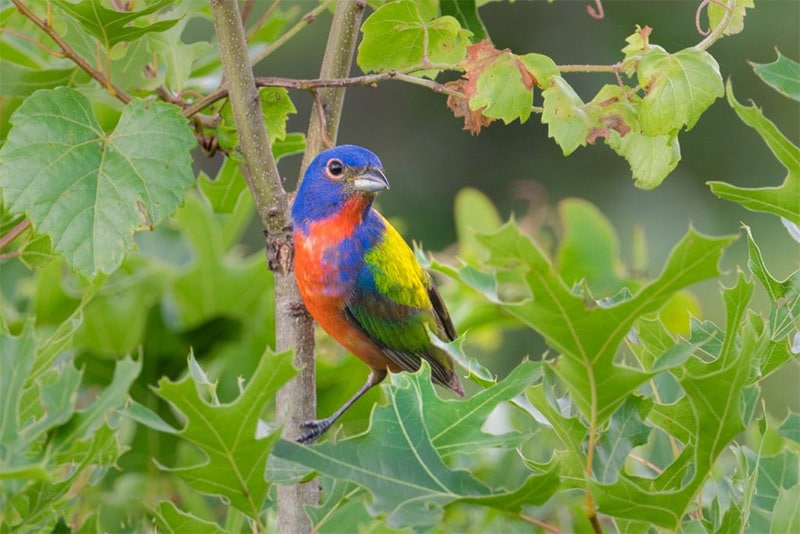
Painted Bunting by Sheen Watkins
Photography Gear & Tools
There are two primary investments – the camera and the lenses. The third is a good quality tripod as your gear expands to heavier lenses or photography subjects (landscape photography, macro photography, etc). Do you need to spend thousands of dollars on lenses, cameras, tripods? A good quality cropped sensor camera with a 70-300mm lens will get you started. Many retailers and manufacturers offer bundles with a couple of kit lenses including the 70-300mm. Prices vary from $700 – 1200 for entry to mid level camera/lens bundles.
The quality of the image is determined first by the photographer’s technique. I’ve seen images taken with less expensive lenses that are better than some with very expensive lenses. Technique will impact image quality significantly before the price tag of the lens. All things being equal, however, yes, a high-end fixed focal length prime lens will outperform kit lenses in low light settings, with image quality, etc.
When shooting birds with shorter focal length lenses that are lighter weight I shoot hand-held. With heavy lenses I use a sturdy, Manfrotto carbon fiber tripod with a tripod head by Really Right Stuff that is designed for the weight of that lens. Shooting from a tripod does slow down the process a bit and I may miss shots as a result. However, I’ve found that I retain more images from my heavier lens when shooting with a tripod or when I brace my camera with some type of extra support (arms resting on a fence, top of the car).
Birds in flight need good light, fast shutter speeds and a steady hand or a tripod head that has smooth mechanics. When photographing birds in flight, I use big apertures for more light and faster shutter speeds of 1/1000 to 1/1600 seconds.
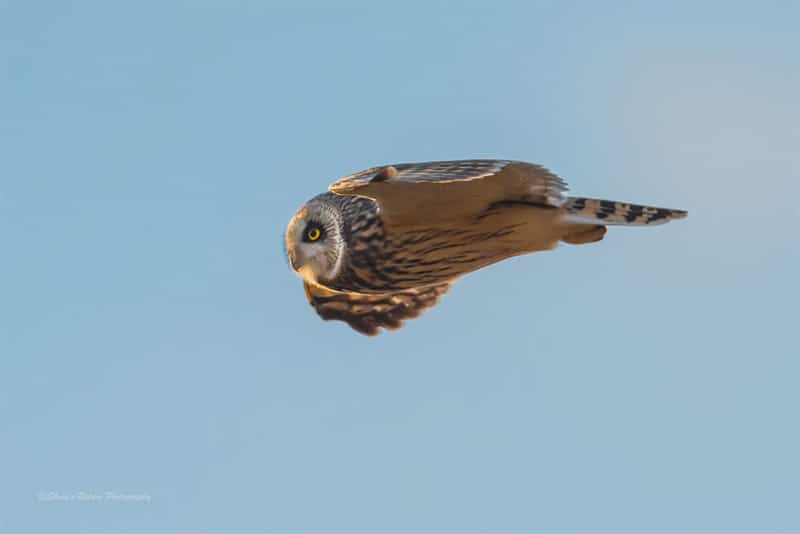
Short Eared Owl by Sheen Watkins
What about flash? As a long term birder before photographer, I appreciate and prefer birds photographed in natural light. I’ve used flash for filling the light and for illuminating the bird and have obtained well-balanced light in the images. However, I still prefer natural lighting. Post processing software can emphasize and enhance lighting and balance lighting in many images.
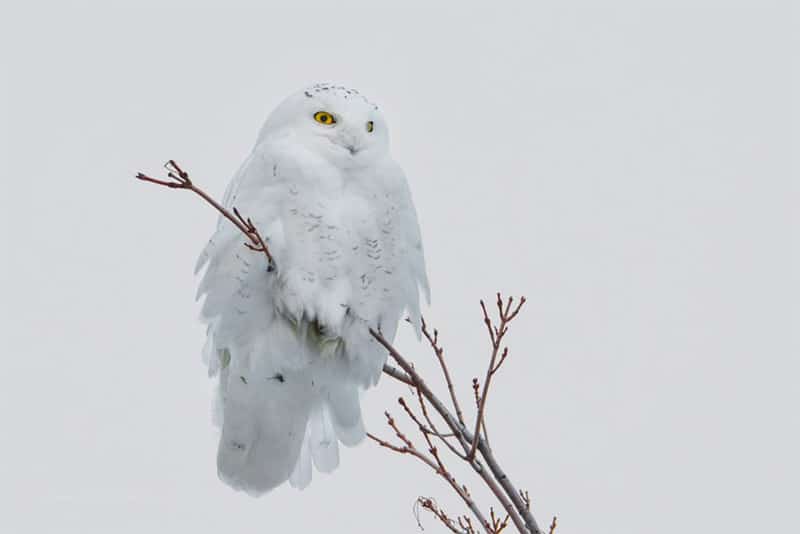
Snowy Owl by Sheen Watkins
Bird Knowledge: Tips on Getting the Shot
My entry into photography was birds. As a twenty plus year birder, I initially tried to photograph what I had been seeing in my binoculars over the years. The knowledge of birds, their habits, songs through field observation and the years of referencing field guides helps in anticipating where and when to locate them. For those new to birding and photography, here’s a few tips to help speed the learning curve:
- Have a good field guide – many are now online – to help identify birds or learn about the birds you’re wanting to photograph in your area. Field guides by the late Roger Tory Peterson, Kenn Kaufman or Audubon Bird Guide are good choices.
- Go out shooting with birders! In addition to learning bird photography, spotting the bird may be a challenge. Hook up with a birder and they’ll be more than glad to point out birds as they see them . They’ll probably be glad to impress you with their knowledge too.
- Talk to bird photographers. Social media is filled with very good bird photographers and bird photography sharing sites. Study their images. Google images by bird names to get ideas.
- Attend bird photography workshops. These workshops could be local or exotic. Workshops provide the opportunity to learn not on from the instructor but also the other students. Workshops I’ve attended and conducted always have many learning, skill enhancing learnings.
For additional reading on photographing birds and wildlife:
Spring has sprung. Flowers are blooming. Grasses are flowing. Birds are chirping. And photographers are shooting!