Photo by Jonathan Combe / CC BY 2.0
Spectacular scenery, powerful waves, jagged cliffs, and smooth, polished sand. Without a doubt, the coast is a favorite location for many photographers.
Perhaps it’s the fact that the scenery is constantly changing, or because there’s never a shortage of amazing vantage points. Or maybe it’s because sunset photography, and images of changing weather conditions reflected over the water can be exceptionally rewarding.
Despite the tremendous beauty of the ocean though, capturing the coast in all of its splendor can be difficult –not to mention frustrating. Translating what you see in-person, into a two-dimensional photograph can be a monumental task.
The challenge is finding a way to convey some of that spectacular beauty that we appreciate firsthand, in a photo. While this is easier said than done, with practice –and some basic guidelines, it is possible to create some truly amazing images of the ocean. Here are a few tips to get you started.
→ Related reading: Essential Seascape Photography Tips
Equipment
While the best equipment for the job is the gear you have with you, some basic equipment can help you to give your images a professional and polished touch.
Lenses
Your lens of choice will depend on what type of photography that you plan to do, but most seascape shots call for a wide-angle lens, ideally something in the range of a 16mm to 35mm focal length. While less ideal for landscapes, a telephoto lens can come in handy for images that call for compression and are great for birds or other wildlife. They can also be useful for close-ups.
Lens Hood
A lens hood helps to shield out glare and sun flare. It also offers some protection from the sea spray.
Neutral Density (ND) Filter
An ND filter is an important tool for coastal photography. Like sunglasses for your camera, an ND filter allows you to capture images with a slow shutter speed, even in bright sunlight.
Polarizing Filer
Polarizing filters create richer, more vibrant colors. They also cut down on reflections, and can help to reduce glare on the surface of the water and rocks, making them useful for seeing through shallow water, or capturing life in rock pools.
Tripod
Many compositions can benefit from a slow shutter speed, and you’ll want a tripod to minimize camera shake.
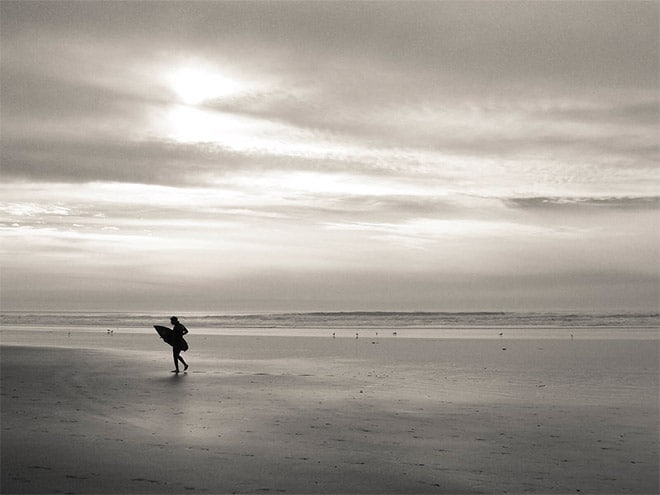
Photo by Dawn Endico / CC BY-SA 2.0
If you’ve ever been to the beach, then you probably know that the elements there are a camera’s worst enemy! Sand, water, and sun can all cause damage to your camera and equipment. To help keep your gear safe, store everything in your camera bag and only take out what you need. Never put anything except your tripod down in the sand. Try to avoid changing lenses on the beach, and of course, be sure to clean all of your equipment when you get back.
Before You Go
Planning ahead can often mean the difference between capturing some amazing shots, and missing out. This is especially the case with coastal photography, where rapidly changing light and weather conditions can drastically alter the resulting images.
Look up the sunrise or sunset time, and plan to get there early if you hope to capture one of these events. Also, take a few minutes to check the tide tables. The scenery often looks vastly different at high tide than it does when the tide’s low.
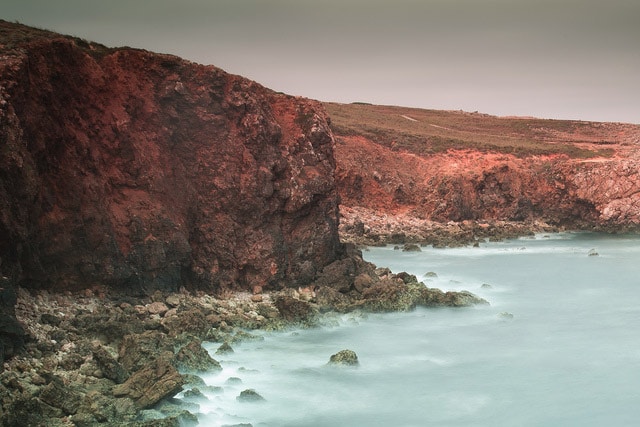
Photo by Paulo Valdivieso / CC BY-SA 2.0
Checking the weather forecast will give you an idea of what to expect, and will help you to bring the right gear. Keep in mind though, that with coastal photography there’s really no such thing as ‘bad weather’. Clear days can make for beautiful shots, but the spectacular lighting before and after a storm can result in some dramatic and powerful images.
Camera Settings for Ocean Photography
For most landscape photography, you’re going to want most of the image to be in focus. If you’re using a manual or semi-auto mode, this means choosing a small aperture, something like f/11. If your images are too dark, you’ll want to up the shutter speed.
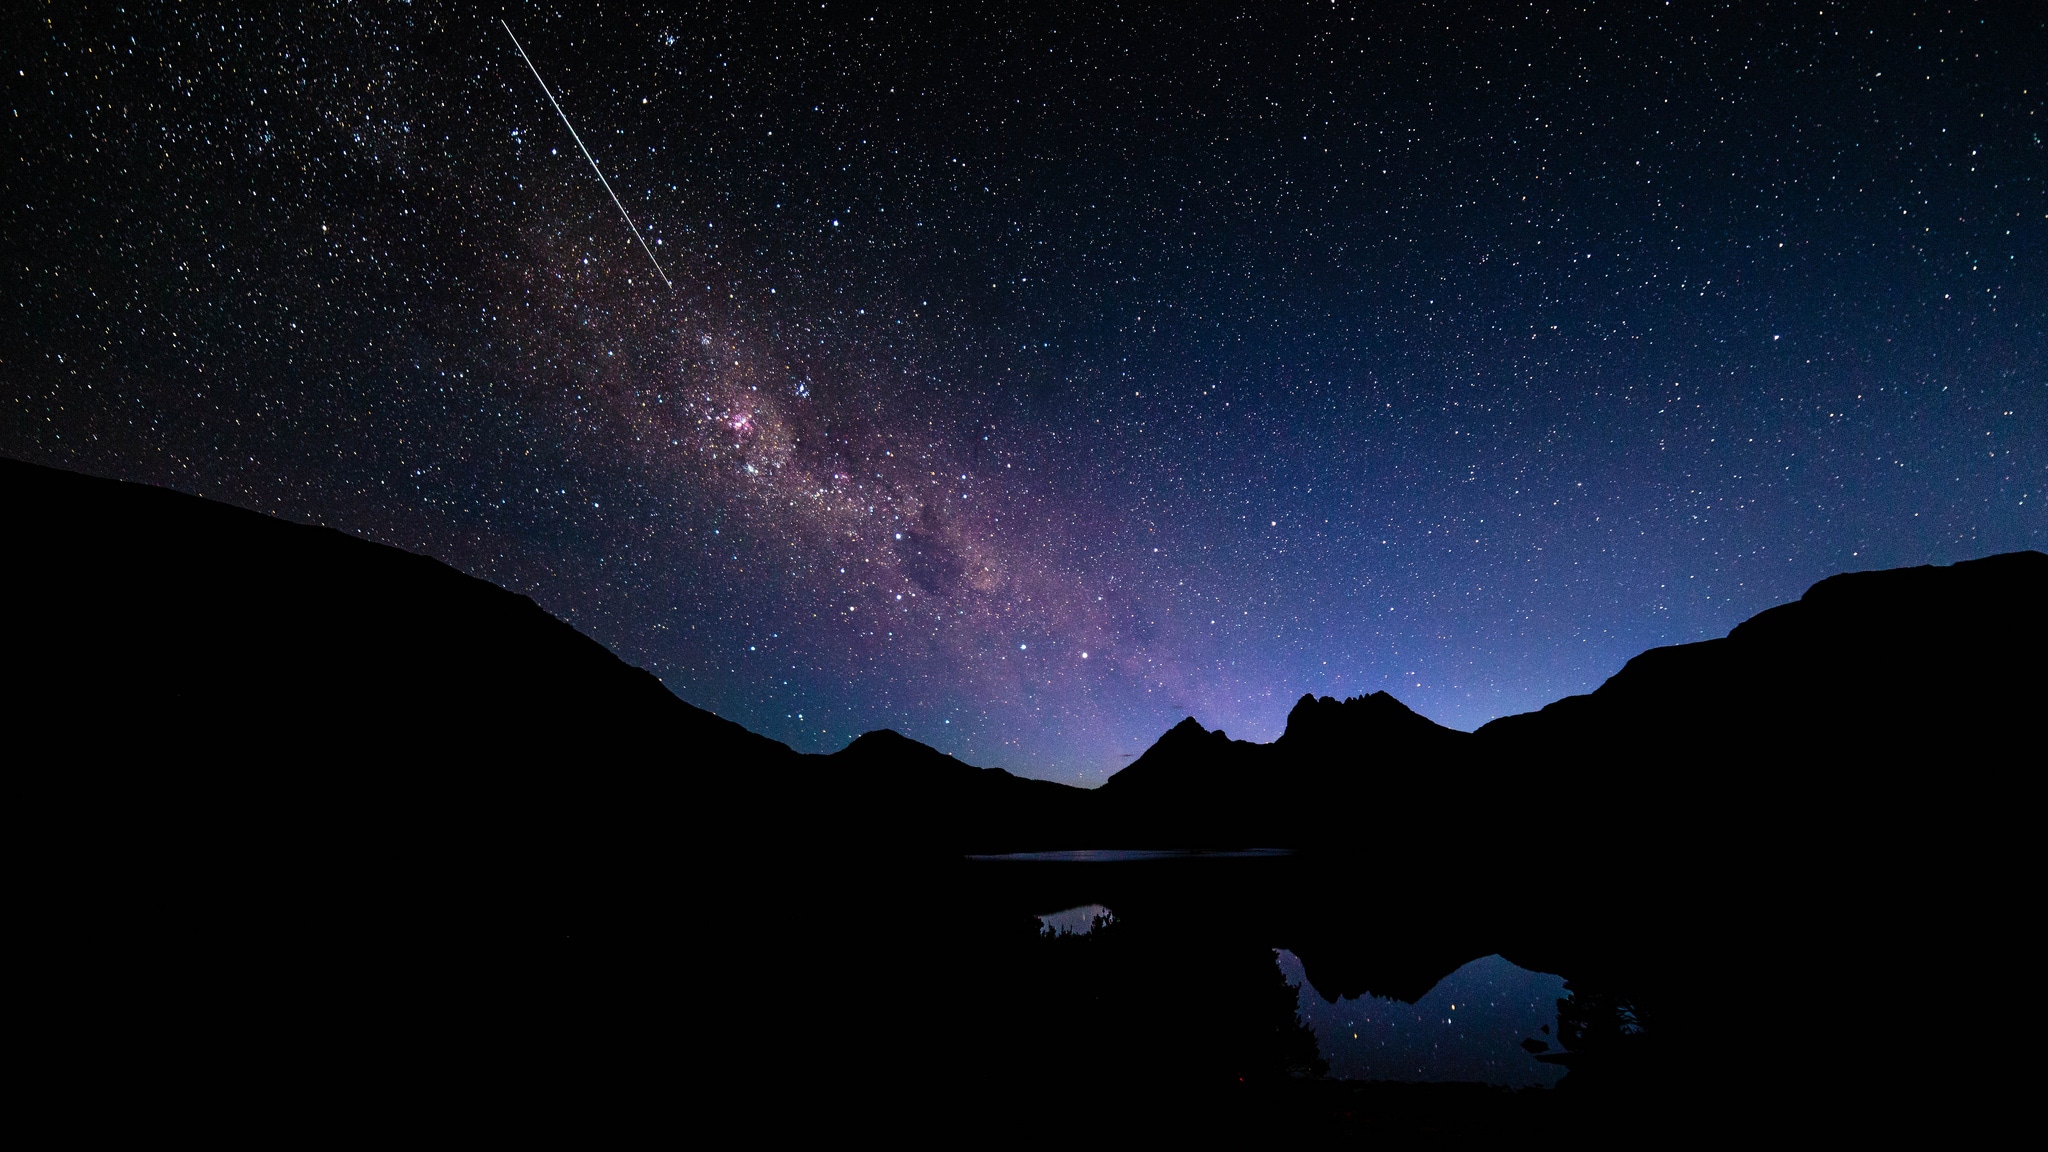
While a fast shutter speed is useful for ‘freezing’ the scene at hand, for capturing soft, blurred water and streaky clouds, you’ll need a long exposure. Slow your shutter speed down, and use a tripod to steady the camera. Set the timer, or use a remote release to prevent the camera from being jostled when you release the shutter. Ocean photography often requires a very slow shutter speed –depending on how close you are the ocean, and how rough the water is. Usually, something between 5 and 30 seconds is ideal for distant ocean photography. With closer shots or for less blur you can use a faster speed –usually somewhere around 1/2 to 1/8 of a second.
As with most landscape photography, try to keep the ISO low to prevent image grain. In low light conditions, opt for long exposures rather than a high ISO for the best results.
→ Related reading: Guide to Long Exposure Landscape Photography
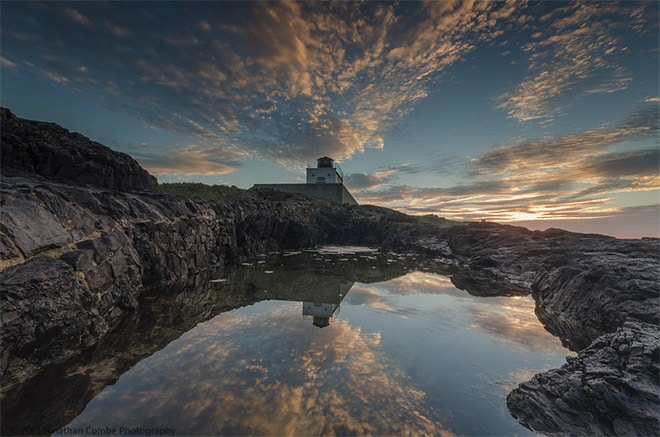
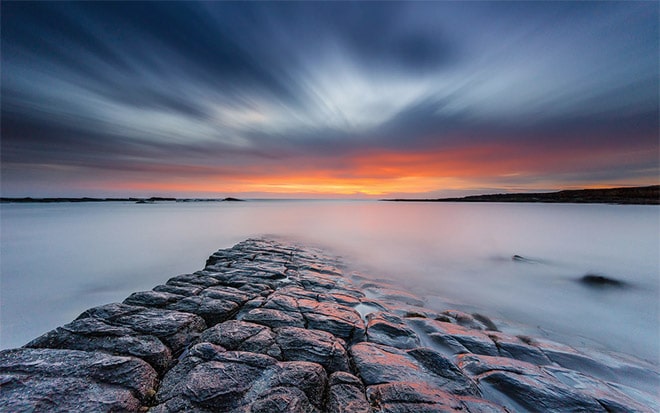
Photo by Jonathan Combe / CC BY 2.0
Compositional Tips for Ocean Photography
Composition is arguably one of the most important aspects of photography –especially when it comes to ocean photography, and recreating the scene at hand!
1. Look for a Focal Point
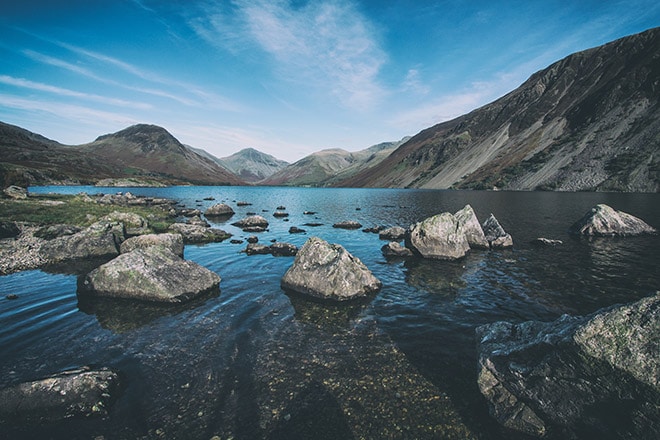
A strong focal point is important for any composition. The focal point helps to anchor an image, and grab the viewer’s attention. Your point of interest could be anything from a rock or a piece of driftwood, to a wave, some texture in the sand, or even a person. With practice, you’ll soon be adept at spotting great focal points.
2. Include Foreground Interest
Without foreground interest, images of the ocean tend to look flat and two-dimensional. They often feature the sky and sea –but offer little else to break the image up. Some interesting foreground can help to set the context, and draw the viewer into the photo.
3. Find a Reflection
Whether it’s a sunset reflected on the sea or some clouds mirrored in a rock pool, reflections can help to add depth and interest to your images. Remember, a polarizing filter can eliminate reflections, so be sure to take it off when capturing a reflection.
4. Watch for the Light
The right lighting can often make the difference between a snapshot and a truly striking image. Sunrises and sunsets are one of the most sought after times of day for coastal photography, but the Golden Hour –the hours just after sunrise and just before sunset is also ideal for photos. Images taken in this light will have a soft, golden glow. The light just after a storm is also spectacular.
5. Capture Some Detail
While it’s easy to be overwhelmingly focused on capturing the amazing sunset, or the waves crashing on the beach, there’s beauty in the details as well. Close-up images of crabs, shells, and coastal flowers can all make for wonderful images.
Finally –be ready. Coastal landscapes change dramatically during the day, so be aware of the shifting light and weather conditions, as well as the changing tides. Often, a few minutes can completely alter the overall mood and setting –and you’ll want to be ready to capture the scene as it changes.
Do you enjoy ocean photography? Share your tips with us in the comments!
Photo license links: CC BY 2.0, CC BY-SA 2.0


wow, amazing pictures and beautiful details about your idea.