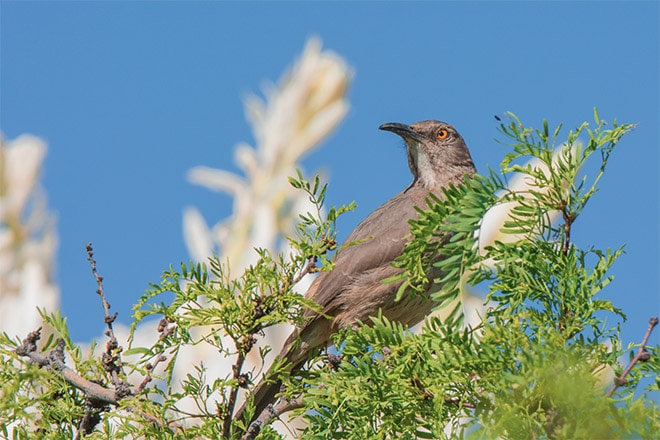
Photo by Sheen’s Nature Photography – Curved Billed Thrasher, Big Bend, Texas using Tamron 150-600mm
Spring fever surrounds us with changing colors, perennial flowers and cheerful songbirds and smaller birds. Magazines, books that share tips on how to bring birds to gardens sell in droves. This is particularly true in the spring as gardeners, birders and nature enthusiasts work to attract birds, bees and butterflies to their back yards. Bird photography also extends well beyond our backyards as the majority of bird species don’t go to bird feeders.
In order to get good photographs, we need three key elements. 1) the right gear 2) understanding how to create good composition along with effective use of the camera’s settings and 3) how and where to find birds.
→ Related reading: 7 Ideas for Spring Photography Projects
1. Gear Considerations
In order to photograph songbirds, a telephoto is highly recommended. If you’re just getting started, a zoom telephoto of 70-300mm, 70-200mm (add a teleconverter of 1.4, 1.7 to get more of the bird in the frame, be sure to investigate teleconverter compatibility with your lens in advance!) work well hand held. Images throughout this article will show birds taken with multiple lenses.
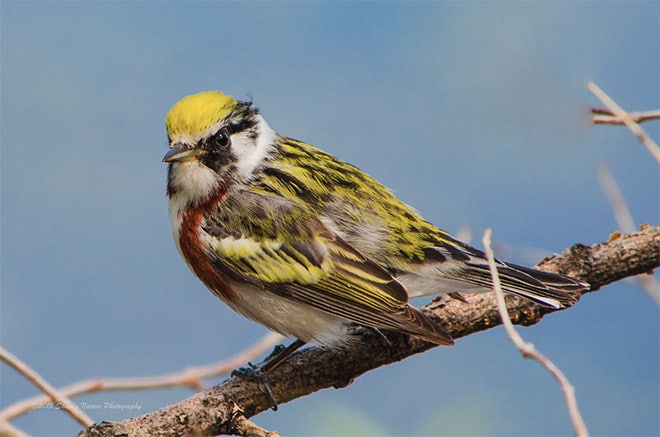
Photo by Sheen’s Nature Photography – Nikon 70-300mm, f/8, 1/320 sec, ISO 250, handheld
The longer the lens the better but they are also heavier. Depending on individual strength, steadiness, longer lenses may require the use of a tripod to get clear images. There are longer zoom telephoto lenses such as the Tamron 150-600 and Sigma’s 150-600 that are excellent price performers, producing high quality images with relatively light weight. I’ve used both brands hand held and with a tripod.
Camera manufacturers such as Canon, Nikon, Sony produce outstanding long lens telephotos and primes. See our Reviews of the Best Telephoto Lenses for Canon and Reviews of the Best Telephoto Lenses for Nikon.
2. Basic Composition and Setting Tips
“It’s better to be lucky than good” is not a phrase that applies to songbird photography. It’s a combination of a practice, taking a lot of photographs and yes, a little bit of luck to get a bird that poses for more than one or two seconds. Since songbirds swoop in and out fast, knowing your gear, the best settings for your lenses in multiple conditions (bright, medium and low light) contribute greatly in getting great photographs.
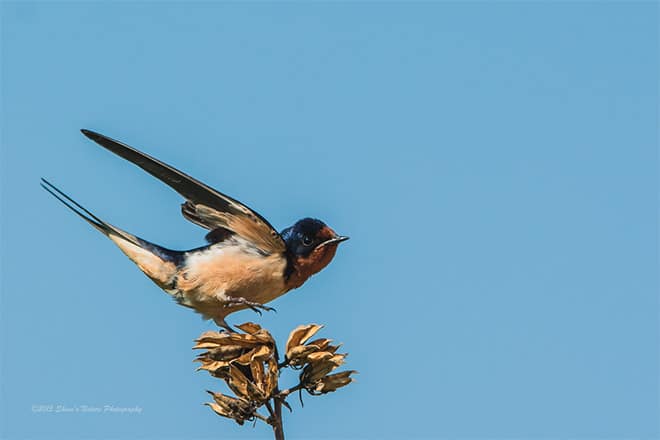
By Sheen’s Nature Photography – Sigma 150-500mm, ISO 250, f/7.1, 1/250 sec, tripod used
→ Related reading: Bird Photography: How to “Get the Shot”
A. Settings:
Know your lens – For example, my Nikon 70-300mm works best in medium to brighter light. The best detail is typically at an aperture setting of f/8 or f/7.1 with an ISO of 250-400. I prefer controlling depth of field so I shoot in Aperture Priority 90% of the time. A shallow depth of field (bigger aperture, lower f/stop number) increases the shutter speed, impacts the amount in focus and image sharpness.
The Tamron 150-600mm varies greatly depending on conditions. With small songbirds, it’s an aperture setting of f/5.6 to f/7.1. Larger birds, such as herons, cranes an aperture of f/8, f/9 and even f/11 works better to get more of the bird in focus. I’ve used a shallower depth of field (small f/stop number) on larger birds based on lighting and desired composition. Knowing your settings and how images will look takes practice and more practice! The good news is that during practice, you’re going to get some great photographs so it’s never a waste of time.
Shutter speed & ISO – Shutter speed should be the equivalent of the focal length of the lens to get cleaner shots. In aperture priority the shutter speed is controlled by the camera. The bigger the aperture (small f/stop number) the faster the shutter speed. Shutter speed can also be increased by elevating the ISO and/or adjusting the exposure compensation down. Note: The use of a tripod provides a bit more flexibility with being able to use a slower shutter speed as the camera is more stabilized.
→ Related reading: How to Create Beautiful Bokeh in Nature Photography
B. Composition
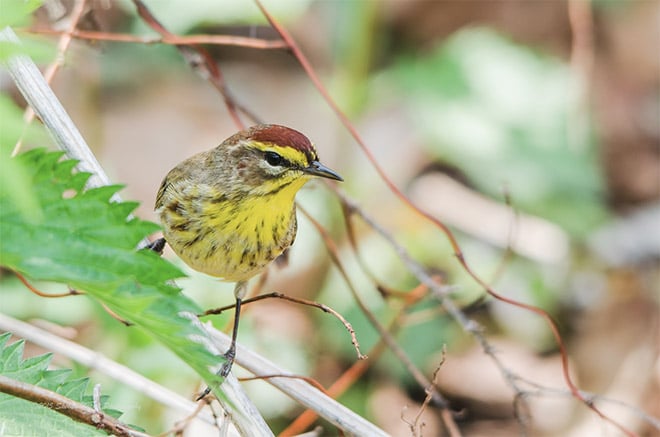
Focus in on the eye – Single point focus with the focus point on the eye. This is the fastest and most effective way to get the eye sharp. When the eye appears soft, so does the rest of the photograph. There are times that a soft eye can be used to your advantage to communicate what’s happening such as cold, snowy weather.
Perspective – We see birds at feeders, trees, on the ground, swimming, in the water and in flight. A photograph of a bird-belly shot up high in the tree or telephone wire or looking down on a bird on the ground may look nice and sharp. However, it isn’t going to show as well as a photo that shows their details, unique features, expressions. A straight on, close view perspective is more captivating.
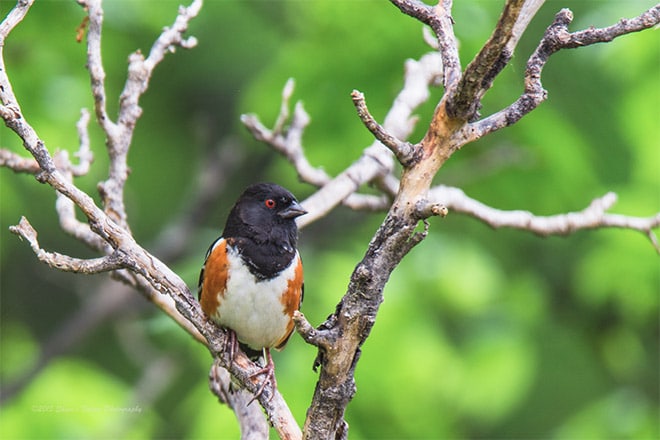
By Sheen’s Nature Photography – Western/Spotted Towhee, Austin, Texas Tamron 150-600mm, f/6.3 1/200 sec with tripod
Surroundings – Spring songbird photography brings colorful, vibrant photography opportunities. If one of your favorite birds is in a colorful tree, stay with it and take advantage of the moment. Birds dart in and out as they are curious little creatures. Watching their movements will help anticipate where they may be next, be ready!
Some backgrounds can be distracting as well. Scraggly branches, too much depth of field with a lot going on in the background can take away from the image. It’s up to you as the photographer and the viewer to determine whether or not the photograph works. The pine warbler photograph below is an example of bird in focus with a lot of vine, foliage and scrag. However, this is this bird’s native environment.
By Sheen’s Nature Photography – Sigma 150-500, f/7.1, 1/250 sec
Use of space – the birds position and eye direction in the photograph helps determine where the empty or open space should be. For example if a bird is standing looking right, having the open space to the right of the bird emphasizes their pose, expression and total image.
3. How to Find Birds and Birding Hotspots
As a birder for years, understanding their habits and habitat has been valuable in locating birds. Migration season is one of the best times for songbird photography.
These tiny songbirds fly thousands of miles braving weather patterns to nest, breed, raise their young. From there, they fly south again for the long winter. The songbird’s plumage is the brightest during breeding season. Chat with bird experts, use field guides or use a birding app to learn where they eat, nest and can be sighted (nesting boxes, ground, trees, water).
Goggle birding hotspots and a geographic area and a listing of bird sighting blogs will appear. In the United States and around the globe, our planet is filled with bird photography locations. Here’s a few examples:
- North American Hotspots – US & Canada
- Experts Pick Top Birding Spots
- Birding Around the World
- Top Best Birdwatching Locations in the World
Two of my favorites are:
Before venturing off into the great birding abyss, particularly to places unknown, plan ahead so you can get accurate visibility and location information. An article that indicates a bird is found in a given area may be true. However it may only be there for two months out of the year and way up in the tall trees. If going far or abroad, finding bird or nature photography workshops and guides is safe and fun choice that will provide a higher likelihood of photographing desired birds.


Nice info!