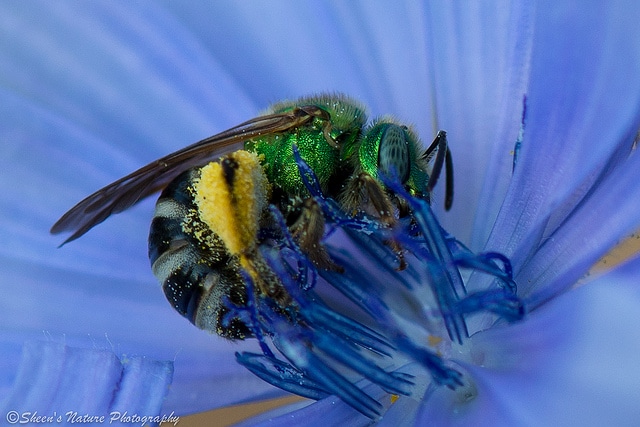
The green sweat bee shimmers against the delicate blue of the chicory flower. By Sheen’s Nature Photography – Settings: 105mm, f/6.3, 1/500 sec, ISO 250
It’s summer time which means the gardens are in full bloom with perennials and annuals. Roadsides, forests and landscapes are dotted with an array of colors while delicate fragrances hover in the early morning. Where there’s flowers, there’s bees. In North America there are 4000 different species of native bees. Our diligent, hard working bees provide crucial work in our ecosystem to many kinds of flowering plants and crops. They are also a fun and delightful subject in our summer photography.
Photographing bees requires 1) Patience & Observation, 2) Flower Surface & Pollen 3) Timing combined with effective use of 4) Tripod, Lenses and Settings.
Patience & Observation
Patience does not really sound like a skill but with bee photography it is a must. Bee’s are constantly moving. If not flying, their antennae, legs and wings are in some kind of motion. They work around the flower darting in and out of areas to gather pollen. They fly quickly from flower to flower too. Just because it lands on one flower, doesn’t mean it will stay very long.
When setting up to photograph bees, take a few moments to watch the bees and their flight patterns. Which flowers look like they have very little pollen left? Which ones have a lot? As you observe their movements, are there many bees or a few? Are they zoning in on those flowers near the ground or at eye level. By watching bees in action for five to ten minutes, you’ll be able to better predict where they’ll move fast and where they’ll hover. This also gives them time to adjust to the new element (you). When I’m watching, the camera and tripod is already set up to minimize movements when ready to start shooting.
Flower Surface/Pollen
Photograph bees on flowers that have a larger, flatter or a very open surface. Sunflowers, chicory, butterfly weed are colorful examples. Flowers with deep crevices are much more difficult as the bee disappears into the flower before exiting quickly to the next abyss.
The bumble bee on the orange butterfly weed was taken in late afternoon. These flowers were in early bloom and the bees would stay two or three seconds per flower.
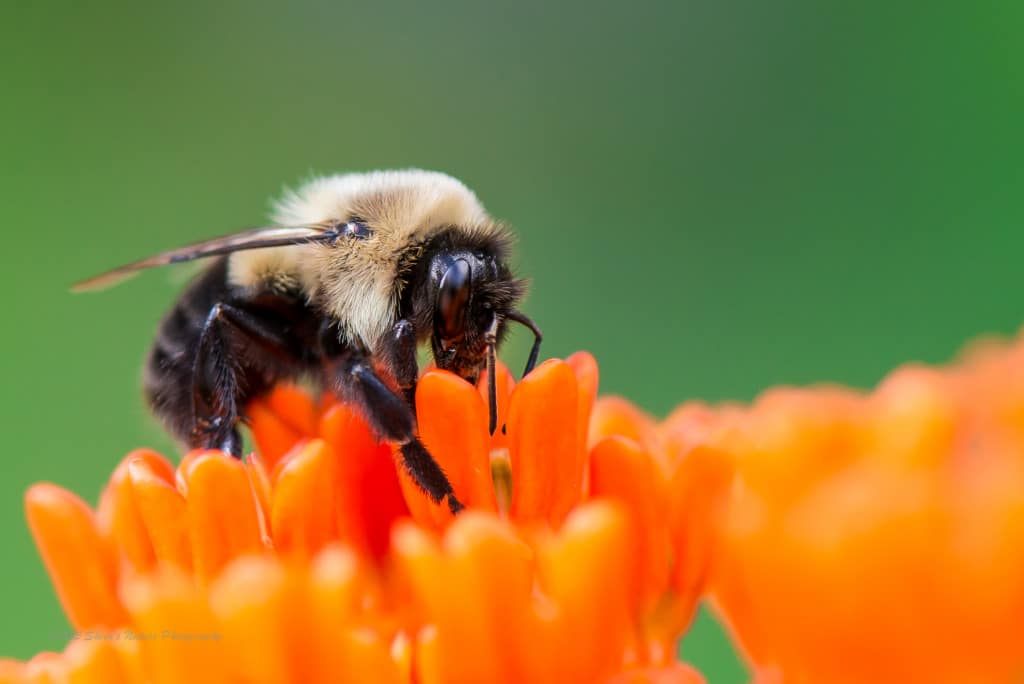
By Sheen’s Nature Photography – Settings: Nikon 105mm, f/5.6, ISO 250, 1/320 sec
Timing
In the early morning, bees, along with other insects move slower as their body temperture is cooler. As they warm up, they will move faster. From moments after sunrise till late mid morning, their pace is much much slower versus mid day and the afternoon. The brighter the light, the faster the shutter speed which helps as their pace picks up. The time of day also determines the tools and settings.
The bee wearing ‘yellow shoes’ below was taken mid morning when the sun’s light was cast across the sunflower field.
→ Related reading: Bird Photography: How to “Get the Shot”
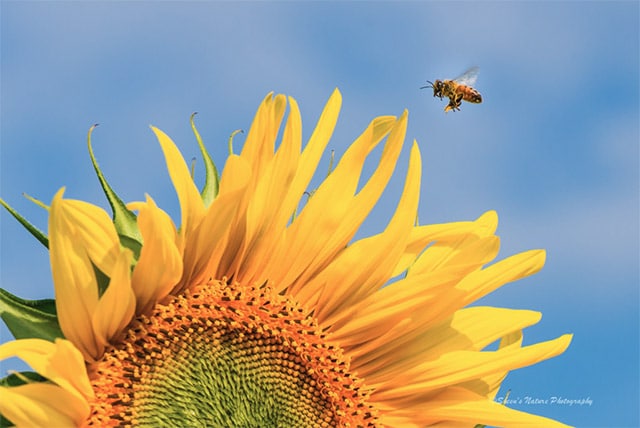
Sheen’s Nature Photography Settings: Nikon 105mm, f/7.1, ISO 250, 1/1250 sec
Tripod/No Tripod, Lenses & Settings
Tripod: When working with slow moving bees in the early morning, I use a tripod. In addition to the lower lighting and slower shutter speed, the tripod makes it easier to get my composition ‘groove’ going. By the time they are moving faster, I’m going handheld with faster shutter speeds and using my ‘composition memory’ from earlier that morning.
Lenses: A 105mm or greater distance is suggested to consistently get close enough for the detail without being too close to interrupt the bee at work. There are many photographer’s that have been able to capture nice, sharp images of bees using less than 100mm.
→ Related reading: What Lens Should You Use for Flower Photography?
Settings: Using Aperture Priority mode, big apertures (low f/stop number) and shallow depth field places the emphasis on the bee. The immediate area around the bee softens quickly into swaths of color. F/stops of f/3.5 to f/7.1 provide a lot of softening. If the surroundings further compliment the bee, step down to an f/8, even to f/11. If you have a bee that’s a poser, work quickly with multiple f/stops to have more flexibility in post processing.
The honeybee below was moving from flower to flower in a cluster of these native plants. Since the background was the lake and the flower had a green crab spider as a guest, I wanted more of the flower and spider in focus. I started with an f/6.3 and tried multiple settings, the f/8 image was my preferred image from the shoot.
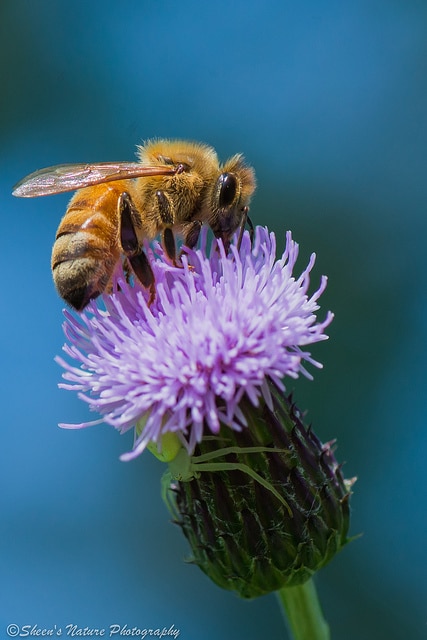
By Sheen’s Nature Photography – Settings: Nikon 105mm, f/8, ISO 250, 1/800 sec
The tips applied here also work with butterflies, dragonflies and other insects. Starting early in the day will provide diverse lighting which will lead to many photos to choose from in post processing.
Note: With all of the bees that I’ve photographed, I’ve never been stung or attacked by a bee. I keep my movements slow and deliberate. If you are dangerously allergic to bees, bee photography is not recommended unless you have attire that protects your skin. If you’re traveling, packing Benadryl is suggested in any type of nature photography just in case a sting from any insect causes an irritation or swelling. I keep a couple in my camera back just in case.


hi just to say i love your photos wish i could take pictures like that