
Photography Basics: FYI Terms and Tips
Educating yourself on the basics of photography is necessary for the improvement of your photography skills.
Regardless of whether you are a beginner in the field or a pro seeking to refresh your knowledge, you came to the right place.
In this post, you will learn the basics of photography, which include the terms you need to know and the basic tips for beginners that should never be missed out on.
After gaining knowledge from this post, make sure to share the information with your fellow photographers.
[table id=11 /]

Image Source: Canva Images
Photography Basics: Terms You Need to Understand
A strong foundation of knowledge is always the secret to upgrading your photography skills, thus this post will be a good read.
Also, you have to remember that photography cannot be easily mastered just by reading “how-to” posts; mastery will require vigorous practice. This means that to significantly improve your skills, you must practice what you have read and learned.
Before we get started on this topic, you must learn about the terms used in photography. Get a pen and notebook and take down notes so it will be easier to refresh your memory.
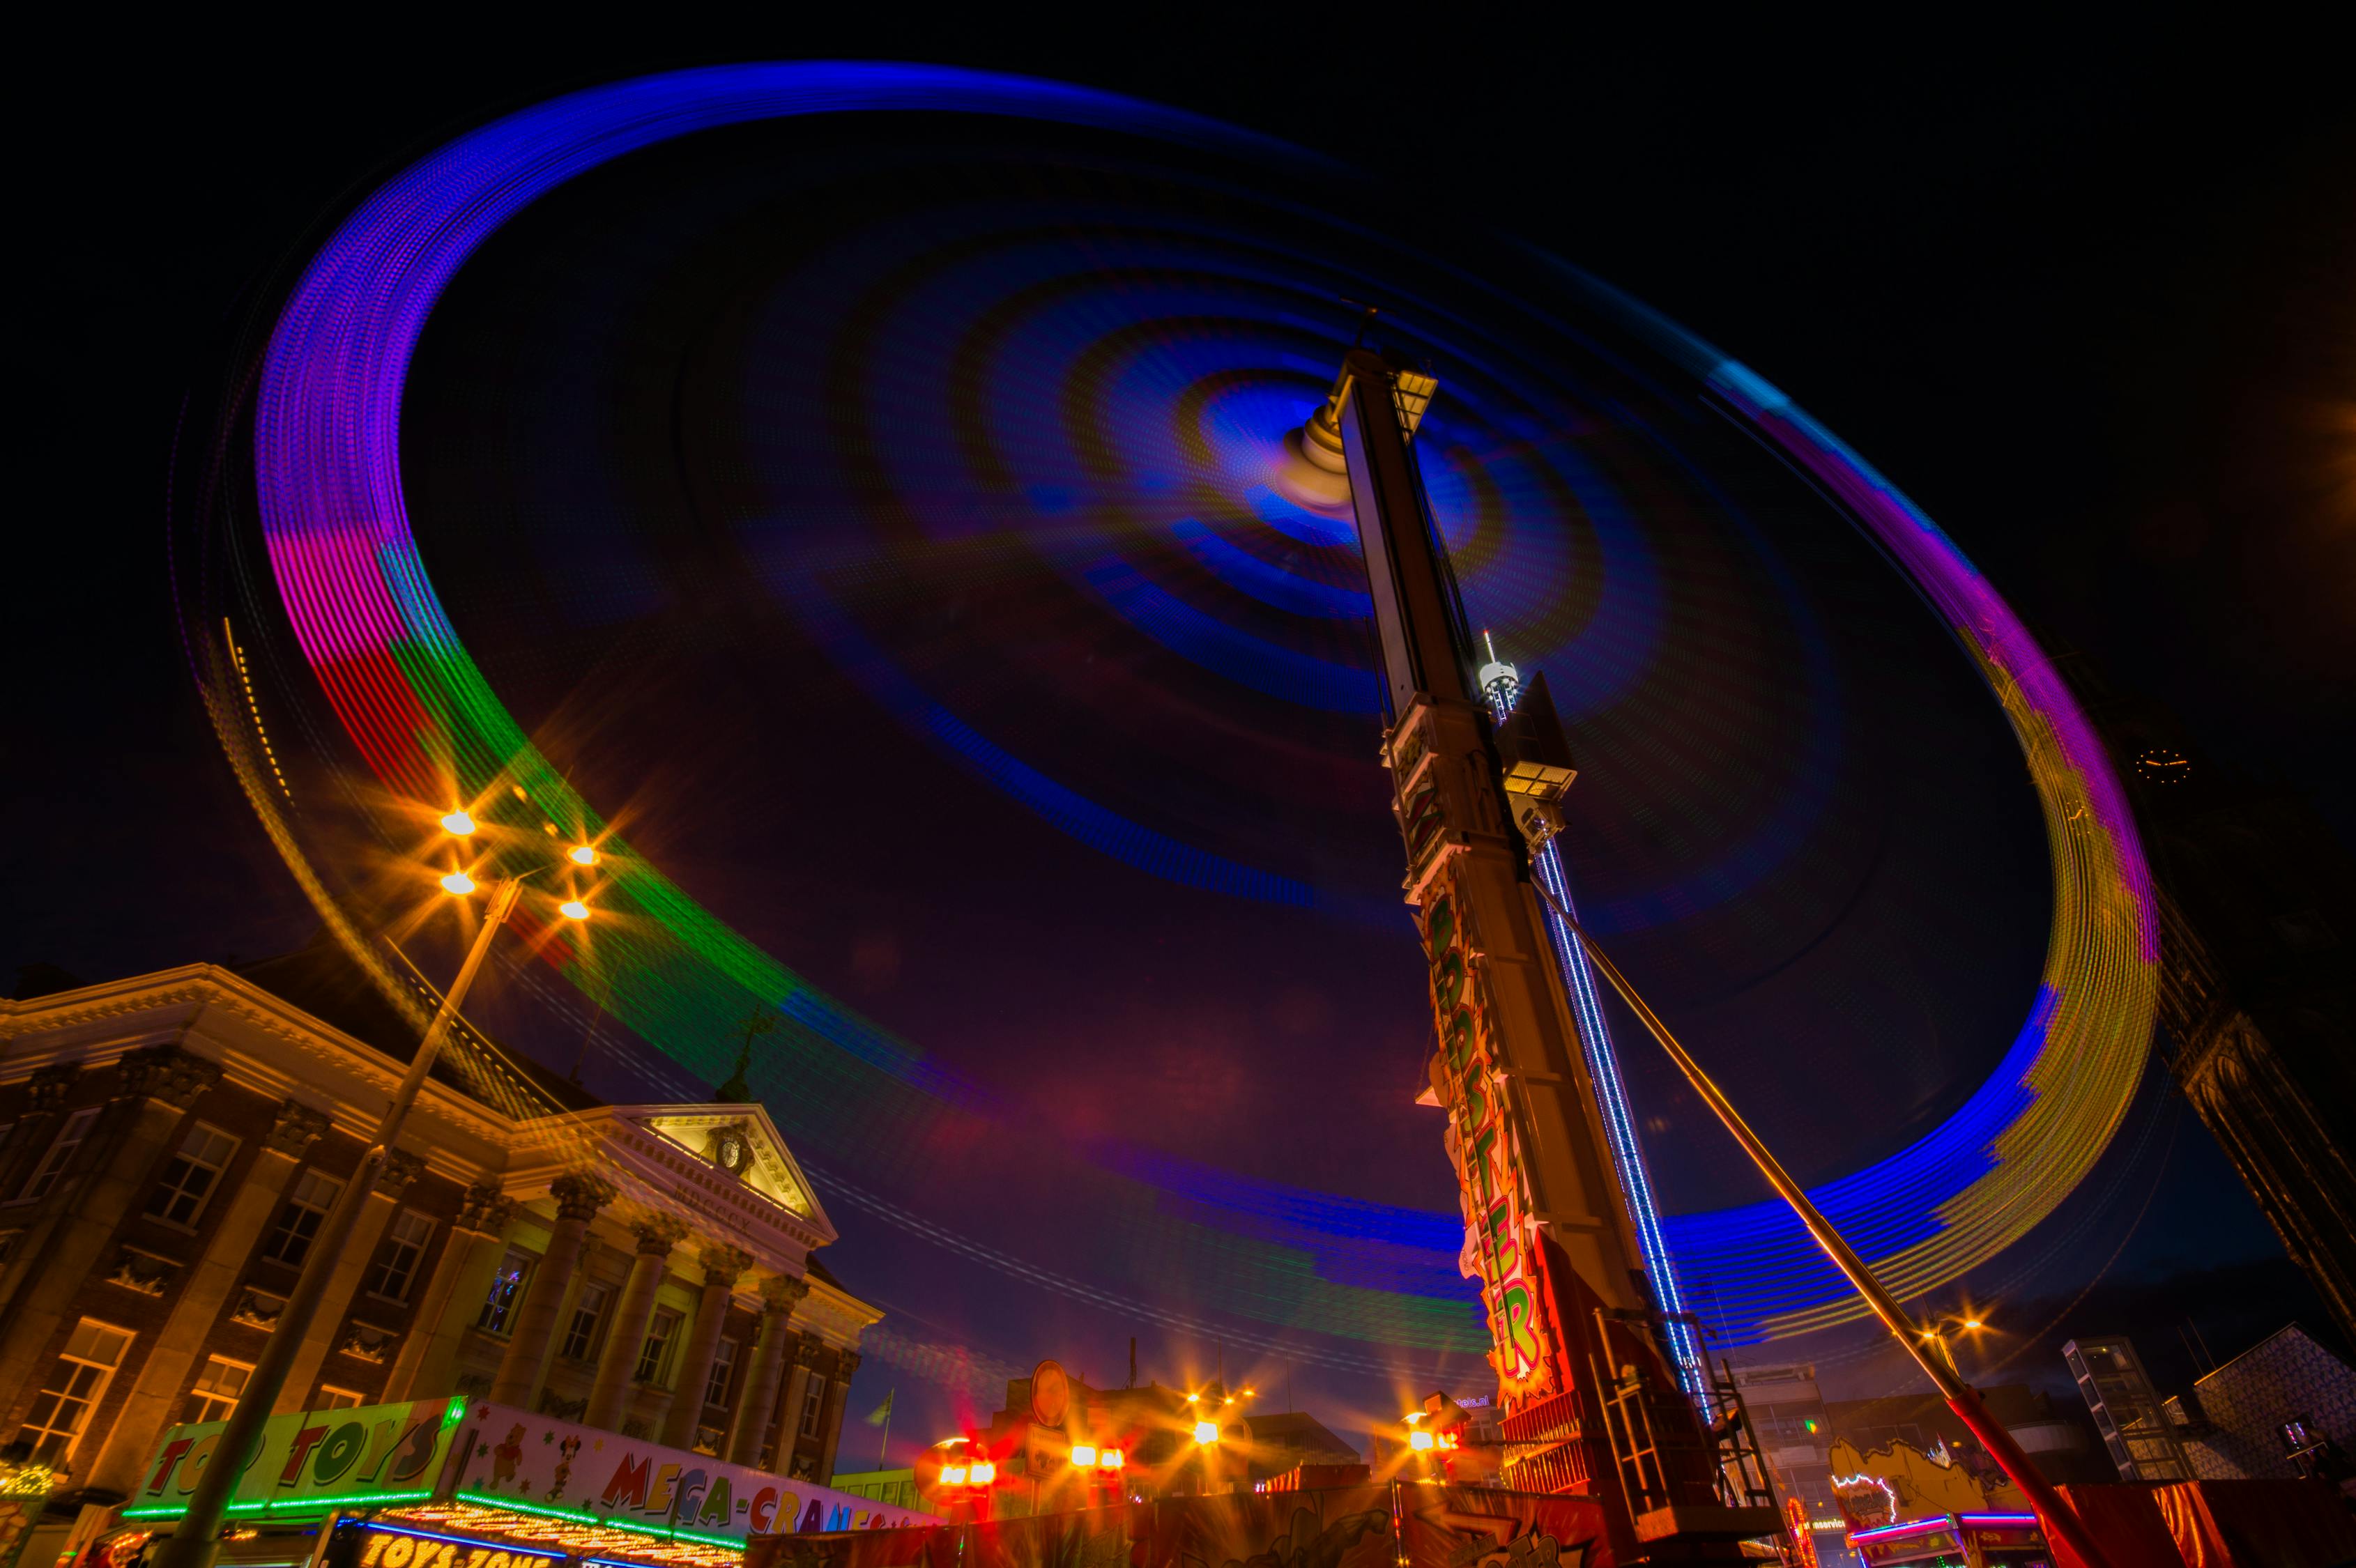
Image Source: SkitterPhoto in Pexels
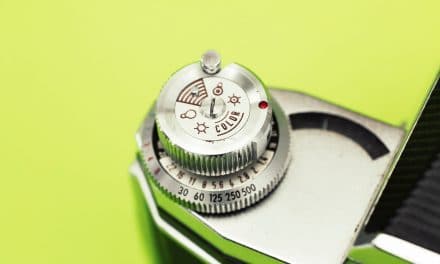
1. Shutter Speed
Shutter speed is the length of time when the shutter of the camera is open while taking a photograph. It is otherwise known as exposure time, which is the length of time when the digital sensor or film found in the inside of the camera is exposed to light.
The shutter speed is shown in measurements of seconds or a fraction of a second. You can see it in forms like 1s, 1/2s, 1/4s, and so on. When the shutter speed is faster, the shutter of the camera opens for a short time. As a result, the image sensor has a shorter exposure time to light. When the shutter speed is slower, the shutter of the camera opens for a longer time, and as a result, the image sensor is exposed to the light for a longer period.
The shutter speed is usually displayed on the camera’s top corner (in some DSLRs, it’s in the rear LCD. You can see it in a fraction measurement. Take your camera now and look for that figure. Try to half-press your camera’s shutter release while moving to a brighter area of the room. You will notice that the shutter speed will change if it’s in auto-capture mode.
2. Depth of Field
If you notice a degree of sharpness or blurriness in an image, that is what you call the depth of field. It is defined as the zone of acceptable sharpness in a photo that appears in focus. Say, for example, you are taking a picture of a frog. In front of the frog, the area of the image will appear sharp, while the background appears to be a bit blurry. That is the depth of field.
As you take a low-light photo, you need to adjust your aperture and make it wider so you will have enough light to enter the lens. However, the effect of a wider aperture is a shallow depth of field. When a photo has a shallow depth of field, the area at the back of the subject will become blurry.
A blurry background adds to the dramatic effect of portrait photography. In such cases of taking people’s portraits or in focus photography, this is the creative way of doing it. But when it comes to nature or landscape photography, a shallow depth of field won’t work. How will you appreciate nature’s beauty when some parts of the photo are blurry?
That is why it is suggested to use a narrow aperture or depth of field when it comes to landscape or nature photography. These are some of the tips you must remember on your next photo shoot. But hold on, what is an aperture?
3. Aperture
In biology class, we have experienced looking into a microscope. You were taught by your biology teacher how to adjust the lens so you can see the specimen clearly. The same thing applies to digital cameras.
The aperture is the opening of the lens of the camera’s diaphragm, which allows the light to pass through so you can capture a clear and bright image. You may have encountered terms like f-stop or seen values on your camera, such as f/1.4. f/2, f/2.8, and so on.
When it comes to apertures, here’s what you need to know. Lower f-stops allow a wider opening of your camera’s lens, thus longer exposure times because more light comes in. On the other hand, higher f-stops such as f/8 and above have smaller apertures and shorter exposure times.
While you are on a hunt for a camera, perhaps you may have noticed that lenses with a lower aperture such as f/1.8 are more expensive than those with high-ranged apertures. It’s because the lower aperture has a high-end image result, and that’s why it’s more costly.
4. F-Stop
At this point, you already have an idea of what the f-stop (focal-stop) is. As mentioned earlier, it is the opening or the “aperture” of the camera lens that allows the entry of light. It also affects and determines the sharpness and blurriness of the area in front and behind the subject of the photo (in other words, the depth of field).
Others call it focal-stop, while some call it focal length; these terms are interchangeable. Just remember that the values of the f-stop affect the aperture and depth of field of an image.
5. Exposure
Another term you often hear in the photography world is exposure. What is exposure? It is the amount of light that reaches the sensor of your camera or film. The exposure of your camera is a vital part of how dark or bright your pictures will appear.
Try to get your phone and edit an existing image. If the photo is too dark, just increase the exposure, and if the photo is too bright, decrease the exposure. That’s it! What’s on your camera phone is basically the same as your DSLR. You can also adjust a photo’s exposure during post-processing using a photo editor software.
Just remember that three camera settings affect the luminous exposure of the photo you are taking: the aperture, shutter speed, and ISO. That is why it’s important to understand these terms to ensure that you get the best of each shot.
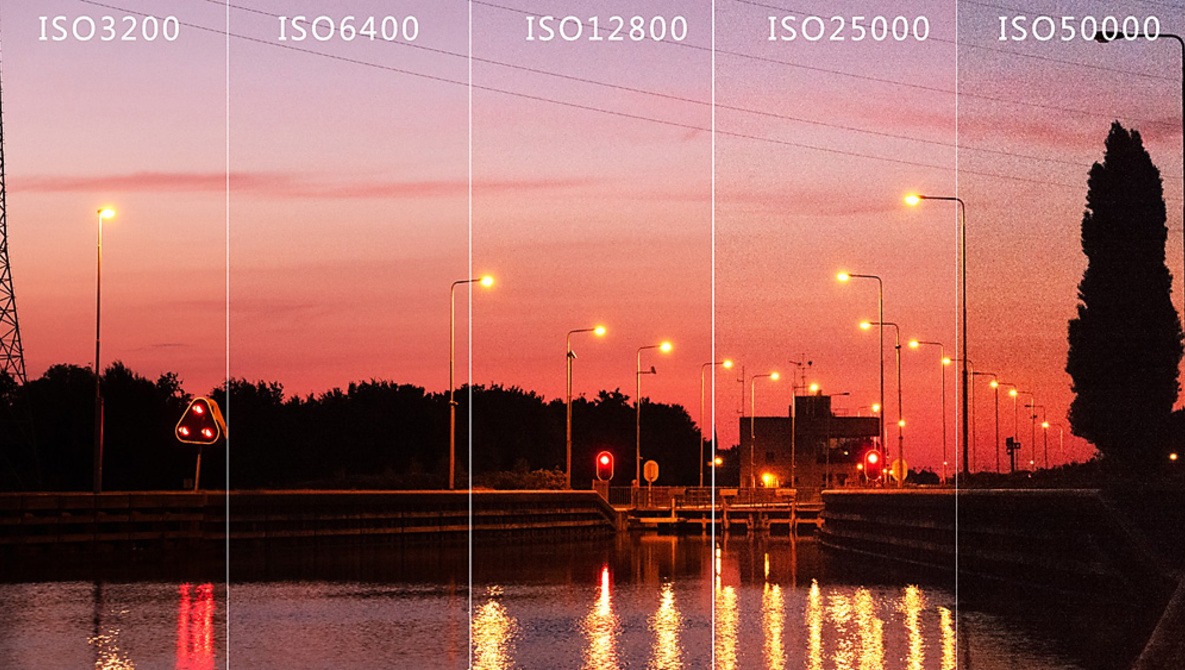
Image Source: Fstoppers
6. ISO
ISO is a measure of the camera’s sensitivity to light. It is one of the three settings that will affect the brightness and darkness of your photo. If you want your photo to look brighter, increase the ISO. Higher ISO values will be an advantage when you are shooting in dark environments or at night.
Along with increasing your camera’s ISO, you can adjust the aperture and shutter speed settings of your camera as well to ensure maximum light. A camera’s regular ISO ranges from 200 to 1600. With the digital cameras’ advancement today, it can be as low as 50 ISO and can reach up to 3 million.
7. White Balance
When you play around with your camera, you will see a setting called ‘white balance’. When you click it, you can see different settings like incandescent, fluorescent, direct sunlight, flash, cloudy, shade, and more. The white balance is the camera setting that can adjust your image’s color temperature.
The white balance is the process in which you can remove the unrealistic color cast in your photo. If you want to adjust the warmness or coolness of white light in your image, the white balance settings are the ones you use.
When shooting a RAW format, the auto white balance settings are perfectly safe to use because you can make further edits during post-processing in photo editing software. As for images taken in JPEG format, the auto white balance settings work perfectly in normal lighting conditions (that is, if you’re using a digital camera).
8. Image Sensor
Do you ever wonder how a camera can capture the light so you can view it on your camera’s LCD or monitor? That is possible through the image sensor of the camera. The image sensor is a solid-state device that is part of the camera’s hardware.
The image sensor of a camera is made up of chip pixels that are highly sensitive to light. It also contains microlens and micro-electrical components that facilitate the interpretation of light to the camera’s LCD.
Now that you’ve come this far in understanding the terms, you might be feeling overwhelmed with all the information. If you feel like you are experiencing information overload, try to relax and take a break. If you’re ready to learn more, then let’s continue with our discussion.
9. Composition
The next term you need to learn is composition. When you take a photo, you always have that goal or creative idea in mind that you want to achieve, right? To reach that goal, you arrange the elements in your photo. In essence, you are manipulating the objects in your image, that is what you call composition.
There are several photographic composition techniques you can choose from. Each of these techniques also covers several other techniques that you can use to come up with an extraordinary photo. That is why photography is an art, and you can always come up with your masterpiece because of the many combinations and compositions you can use.
Here are some of the most common compositions used (plus a short definition):
- Simplicity: When you see a photo placed in a neutral background or uses the sky as the backdrop, that is the simplicity composition method.
- Symmetrical Balance: Symmetrical balance or symmetrical photography is a composition wherein two halves of the photo have similar elements (such as the darkness and focus). The image appears to be balanced or symmetrical. This is the perfect photography composition used when taking photos of bridges, tunnels, twin towers, mirror imaging, big cathedral windows, buildings, and more.
- Asymmetrical Balance: When we talk about asymmetrical balance, there is a different visual aspect in an image. It has unequal weight, but the photo’s output still has that balance that compliments the unequal sides. If you see pictures with different compositions but still have that complimenting balance, that is an asymmetrically balanced photo.
- Radial Balance: If you see a photo with a circular shape in the center, that is a radial balance type of composition. If you’re taking photographs of a circular object with an unending subject matter, this is the perfect type of composition you would want to use. This ideal composition takes a photo of a spiral staircase, a circular plant, or an infrastructure with a circular design.
- Rule of Thirds: One of the most common photography compositions is the rule of thirds. Just imagine dividing the photo into two vertical and horizontal lines. Imagine there are nine grids with four intersection points. When you use the rule of thirds, you can place more emphasis on the photo’s subject. The rule of thirds helps in taking a balanced photo and straightening it.
- Leading Lines: If you want to draw a viewer’s eye to a particular point of interest on a subject’s photo, you can use the leading lines composition. The picture of lines appears that they lead you to a specific direction to emphasize that point of interest. This element in photography creates a powerful visual impact to create depth and symmetry. The leading lines composition looks excellent in taking pictures of roads, bridges, railroads, a straight flower garden, or the beachline.
- Golden Ratio: Another composition guide used in photography is called Golden Ratio. It is a design principle used even by artists for centuries with a ratio of 1 to 1.618. This ratio of a line segment is cut into two parts into different lengths. This composition in photography and art attracts viewers to a photograph.
- Framing: Another popular composition is the framing element of photography. This technique draws focus to the photo’s subject by blocking other image areas with a frame. Framing photography examples are such pictures taken with a subject in an open doorway, a tunnel, a hole, or through a window.
10. Metering
When we talk about metering in photography, it refers to the subject’s brightness. The camera automatically optimizes the exposure to adjust the shutter speed, aperture, and ISO settings. The exposure self-optimizes depending on the subject’s brightness, thanks to the built-in metering sensor of most cameras.
The Evaluative Metering mode of a camera will attempt to find the best lighting based on the image’s contents. However, each photographer must remember that when taking portrait photos, always emphasize the person, not its background.
11. Camera Modes
There are three categories of shooting modes you should be familiar with. These are the auto shooting mode, scene shooting mode, and exposure mode. On most of the DSLR cameras available in the market, there are exposure modes or advanced camera modes known as
- M – Manual
- AC – Aperture-Priority
- TV/S – Shutter-Priority
- P- Programmed Auto
In this way, you’ll have more control over adjusting the aperture or shutter. If you’re a beginner, what is the best way for you to master these camera modes? It’s by practicing with the manual mode to control the parameters and master the needed angles.
12. Focusing
Focusing means adjusting the lens elements to achieve the sharpest image possible. The focusing adjustment depends on the distance of the camera to the subject. There must be a certain distance from the subject to the camera’s sensor to capture a clearer image.
Mastering focus in photography is an essential element. If an image lacks sharpness, it will appear dull. Focusing on the subject gives that artistic highlight in emphasizing what you want your viewers to see in your photograph. A part of mastering the focus photography skills is knowing which part of the image highlights and which elements are less important.
13. Flash
Everybody knows what a flash is; even our camera phones now have a flash. When do we use flash? It’s used to add light to the photo when it’s dark. The camera uses an electronic flash or in-studio settings, a flashbulb.
A flash is used to illuminate a dark scene for night photography or even indoors. Suppose there is not enough lighting to illuminate the subject matter, better to use flash. Another instance where flash is used is if you want to eliminate shadows in your photo.
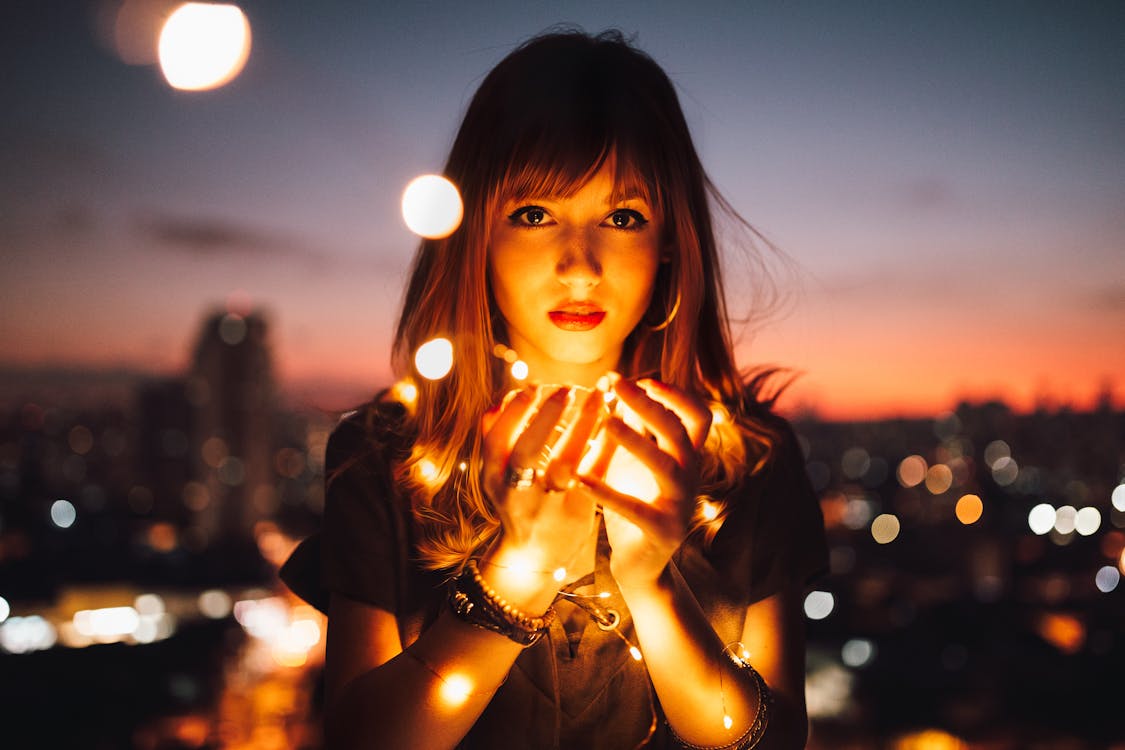
Image Source: Matheus Bertelli in Pexels
10 Photography Basic Tips for Beginners
Now that you have learned the basic terms in photography, you are now ready to read these tips for your next photoshoot. Take note of these basic photography tips and just try it. Have fun and practice with every scenery you encounter.
14. Make Use of the Camera You Have
If you’re a beginner, expensive camera gears aren’t a necessity (as of now). Although in the long run, you’re going to need an upgrade of your equipment, but as of now, just focus on mastering your skills. Make use of the camera that you have and start capturing photos.
Hone your creative skills, experiment with different compositions, and know when and where to get that breathtaking photo. You must think and act like a real photographer. Practice the skill of seeing beauty even in simple things.
When you see a butterfly collecting nectar on a flower, how will you take a photo? Will you focus on the butterfly and use the rule of thirds? What camera mode will you use? Whatever camera you have now, practice and master it.
15. How to Hold Your Camera Properly
If you think and see like a photographer, you must act like one too. This is done by holding your camera properly. You don’t see professional photographers randomly holding their cameras, right? They have a certain angle that they follow, and you should start practicing that too.
With your right hand, hold the handgrip of the camera and cradle the camera body or lens with your left hand. You must lightly prop your elbows against your torso for support. Always pivot one foot forward to keep your upper body stable. This is a much better position rather than holding a camera away from your face.
Another tip, if you want to be a photographer, you must avoid shakiness and tremors – this is important. So, you should avoid activities or drinks that contribute to your tremors or shakiness.
16. For Landscapes Use Narrow Apertures
This tip is useful for beginner photographers: use a narrow aperture for landscape photography. This will produce shots with an increased depth of field, allowing a whole scenery focus.
A small aperture with a deep depth of field is f-stops f/16 to f/22. The same concept also applies to architecture photographers. This works all the time; stick to this basic tip so you’ll appreciate your shots more.
17. For Portraits Use a Wide Aperture
Contrary to landscapes using a narrow aperture, a wide aperture is recommended for portrait shots. These include close-up photos of people or objects. You use wider apertures to capture low-light scenarios as well.
The wide aperture also allows the photographer to focus on the subject’s eyes and enables the blurring of the subject’s background. It is recommended to use a wide aperture for portraits running from f/2.8 to f/5.6. These f-stops allow you to capture a shallow depth of field, so the other elements of the photo are blurred while the subject is emphasized well.
18. Focus on the Eyes
Have you seen photos of models that stare into your soul? It’s because that portrait shot focuses on the eyes. When an image has a special focus on the eyes, it will appear more life-like, just like it’s staring into your soul.
That’s what makes a supermodel popular – staring at the camera. Also, what makes a renowned photographer sought after – the talent of capturing life through the person’s eyes. Without it, an image will look dull, and then there will be no point of focus.
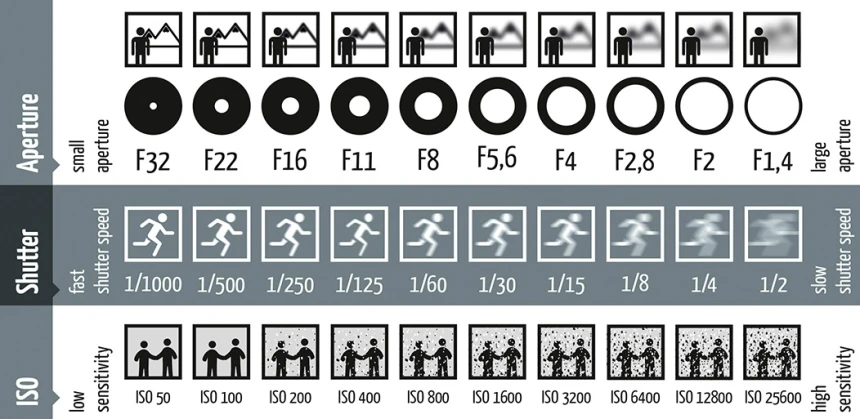
Image Source: Daniel Peters/Fotoblog Hamburg
19. How to Use Shutter Priority and Aperture Priority Mode
The three basic elements of exposure: ISO, shutter priority, and aperture priority, are the basic concepts you need to master when you’re starting in the world of photography. So how do you use shutter priority and aperture priority mode? Here’s what you need to remember.
With shutter priority mode, set the ISO and shutter time you want to work on. The camera has a built-in exposure parameter that automatically sets the aperture value on the settings you chose so that the photos will be exposed correctly.
If you’re using the shutter priority mode when shooting, you can adjust the shutter speed as you please while the camera automatically chooses the ISO value and aperture value. That is why it’s called shutter priority because you manually manipulate the shutter speed while the other settings adjust. The shutter priority mode is also known as the time value (TV).
On the other hand, aperture priority mode is the command where you can manually change the aperture value while the shutter speed and ISO automatically adjust. Remember that aperture affects the depth of field, so when you’re having issues with capturing the sharpness of an image, you may want to use the aperture priority mode so you can make necessary adjustments.
20. Play Around With the ISO
As you master the shutter and aperture priority mode, it’s time to play around with the third exposure element: the ISO. Don’t be afraid to make adjustments to your ISO even though it will look ‘too noisy or too grainy.’
Some photographers are afraid to use a higher ISO because it can lead to a lower quality of an image. While this is true, there’s always a time and place for everything. Sometimes, photos taken out of the norm create an outstanding masterpiece.
When do you raise your photo’s ISO? In cases where you can’t lower your shutter speed or there is a motion blur because you have no tripod, it’s better to take a photo with sharpness and noise by raising the ISO. That’s better than not having any photo at all, right? Anyway, you can always remove that ‘too much noise.’
As compared to old-school photography, we are lucky to be in a generation where we can produce amazing photographs, even at ISO 6,400 or higher. Each shot does not cost a dime, as compared before wherein the trial and error in photography will cost a lot of money.
If you want to minimize the noise for higher ISOs, you might want to use a wide aperture. The process involves slightly overexposing the image, so light areas of the photo appear to be dark during post-processing.
21. Master the Use of Your Flash
Yes, flashes are helpful to illuminate dark environments. But is it only useful in dark environments? Flashes have other purposes. If you think outside the box, you’re going to come up with an out-of-this-world masterpiece.
For instance, who in their right mind will use a flash in broad daylight? Only master photographers. There’s this thing called ‘filled flash’ where you can fill the ugly shadows on any area of your photo by using a gentle flash. Amazing, isn’t it?
22. Practice on the White Balance Adjustment
If you want to capture colors more accurately, you may want to practice your white balance. You must know by now that different types of lights also have different characteristics. That is why you have to master white balance in the colors of your photos. You may want to take on a slightly orange, moderate blue, green hue, or ‘temperature’.
Even though you can fix white balance during the post-editing process in photo editing software, it is best to practice RAW capturing a photo. Improving white balance during a post-processing edit will be a tedious job. There’s going to be a lot of adjustments to get it right. Why not get it right in your camera first thing?
If you want to call yourself an expert photographer in the near future, you should be able to adjust the white balance settings of your camera. You should be able to tell the difference between cloudy and fluorescent settings.
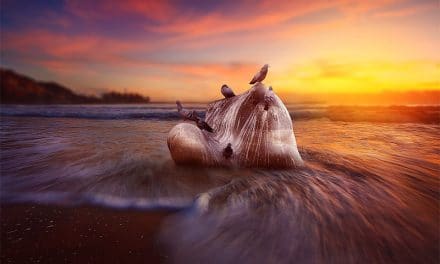
23. Invest in a Tripod
If you have mastered the nine tips mentioned above and practiced endlessly on your photoshoots, there’s one thing you know you’ll need: a tripod. At one point in your photography journey, you’ll realize that you’re going to need a tripod. This great invention addresses one of the problems in photography: the lack of light.
When you have a tripod, you can shoot in multi-minute exposures. You can even capture details in the dark that are invisible to the human eye. In brighter scenes, you can use the tripod to improve the stability of a photo. When you have shaky hands or have tremors, you can take a sharper photo with a tripod.
You use a tripod for stationary objects, landscape photography, architectural photography, still life photos, or even night photography. You can also use it when you’re trying to capture once-in-a-lifetime moments. Tripods are also used for event photography, especially when taking videos, so the output won’t keep moving.

Image Source from Kyle Loftus in Pexels
Other Basic Photography Tips
Other than the ten basic photography tips mentioned above, here are some tips you’ll find useful as well:
24. Use your camera’s histogram
Try to understand the graph featuring the light’s image distribution. If you know how the histogram works, you will understand the brightness and exposure settings.
25. Learn how to shoot from different perspectives
When taking a photo of your subject, learn how to take photos from different angles. You’d be surprised to know how the same subject looks better from different perspectives.
26. The sun is your friend
The golden hour or the sunset may sound cliché, but it’s always the perfect moment to capture. Remember that in photography, natural light is your friend.
27. Learn basic photo editing skills
At some point in your photography journey, you should learn basic photo editing skills and invest in photo editing software.
28. Go on a photoshoot with the experts
An excellent way to learn and improve your skills is to be in the company of expert photographers. Take their advice and get inspiration from them. Listen to their tips and tricks, and make them your mentor.
29. Learn from your mistakes
There is no better mentor than learning from your mistakes. Don’t get frustrated if you take bad shots, it’s part of the learning process. Don’t delete a badly taken photo; dissect it and take time to study it. Ask yourself what went wrong and how you can improve next time.
Just Have Fun!
Lastly, always practice and have fun while doing it. This is a tricky new hobby or profession, but it is guaranteed that you’re going to love photography. Take your camera everywhere, take shots of things that you see daily, capture each moment while you can, and have fun while you’re at it.


NICE POST!
THANK YOU FOR SHARING….