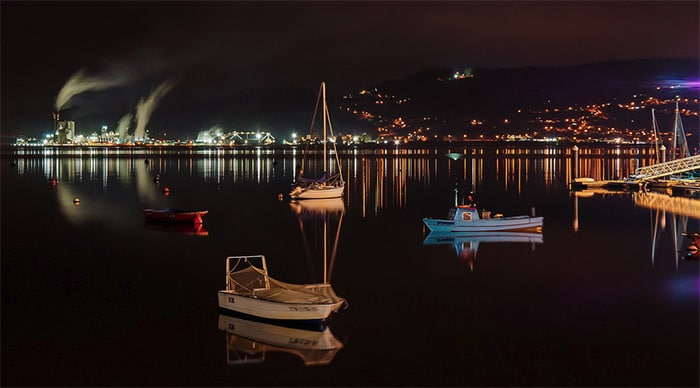
Photo by Gianluca Biondi / CC BY-SA 2.0
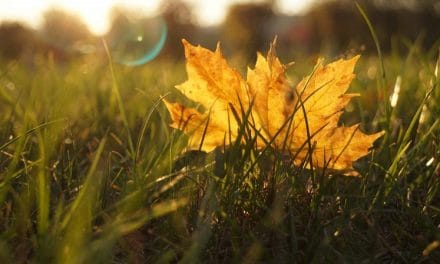
The challenge of shooting in low light and nighttime lighting conditions can be daunting. While many of the same principles apply to night photography as photographing during the day, there is definitely a learning curve before you start taking great photos at night. Let’s take a closer look at some of the fundamentals as we explore some of the possibilities of shooting landscapes at night.
Learn how to master night photography: Collier’s Guide to Night Photography in the Great Outdoors
Equipment
It’s easy to believe that the gear doesn’t make the photographer and from a creative standpoint that maxim is 100% correct; however, from a technical stand point, having the right gear can really make a difference.
Tripod – Invest as much as you can afford into getting a durable tripod that is sturdy enough to trust with staying upright while shooting in potentially rough weather and terrain. Consider purchasing a good quality tripod as in investment into keeping your camera safe.
Remote Shutter Release – This little device comes in many forms ranging from an infrared remote to cable and smartphone app. Most are fairly inexpensive and some, such as a Triggertrap, will even perform other functions. Using a remote shutter release will allow you to take a photo without the risk of your finger jostling the camera as you press the shutter release button, which can result in motion blur. Alternatively, you can use your camera’s timer as a workaround if you don’t have a remote. Simply set the self timer to expose the photo a few seconds after you manually press the button so the camera shake has time to resolve.
Camera – Having a camera that has above average low light capabilities will be beneficial. Not all cameras are created equal when speaking of low light capabilities and shooting with a camera model that has above average low light performance will be beneficial. This will allow you to shoot at higher ISO’s without having too much digital noise.
→ Related reading: Gear and Resources for Night Photography
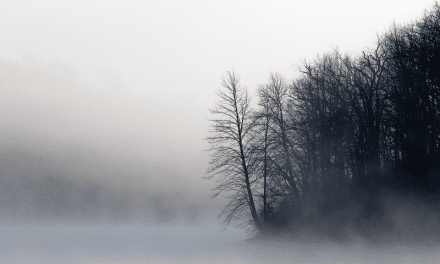
Take note if subjects will be moving in your composition. If motion blur will detract from the quality of the image, try to bring up your ISO and/or open up your aperture to allow you to shoot with a faster shutter speed. – Photo by Gabriel Gonzalez / CC BY 2.0
Getting The Shot
When setting up your composition, there are a few things to take into consideration. For example, what is the existing light like? Are there subjects that will be moving during the exposure that could create motion blur–if so, how can you use this to your advantage? These things will obviously help dictate what your exposure settings are going to be, but will also play a role in the way you set up your composition.
→ Related reading: How to Photograph the Night Sky
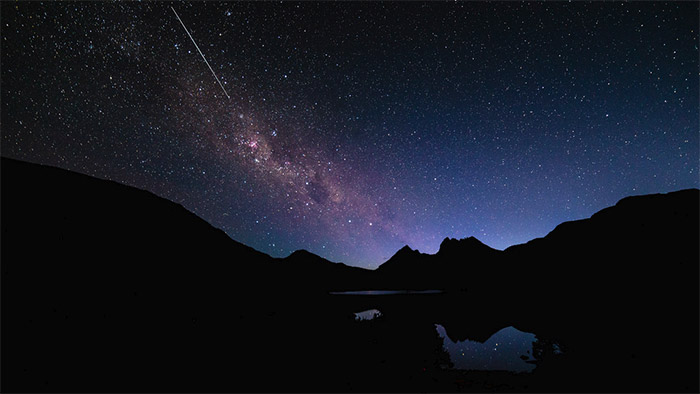
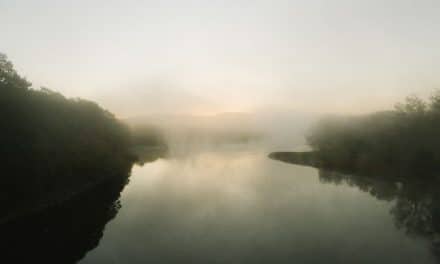
If you want foreground elements to be more exposed, you may need to use lightpainting techniques to brighten them up during exposure; however, silhouettes can create interesting contrast between the horizon and stars. – Photo by Scott Cresswell / CC BY 2.0
Getting sharp focus can also be trying. Ideally, you should set your lens to focus on infinity. And keep in mind that auto focus is rarely helpful when shooting under dark skies.
One possible way to ensure you’re getting tack sharp manual focus if you’re having a hard time recognizing anything through your viewfinder is to take a series of test shots, adjusting the focus as needed between each shot. One of the most time efficient ways to do this is by temporarily setting your camera to a very high ISO. This will give you bright test images that you can use to reference your focus. Do not worry if the shots have very heavy noise as they are purely for testing purposes and can be sent to the trash–just be sure you remember to turn your ISO back down before you begin taking photos “for keeps”.
→ Related reading: E-Book Review: Collier’s Guide to Night Photography in the Great Outdoors
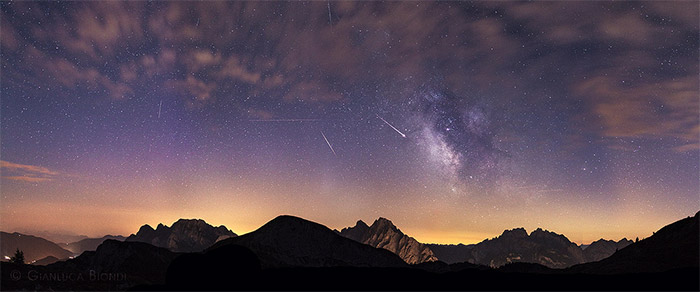
Don’t forget to think about ambient light from nearby cities. In this photo, Gianluca Biondi has found an interesting perspective of the night sky which is complimented by the rim light the city is casting onto the mountain range. – Photo by Gianluca Biondi / CC BY-SA 2.0
Once you have your focus correct, you’ll want to use as low an ISO setting as possible while still maintaining an acceptable shutter speed. Aim for ISO 400 (as a starting point) and adjust your aperture and shutter speed accordingly.
Try out the following tips to help you get better night shots:
- Make sure you remove your UV/Polarizing filters before shooting.
- Shoot RAW whenever possible.
- Utilize the mirror lock up setting when available, this will prevent your camera from being jostled from the mirror when it slaps open, thus preventing camera shake during long exposures.
- Scout your location and plan in advance. Different moon phases can greatly impact the amount of natural light in a landscape. Also, be sure to check weather reports and conditions before you head out so you’re prepared for whatever is in store.
- Don’t forget to turn off the lights! When shooting landscapes at night, you’ll probably want to have a headlamp or some kind of light source so you can see what you’re doing between shots. That being said, it’s easy to forget to turn them off before you hit the trigger release. Also, if you’re shooting with friends, give them a friendly reminder so they don’t accidentally shine a light during your exposure.
Taking great landscape shots at night, for the most part, boils down to trial and error. Take your bad shots with the good and use them all as a learning experience. It takes patience to take great night landscapes as there are so many variables, some of which are completely out of your control.
Photo license links: CC BY 2.0, CC BY-SA 2.0