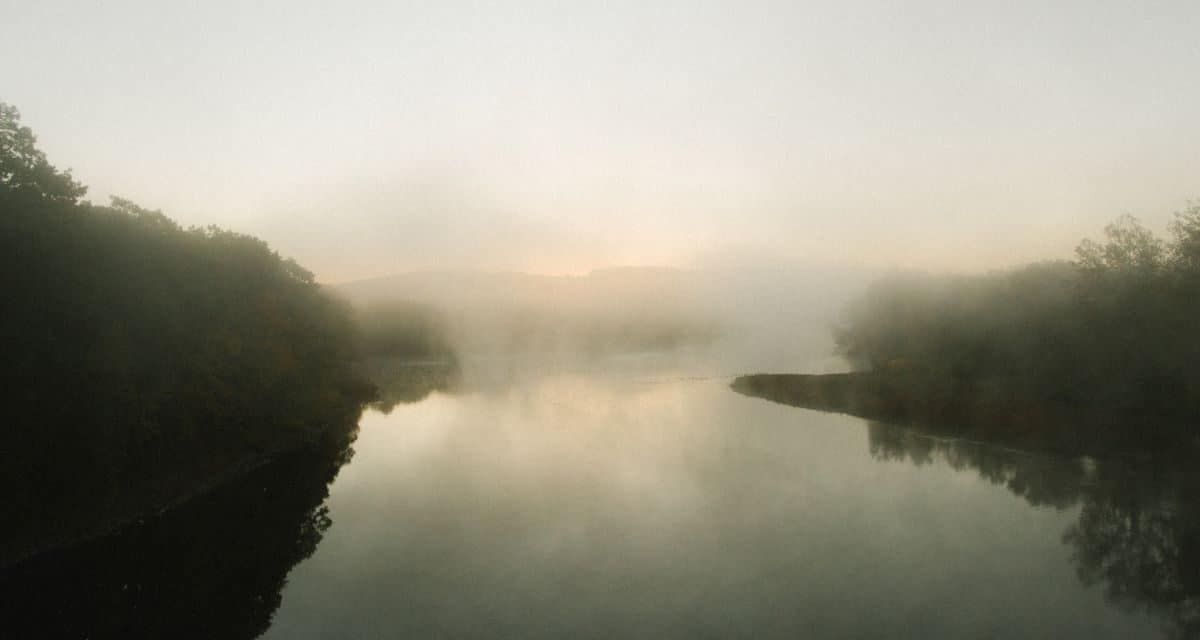
Haze can be a photographer’s ally, but it is a trouble to endure most of the time. Misty mornings allow us to create fascinating and subtly beautiful images. But how can we ensure that visuals are radiant with charmed captures rather than dissipate into a photo setback?
To reduce the haze in landscape photography, add a polarizer to the scene to reduce the scattered light. After taking the picture, you may use a combination of the Dehaze, Clarity, and Contrast changes in the photo editor (particularly Lightroom) to reduce the haze effect and improve the clarity of the picture. You can also use Auto Tone in Photoshop.
Read on to learn how to clean up haze from your photos and reduce unwanted haze as you take the shot.
What Causes Landscape Haze?
Haze results when dust, smoke, water, or other airborne pollutants scatter light as it travels through the atmosphere. As humidity rises, these particles often enlarge, further reducing visibility. Haze may soften a view and lessen the sharpness of landscape components.
Photographing in the haze is significantly different from photographing in clear weather. With proper knowledge, these climatic events might make your photographs more exciting.
How to Reduce Unwanted Haze in the Field As You Take The Shot
After setting up your photo arrangement, you notice some haze. How do you eliminate it?
Bring the Correct Gear
You can bring a UV filter, skylight filters, a tripod, and wet-weather gear for the least chance of getting ominous hazy shots (including a lens cloth).
A wide-angle lens may be helpful when using an SLR camera, or you might carry a long lens to emphasize the photo’s depth. Using a tripod allows you to experiment with exposure settings, and an open mind is vital when photographing haze.
Choose the Best Time to Avoid Haze
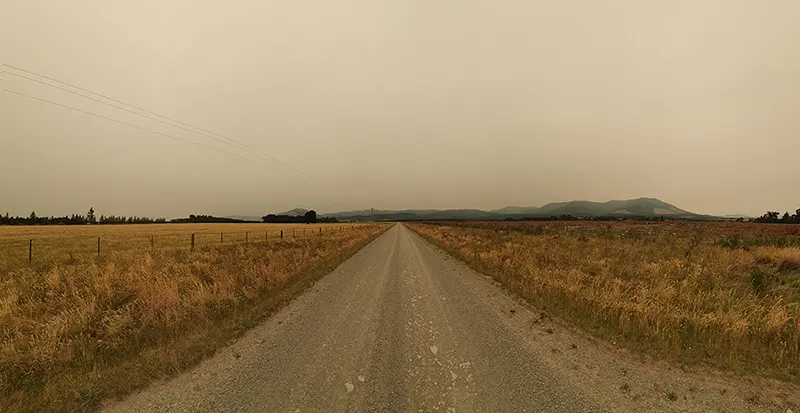
Due to the day’s high temperatures, atmospheric haze is more frequent in the afternoon and evening. The quantity of haze rises due to the warmer air expanding to accommodate more particles. The daytime increase in winds also stirs up more haze and other particles into the air, adding to the haze effect.
Often, haze is the least prevalent in the morning since the air is cool, less humid, and moist. There is also naturally less haze when the sun is directly above since the light passes through the atmosphere the least.
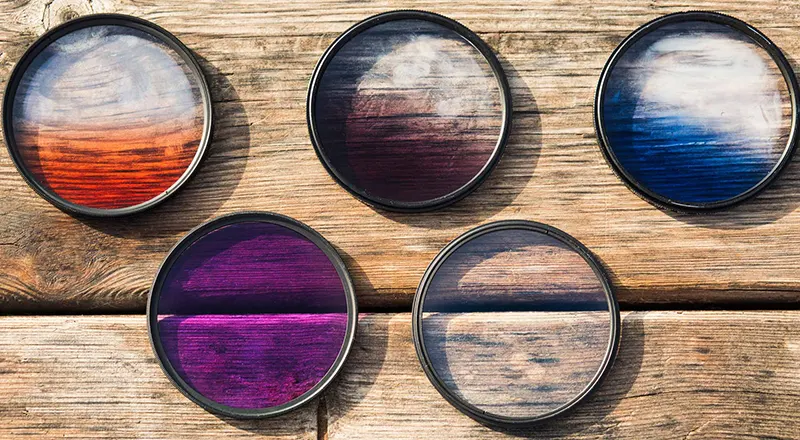
Reduce the Haze Through A Polarizing Filter
Atmospheric haze is essentially light dispersed by moisture and airborne particles. A polarizing filter will eliminate this undesired haze before taking the picture. A polarizing filter will also improve the clarity and sharpness of the scene’s objects by reducing the amount of dispersed light entering the lens.
Remove the Atmospheric Haze
Atmospheric haze is often to blame for nature photos that are murky, dusty, and have the dreaded blue color. A UV filter or skylight filter will eliminate any air haze in your photograph.
Your lens may be shielded from dirt, grime, and scratches by a high-quality UV filter without compromising the color, contrast, or exposure of your pictures. A UV filter or skylight filter decreases the likelihood of a blue cast, which will also improve the clarity and accuracy of your photos.
Modify Your Angle
The sun may lessen haze by adjusting the camera’s angle concerning the light source. Unfortunately, it is only sometimes possible to dramatically alter the camera’s orientation.
You could think about shifting the light’s axis, however. If you return to the same spot later in the day, the sun will be positioned differently concerning the camera.
Play Around with Exposure
With a long exposure, you may capture the illusion of movement in a slow-moving mist and create a clear contrast adjustment between blurred and static elements in your shot.
Even the most seasoned photographers may learn a lot by photographing hazy and foggy landscapes, so make sure you spend the time experimenting with exposure settings.
Balance is Important
Because hazy situations often lack color, it is crucial to pay attention to the color balance and lower the likelihood of getting boring, vanilla photos. Ensure your white balance is in order to balance the cold tones of early morning. You may also want to think about shooting in RAW to have additional post-processing possibilities.
Pro tip: To portray your people as black shadows, make sure that you expose depending on the haze, not the subject. Exposing the haze gives this transient phenomenon additional complexity and texture.
How to Remove Haze in a Landscape Image?
We provided some ideas on reducing haze in the photo in the first part of this article, which you may utilize when shooting on location. However, how can you lessen its effects post-processing?
Many methods will work to remove haze from a photograph, and a more effective strategy is to combine many modifications to get the desired effects.
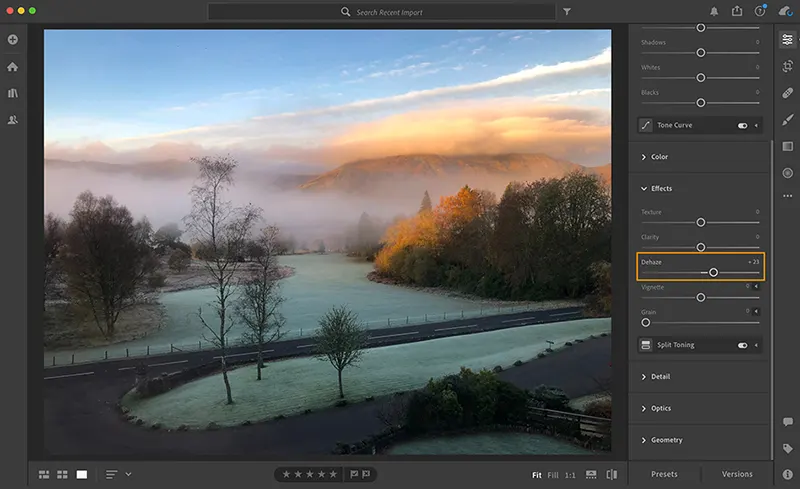
Use Dehaze To Remove Haze
The Basic panel in Lightroom has the Dehaze slider. Dehaze may be used to decrease haze across the whole picture. However, this modification may also result in saturated colors and a darkened picture. Therefore, use cautiously and in conjunction with increasing exposure and lowering colour saturation.
You may also use Dehaze with the Masks above the Basic panel. Using a mask, you may choose which parts of the picture the Dehaze effect is applicable.
For tiny areas, use the paintbrush tool. The Grad Filter might be helpful if the sun comes from one side since it allows you to choose vast areas of your picture.
Clear out the Haze with Clarity
You may boost the mid-tone intensity with the Clarity slide. Choose the Natural or Classic settings first since they are the most effective when you want to keep highlighting detail.
Make a white-balance adjustment or an Auto Levels adjustment before utilizing the Clarity tool, ideally by using the individual Red, Green, and Blue Channel modes.
It is doubtful that the Structure slider will improve much, although it depends on how bad the haze is. Images with greater detail and slight haze may show enhancements. Move the Clarity and Structure sliders to the left gradually, staying at low values if you want to add haze creatively.
Set the Blacks and the Whites Apart
You may wish to change the black and white levels after adjusting the mid-tones using the Clarity slider. The benefit of this strategy is that you may alter each of them separately to get the desired outcome.
Any dark tones in the photograph can be washed away by the haze. But because the black levels may be affected by the Dehaze and Contrast sliders, it is a good idea to recheck them after each change.
Make the Tonal Curve Adjustments
Just below the Basic Panel is where you will find the Tone Curve Panel. In a setup, the haze often appears when the left side of the curve’s solid line is higher than the dotted line. Click on one of the dots on the left side of the curve and drag it closer to the dotted line to lessen the haze effect.
The Tonal Curve provides access to precise tone alterations throughout the whole image. You may choose one of the preset tone options and fine-tune any tonal values. While you may adjust certain tones, the changes may affect the whole picture.
White Balance Correction
Haze may make your White Balance do bizarre things, depending on where you are and what time of day it is. Haze, for instance, may artificially warm the image and filter out blue tones. As an alternative, your shot can have blue color casts.
You have great versatility when you take your pictures in RAW. A photograph in RAW format may always have its White Balance changed without degrading the image’s quality.
The NeutralHazer Approach
Paid software is available to reduce haze for individuals who want to do it entirely under their control. NeutralHazer is a plugin for Photoshop and Photoshop Elements that determines the air thickness in each pixel, allowing the user to define the boundaries between the foreground and background.
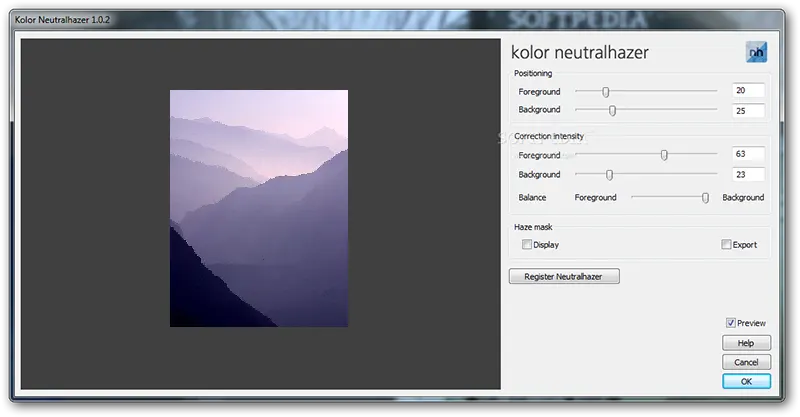
NeutralHazer is a unique tool since it allows users to choose the covered background and foreground sections, the strength of the impact on each of them, and the transition between the two areas.
Add Contrast
You may restore contrast to your image by using the Contrast slider. Be careful that changing the contrast will influence all tones, including black, mid-tones, and whites. You could utilize the Clarity slider if you don’t want to affect the blacks and whites.
It is also a fantastic place to experiment using the Unsharp Mask technique and adjustment in Adobe Camera Raw. For this “haze removal” approach, you do a Local Contrast Enhancement utilizing Radius rather than the more extreme value shift in a typical Unsharp Mask procedure called Amount.
Haze is Not Always A Bad Thing
Haze may significantly affect your image and limit your ability to see what is in front of you. Even while this can at first look terrible, it can be a positive thing! Haze may provide a dynamic layer of mood and atmosphere to your photographs, altering how viewers may interpret them.
Haze may be used successfully in a landscape photo to enhance the composition and the message you convey about the scene.
For instance, haze may create a cluttered backdrop, create separation from subjects, capture images like the sun’s color and enhance a picture’s atmosphere and warmth. Consider inventive methods to include the haze in the composition so that it tells a powerful tale
Conclusion
Use a polarizer to remove scattered light for a crisper picture if you wish to lessen it, or shoot in RAW and apply various modifications while editing the picture. Consider using the lighting and including the haze as a design element for a fantastic job.