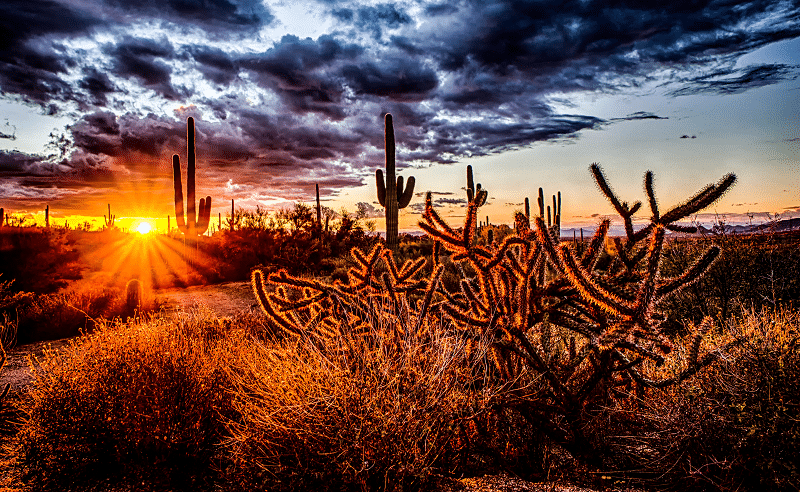
photo by: Robert Murray
While the harsh, midday sun is something that most photographers run from like the plague, the truth is, you don’t have to pack up and call it a day when the sun comes out!
As much as shooting with full sun seems to go against your better judgment, there are plenty of ways to work around the challenges in order to create some amazing images. While full sun is renowned for high-contrast conditions, harsh shadows, and overexposed, washed out images; the good news is that there’s tremendous beauty to be found in full lighting conditions. The sun can highlight interesting details and when captured carefully, images taken during the sun can be full of life and beautiful warmth; evoking all of the joy of a summer’s day!
Some photo opportunities just won’t wait until the sun’s at a lower angle in the sky! If you find yourself on-location and ready to shoot when the sun’s at its peak, here’s how you can work with the bright light and even use it to your advantage in order to capture some amazing images.
• Start With Sunny 16
Sunny 16 is the well-known rule that says to shoot with an aperture of f/16 during full sun. According to this guideline, you should also use a shutter speed of about 1/100 and keeping the ISO at 100. If your ISO only goes to 200, put your shutter speed at about 1/200 as well. While this rule is a good place to start if you’re shooting in full sun, keep in mind that you’ll have to adjust accordingly depending on how low the sun is in the sky and whether there are any clouds present. Depending on the angle of the sun, you may find that you’ll need a much faster shutter speed as well. Don’t be afraid to bump it up to 1/1000 or 1/1500 if the sun’s especially bright.

photo by: Buzz Zhang
• Use Shadows to Your Advantage
Shadows are often unsightly and unwanted additions to your images, yet if used correctly, they can add some interesting detail to your shots. The phrase, “If you can’t beat them, join them” applies here. Instead of trying to avoid the shadows completely, consider embracing them and working them into your compositions. Using the shadows as leading lines, for example, can help you to create a well-balanced image. Or let them take center stage. Consider capturing the main subject in your image –say, a lone tree in a field, along with its shadow. A fun and creative way to make the most of shadows!
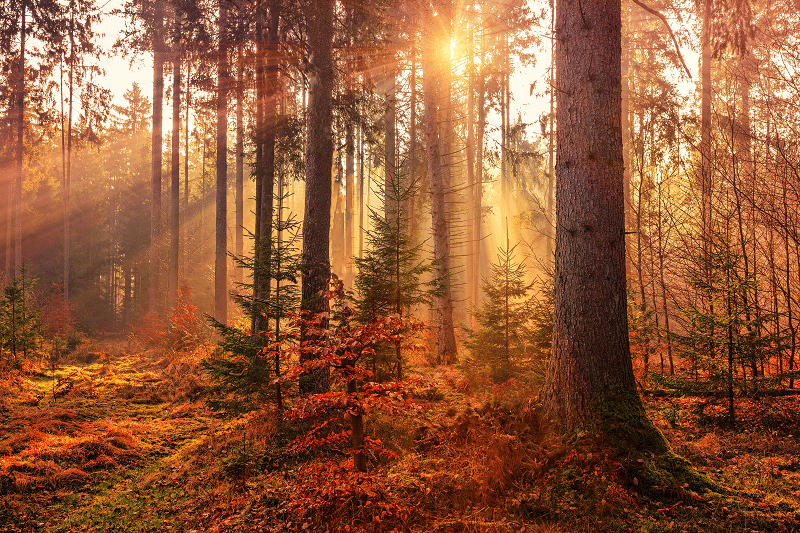
photo by: Johannes Plenio
• Reposition Yourself
While you can’t reposition the landscape, you can reposition yourself and adjust the angle you’re shooting from. Consider getting down lower and including some foreground into your images. A lower angle can help to limit the amount of light that reaches the sensor. You may even find something to ‘hide’ the sun behind; like a tree or large boulder, to help diffuse the sun some more. Or, head for the woods. The light, gently filtered through the trees can make for a beautiful image!
• Watch the Clouds
When there are clouds on a sunny day, you’re in for a treat! Just wait for the clouds to float past the sun, and you’ll be rewarded with the world’s largest softbox. Allowing the clouds to cover the sun can give you softer, more diffused lighting that will be easier to work with.

photo by: Ken Kistler / CC0
• Add Sun Flare
While there isn’t anything quite as unsightly as unwanted sun flare, intentional sun flare, done with style and tact can be an interesting feature that can help your image to stand out. To add sun flare, carefully position the sun behind something, while allowing just a bit of it to peak out from around the edges. Keep in mind that sun flare often works best when you have an aperture of f/16 or higher. Just remember to take your lens hood off, if you have one, as it can block the light that the camera tends to render as flare.
• Create Silhouettes
When shooting in a bright lighting situation, it’s a great time to do silhouettes. Try positioning a subject with an easily identifiable outline in front of the sun, then using a fast shutter speed to let in less light, resulting in a darker image.

photo by: Anisur Rahman
• Consider a Polarizer or ND Filter
When shooting in the bright sun, consider using a polarizer. A polarizing filter will render the sky a deeper, darker blue, and help to add contrast to the fluffy white clouds, drawing them out from the background. Just remember that polarizers are most effective when used at a 90° angle to the sun. Likewise, neutral density (ND) filters can also be effective when shooting in the midday sun; helping to filter out some of those harsh rays.

photo by: www.maxpixel.net
• Consider Black and White Images
While you can create black and white images at any time of day, the high-contrast conditions during full sun make for an ideal time for creating black and whites. Since your details will be stronger, and bolder; transforming your photos into black and white will help to showcase the details more clearly as well. Consider using Silver Efex –a plugin for Lightroom to create stunning black and white images.
A word of caution before you go. Shooting in the sun can be tremendously rewarding; just take care never to look at the sun directly through your viewfinder. Looking at the sun directly through your camera will magnify the intensity and could cause damage to your eyes.
While capturing images in full sun can have its challenges, but it’s worth doing. By brushing up your skills, you’ll be able to take advantage of different lighting situations; allowing you to create some beautiful and truly unique masterpieces that are all your own.
Do you avoid the midday sun, or brave the light to take photos during the middle of the day?


Why would the lead photo, indeed all photos except 2, for an article on shooting in mid-day have the sun at or near the horizon?