Achieving ideal sharpness is an important part of creating the best photos possible. While you should certainly take the appropriate steps to capture sharp photos, applying some additional sharpening in post production will be necessary with many photos, especially those that you will be using for prints. Both Photoshop and Lightroom offer you the opportunity to sharpen your photos. In this tutorial we’ll cover the sharpening options in Photoshop, and in a future article we’ll cover sharpening in Lightroom.
If you don’t already have Photoshop you can download a free trial here.
Photoshop offers users several different options when it comes to sharpening. Having a few choices can be nice, but it can also be a little overwhelming at first because you probably won’t be sure of which method you should use. If you go to Filter > Sharpen you’ll see most of Photoshop’s sharpening options.
→ Related reading: 11 Steps to Tack-Sharp Landscape Photos

The most logical options to start with would probably be “sharpen”, “sharpen more”, and “sharpen edges”, but none of those options give you control. They will all apply some level of sharpening to your image, but you have no creative control. The options that we will be covering in this article are “unsharp mask“, “high pass” (which is listed under Filter > Other), and “smart sharpen“.
Unsharp Mask
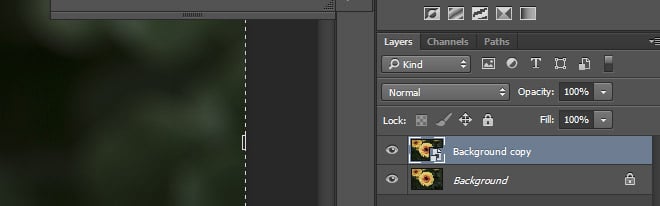
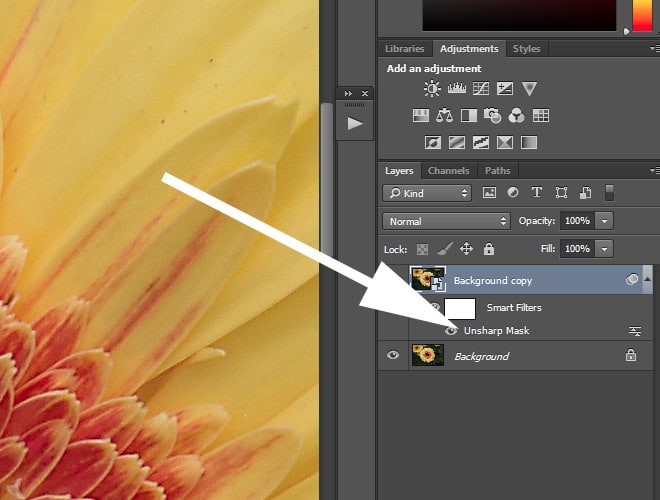
Let’s take a look at Unsharp Mask first. Before we apply any sharpening I recommend that you duplicate your background layer and convert it to a smart object. To do this go to Layer > Duplicate Layer. Then go to the layers palette at the right side of your screen, right click on your duplicated layer, and select “convert to smart object”.
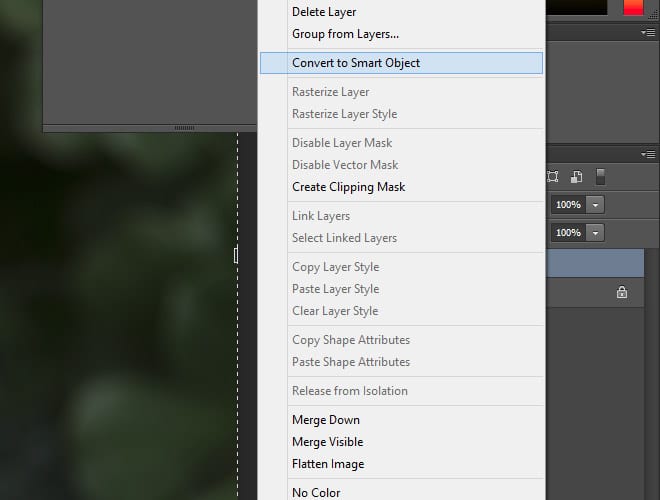
After doing this we will be sharpening the duplicated layer, so it will be non-destructive and will not impact your original photo layer. The smart object also makes it easy to go back and apply changes to the filter to adjust the level of sharpening after it has been applied. Without using a smart object you cannot go back and adjust the level of sharpening after it has been applied. When you are using the unsharp mask you can edit non-destructively simply by using a smart object with your background layer, but I prefer to work on a duplicated layer just to be safe. Plus, for the high pass sharpening that we will cover in a few minutes you will need to duplicate the layer.
Ok, so now that you have duplicated your layer and converted it to a smart object it should look something like this in your layers palette:
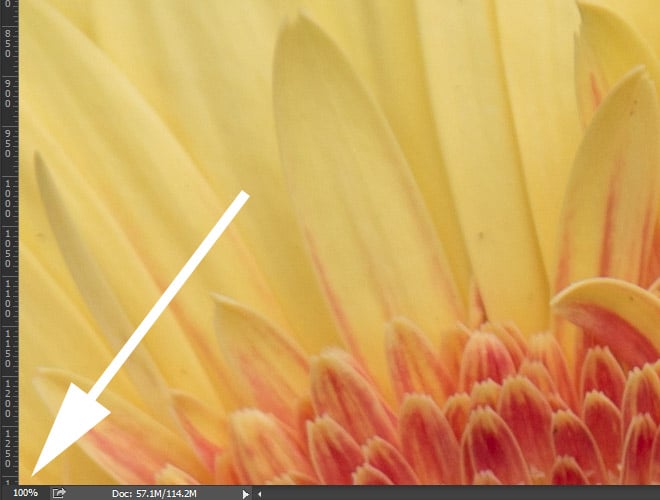
Next, go to the lower left corner of your screen and zoom in to view your photo at 100% so you will be able to see the details for sharpening.
Now, with your background copy layer selected go to Filter > Sharpen > Unsharp Mask and it will open the unsharp mask options.
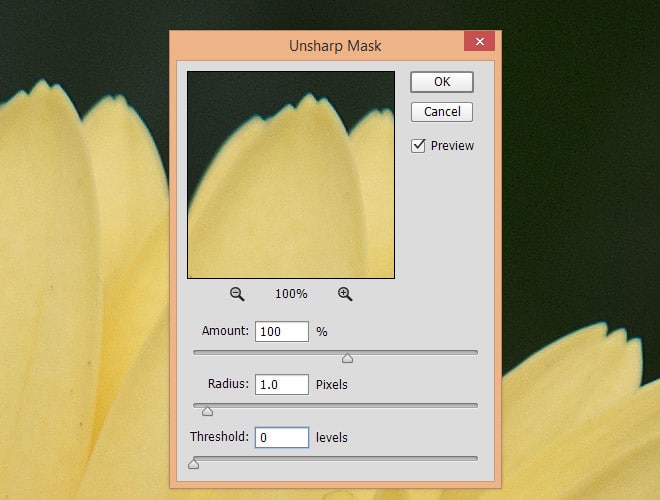
First, check the “preview” box. If this box is checked you will see the impact of the unsharp mask settings on your photo, which makes it easier to manage.

There are 3 different sliders involved in the unsharp mask: amount, radius, and threshold. While this can be a little confusing or overwhelming at first, this is actually what makes unsharp mask more effective than the regular sharpen filter that gives you no options. Amount controls the strength of sharpening that is applied. The higher the number the more sharpening will be applied. Radius controls how many pixels at the edges are sharpened. A higher number here will have a more extreme look and a lower number will have a less extreme look. Threshold determines which pixels are impacted by the sharpening. Set at 0 all pixels in the photo will be impacted. The slider determines which parts of the photo will be impacted based on contrast.
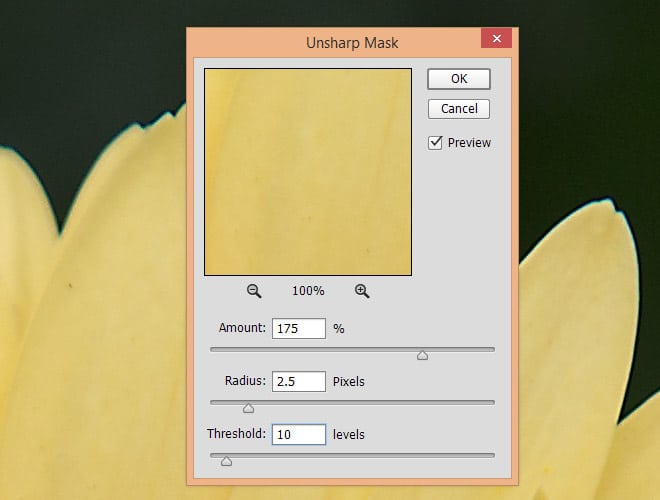
There are no exact settings that you should use every time, it really will vary from one photo to the next. The size/resolution of your file can also be a factor, especially since the radius slider uses pixels as a setting. Smaller resolution photos will be impacted greater by each pixel that is sharpened since there are fewer pixels in the image. Also, RAW files may need to be sharpened more than JPG files. The example photo that I am using for this tutorial is a RAW file.
For the amount I usually start somewhere between 100 – 200 and experiment from there. With the radius I start at 1 px and work my way up. For the threshold I often start at 0 and work up to see how it impacts the photo. In the case of this sample photo I am using these settings:
- Amount: 175
- Radius: 2.5
- Threshold: 10
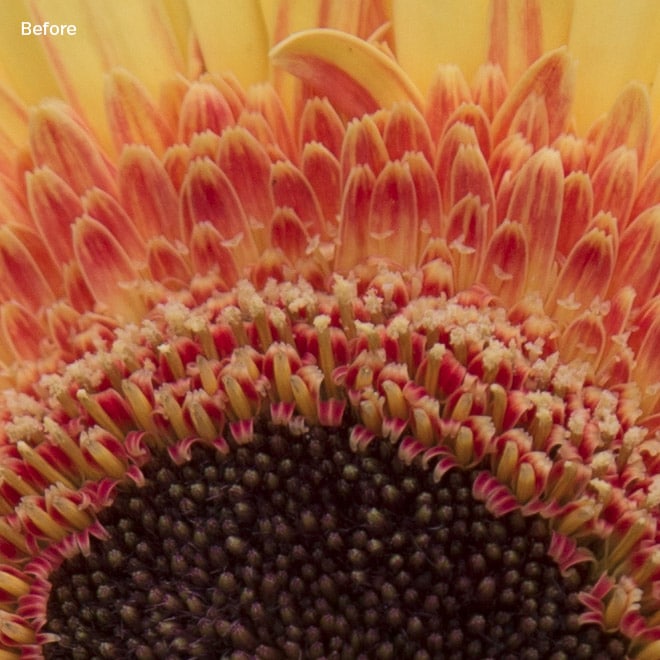
Before and after images are below. It may be a little difficult to see the difference here, but when you are working in Photoshop you can show and hide the sharpened layer which will make it really easy to see the impact on the photo.

Since you used a smart object you can go back and make changes to the unsharp mask if you’d like. To do that just double click on the unsharp mask in the layers palette.
High Pass Sharpening
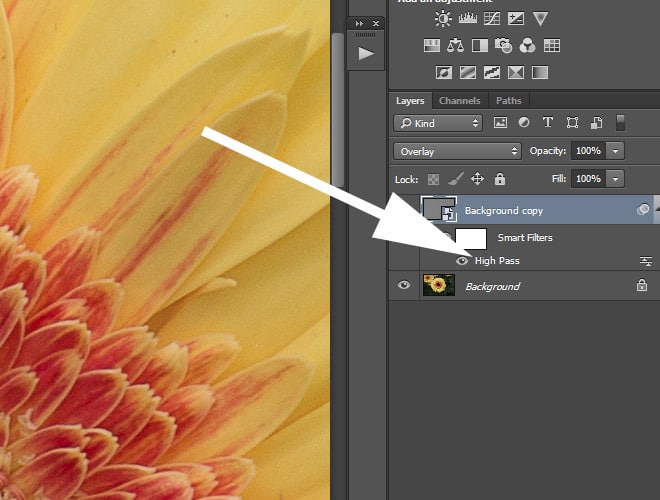
The next sharpening option that we’ll look at is to use a high pass filter. This method will give you fewer options that the unsharp mask, which may make it a little bit simpler to use. Before moving to the high pass filter I am going to delete the unsharp mask so I will be working with the background copy layer and the smart object. If you want to apply high pass sharpening right after opening your photo simply duplicate the background layer and convert that duplicated layer to a smart object.
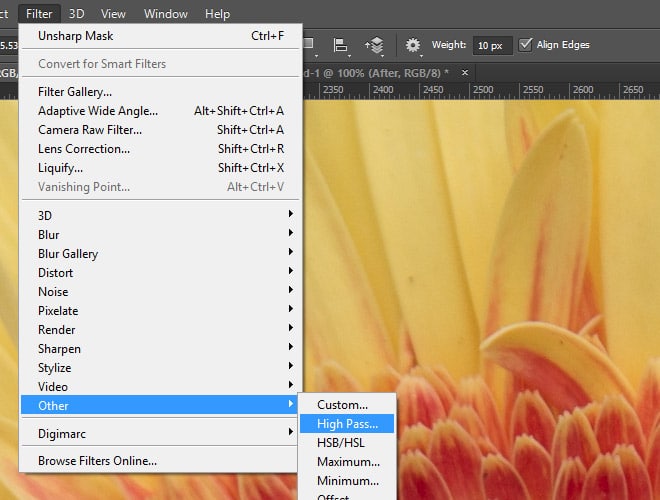
To access it go to Filter > Other > High Pass.
With the high pass filter you’ll see just one slider for the radius, which controls what areas of the photo are sharpened. You’ll also notice what looks like a gray overlay. The gray areas will not be sharpened. As you increase the radius slider more of the photo will show through the gray and those are the areas that will be sharpened. So the higher number you use for the radius the more sharpening will be applied.
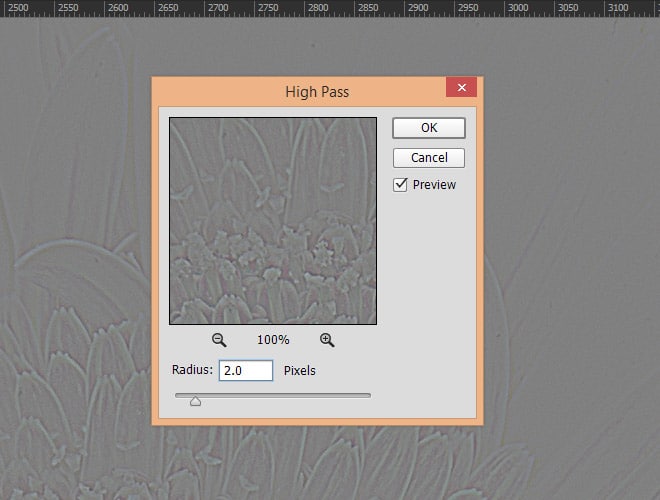
The easiest way to work with high pass sharpening, since we are using a smart object, is to make a guess and apply it, then change the blend mode of the sharpening layer, and then go back and fine tune the radius setting. Generally you will want the radius to be quite low when you are using high pass sharpening, so I will set it at “2” and click ok. Next, I’ll go to the layers palette and change the sharpened layer to “overlay”.
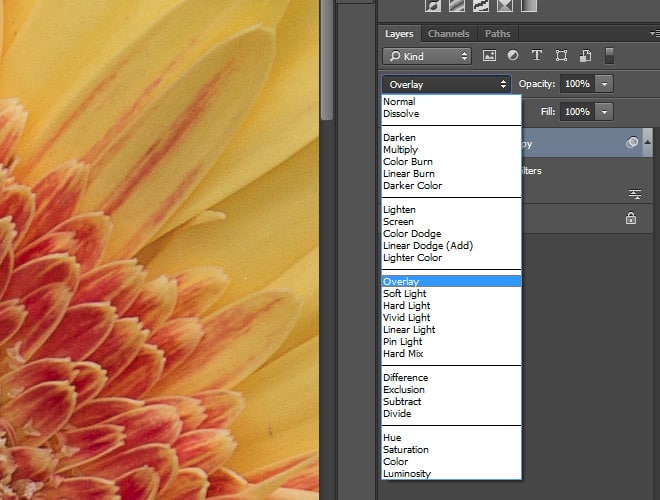
There are several different blend modes that you can use for high pass sharpening. Generally the best options are overlay, soft light, hard light, and linear light.
After setting the sharpening layer to overlay I now have a good visual to work with, so I will double click on “high pass” in the layers palette to re-open the high pass filter options.
View your photo at 100% and experiment by increasing and decreasing the radius setting until you get the level of sharpening that you want. Higher resolution photos may need a higher radius setting since there are more pixels in the photo.
High pass sharpening is a really great option because it gives you some degree of control while still being simple to use.
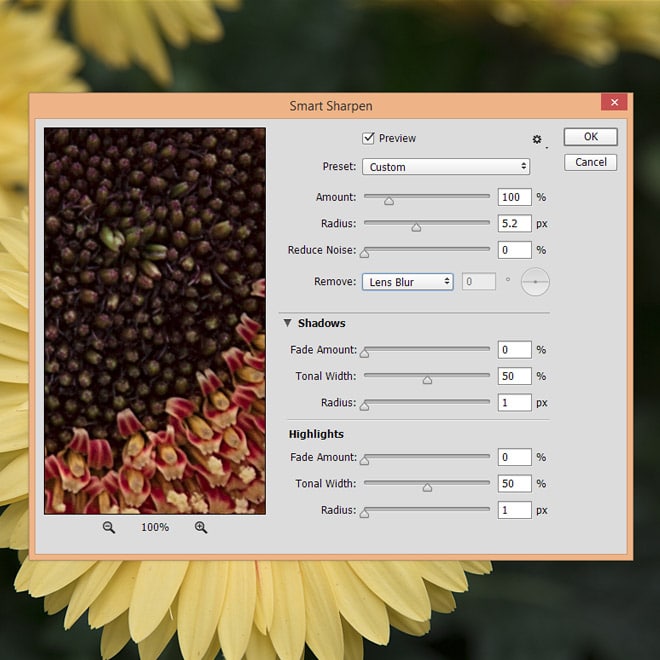
Smart Sharpen
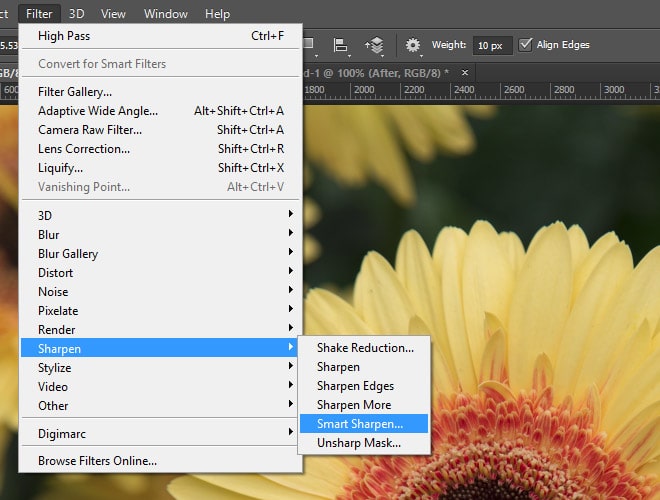
The last option that we will look at here is the smart sharpen filter, which is also the most advanced of these 3 options and you will have more control as compared to high pass and unsharp mask. To access smart sharpen go to Filter > Sharpen > Smart Sharpen.
Smart sharpen has a few noteworthy features. First, you can save and re-use presets, which is a great way to reduce the amount of time you spend on each photo, especially if you are working with a series of photos from the same shoot that all need similar amounts of sharpening. At any point when you want to save your settings you can click on the dropdown and select “save preset”.
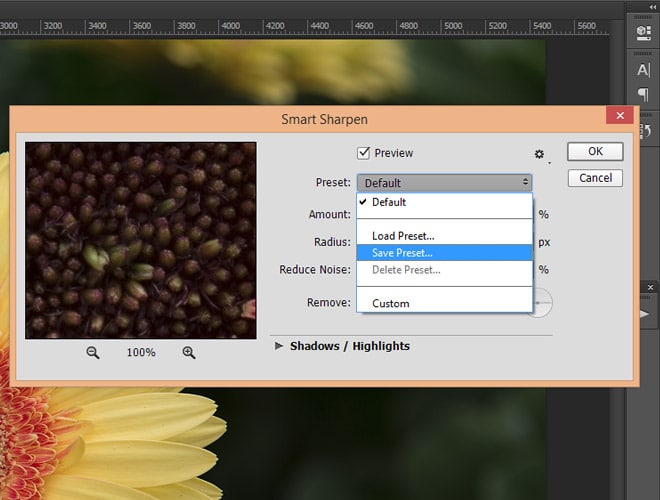
Then you will be able to apply your preset from the dropdown menu in the future.
Smart sharpen also allows you to apply some noise reduction at the same time, which is another helpful time saver.
Let’s take a look at the specific options in smart sharpen. First, you’ll find the amount and radius sliders and they work the same way that amount and radius work in unsharp mask. Amount sets the level of sharpening and radius determines how many pixels from the edges are impacted. The third slider is for noise reduction and higher numbers here will apply greater noise reduction. In the other dropdown you have the option to select gaussian blur, lens blur, or motion blur.
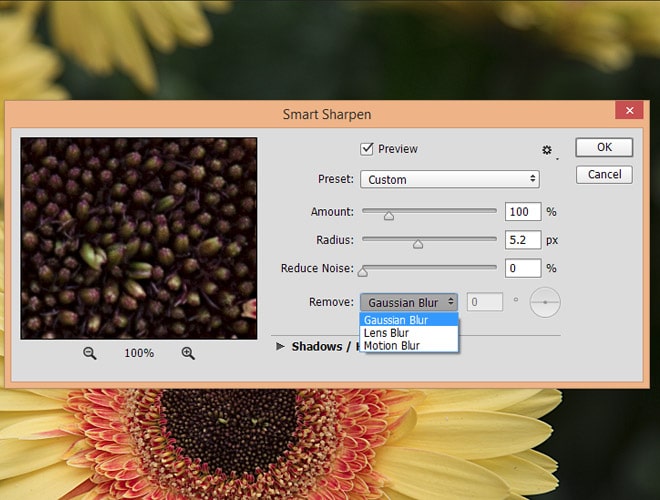
If you set it to gaussian blur it will apply the same type of sharpening that you would get with unsharp mask. Lens blur applies a finer level of sharpening. Motion blur is useful for reducing the impact of motion during the shot, and you will also need to enter a degree/angle if you are using motion blur. Generally, I leave this set at gaussian blur.
For the last options in smart sharpen, click on the arrow next to “shadows/highlights”
These settings allow you to add a different level of sharpening to the shadows and highlights. The fade amount slider will impact the strength of the sharpening. The tonal width sliders will determine what parts of the photo are impacted, darker or lighter. The radius determines how many pixels from the edges are sharpened.
Using smart sharpen takes a little bit more time and experimentation, and the settings needed will vary from one photo to the next, especially if you are using the shadows and highlights settings. The presets functionality is really great if you are editing a batch of similar photos, which can make up for the extra time needed to get the settings just right.