In April of 2018 Adobe released a major update to Lightroom and Camera Raw, and one of the most noteworthy changes/additions involved Profiles. Profiles had existed in Lightroom previously, although they had been known as “Camera Profiles” in earlier versions.
With this update Adobe made profiles much easier to access, and they also added to the functionality and usefulness of profiles. If you’re using Lightroom CC, Classic CC, or Camera Raw and you haven’t taken the time to get familiar with the new Profiles, this article is for you (and there is a video at the end of the article). Profiles have the potential to be quite useful if you understand how they work.
Where Can I Find the Profiles?
In older versions of Lightroom the Camera Profiles were near the bottom of the options within the Develop Module in the Camera Calibration panel. The options were limited. With limited options and being buried at the bottom, Camera Profiles were rarely touched by most Lightroom users.
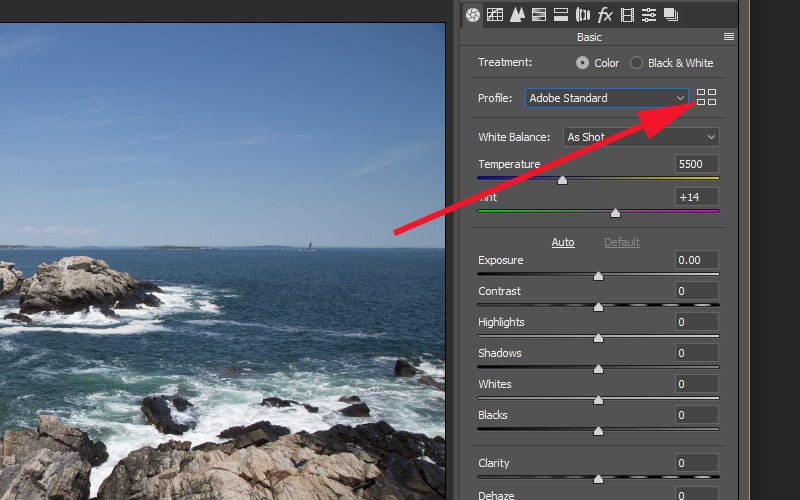
Now, Profiles have been moved to the top of the Basic Panel, directly above the white balance settings.
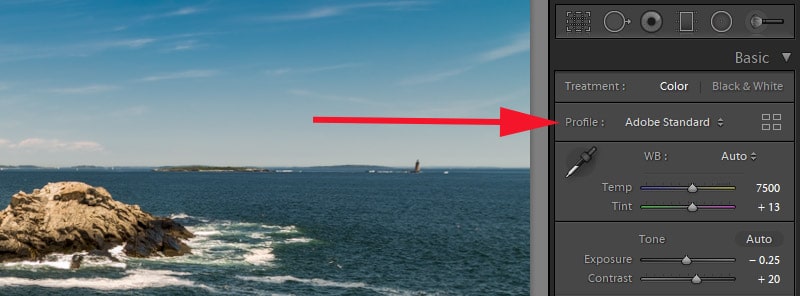
There is a drop down that allows you to change the profile, or you can click on the icon to open the Profile Browser.
![]()
It’s important to note that the new Profile functionality is only relevant if you are using Lightroom CC, Lightroom Classic CC, or Photoshop CC 2018 (via Camera Raw). So if you are using an older version of Lightroom (like LR 6, for example), you won’t have access to this functionality.
There are several profiles that come built-in to Lightroom / Camera Raw. You can also purchase custom profiles, like our set of Creative Profiles for Landscape Photos. It is possible to create your own creative profiles, but for now the process is pretty technical and a little complicated, so it is beyond the scope of this article.
Overview of the Different Types of Profiles
Profiles can be a bit confusing, partly because there are a few different types of Profiles. Let’s take a quick look at each of the different types.
1. Raw Profiles
If you are working with a raw file, you will have the option to select one of several different Raw Profiles. The intent of Raw Profiles is to give a unified, consistent look and feel regardless of which camera you used to take the photo.
Previous versions of Lightroom used Adobe Standard as the default profile. Adobe has added a few new options, and now the default for new images that you import will be Adobe Color, which has a little bit more vibrance than Adobe Standard. The profile will not be changed on the photos in your archives unless you manually change it. But new photos that you important will have the Adobe Color profile by default.
Other options that may interest you include Adobe Landscape and Adobe Vivid. Adobe Landscape will give your colors more pop than Adobe Color, especially for skies and foliage. Adobe Vivid gives photos even more pop than Adobe Landscape.
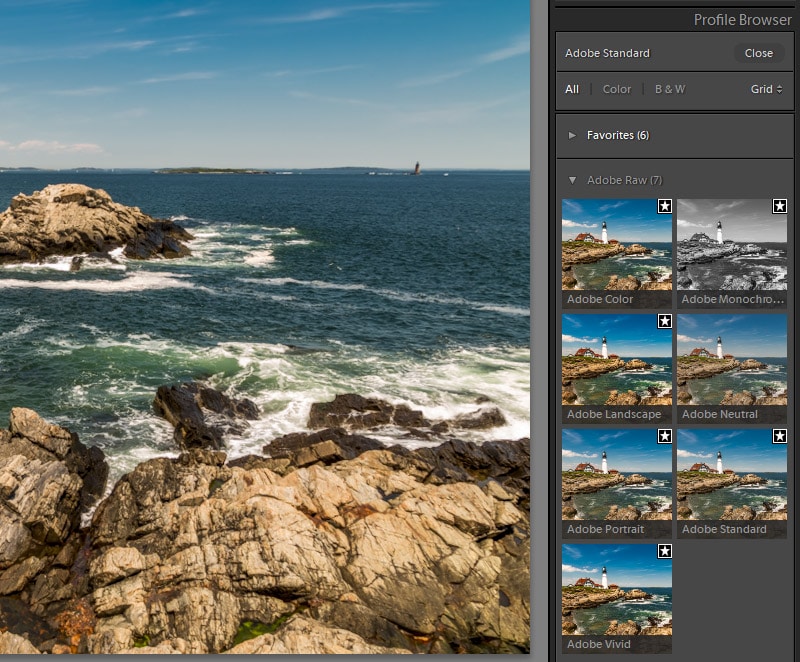
Adobe Monochrome is the default profile for black & white conversions, but there are also several other black & white profiles that you can choose from.
Raw files need a Profile in order for Lightroom to know how they should be displayed. That is not the case for JPGs (or other non-raw file types, like TIFFs). If you’re working with a JPG you will not have options to use the Raw profiles. Instead, you’ll see Color and Monochrome as your options.
However, if you’re working with a JPG you can use other Profiles for creative purposes, and we’ll get to that in a minute.
2. Camera Matching Profiles
The Camera Matching Profiles allow you to match the options from your camera, making it a closer match to the color and tonality that you see on your camera’s LCD screen. The options you’ll see here will depend on what camera you used for the photo.
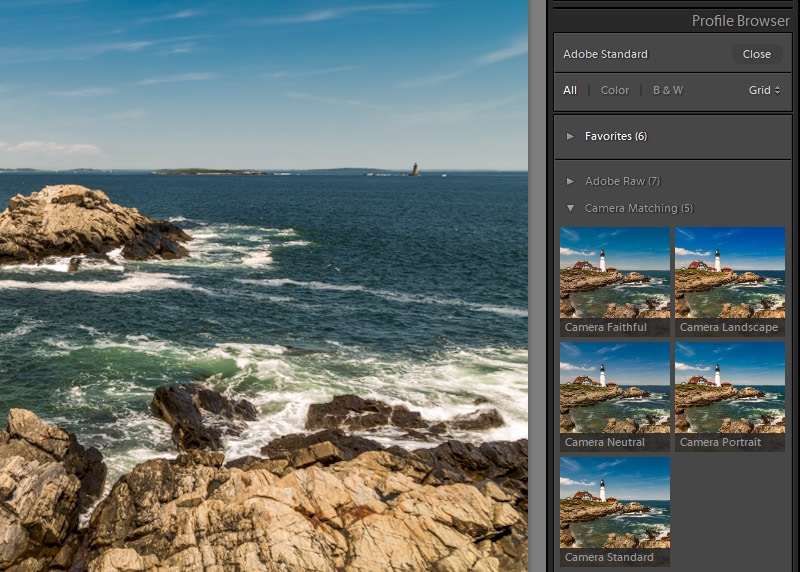
The Camera Matching Profiles are only available with raw files.
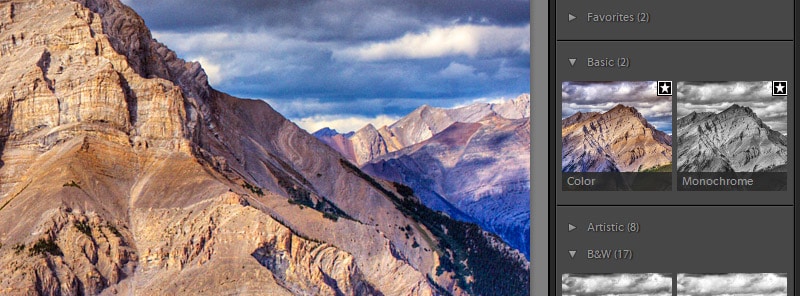
3. Creative Profiles
Creative Profiles open up a lot of new possibilities, and they can be used in several different ways. Adobe includes some packs of profiles that they classify as Artistic, Modern, Vintage, and B&W. These profiles will give your photos a certain look or style. In some ways they are similar to what you could achieve with a preset, but there are many difference (we’ll look at the differences later in this article).
You can also install Creative Profiles that you’ve purchased from other websites, like our pack of 60 Creative Profiles.
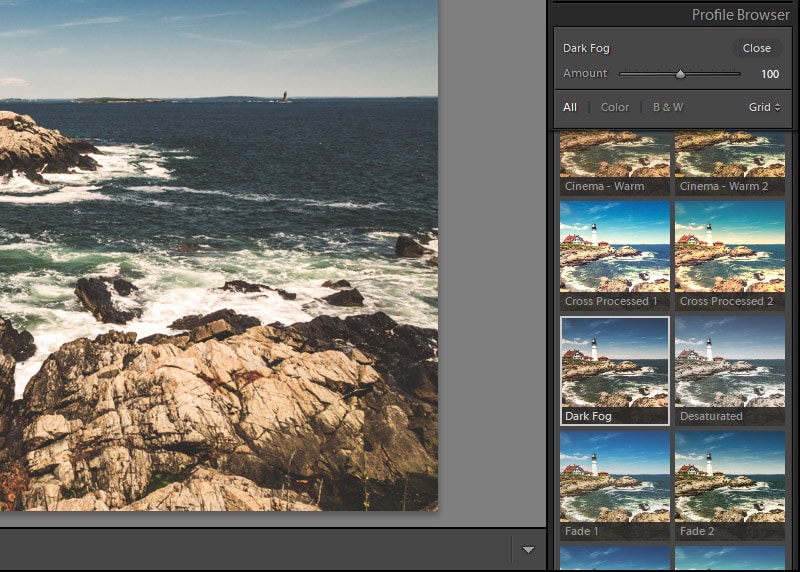
One of the key things to note about Creative Profiles is that they can be used with both Raw and JPG photos (or file types like TIFFs). Creative Profiles can include a 3D Lookup Table, or LUT, which applies a color grading effect that would otherwise not be possible in Lightroom.
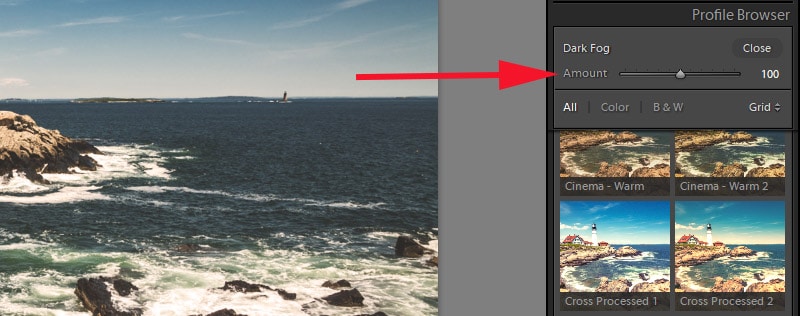
Another important point about Creative Profiles is that they include an “amount” slider that allows you to adjust the strength of the effect. It’s basically like an opacity setting. Slide it to the left (lower number) to reduce the strength of the effect. Slide it to the right (higher number) to increase the strength of the effect. The slider’s value ranges from 0 – 200, with 100 being the default.
How to Use Profiles in Lightroom
It’s important to know that unlike presets, Profiles do not impact the sliders in the Develop Module. The Profile you choose will have an impact on the look of the photo, but all of the sliders will remain at the default settings unless you change them.
One of the reasons to like this is that changing the profile will not override the other changes you’ve already made in the Develop Module. On the other hand, when you’re working with presets you can easily see how they impacted the photo, or how the preset achieves a certain look, by checking to see which sliders where impacted and what value they’re using. With a Profile you can visually see the result, but you don’t know what was done to get that look or effect.
Setting Favorites
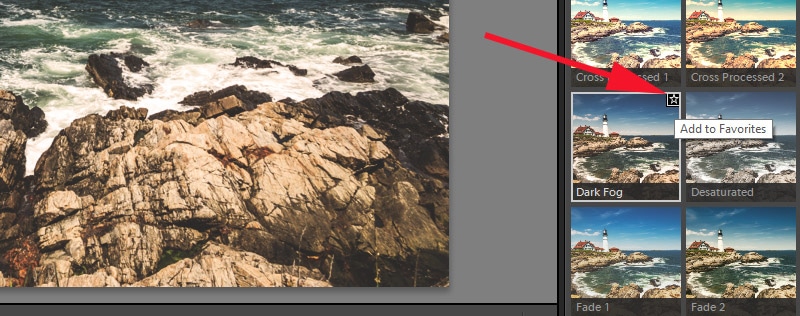
One of the cool functions is the ability to mark specific Profiles as favorites. If you use Profiles in your workflow, chances are you’ll find a few that you like and use them very often. You can mark these as favorites and it will be easier to find and apply in the future.
To mark a Profile as a favorite, simply click on the star icon.
You’ll then be able to find it in your favorites.
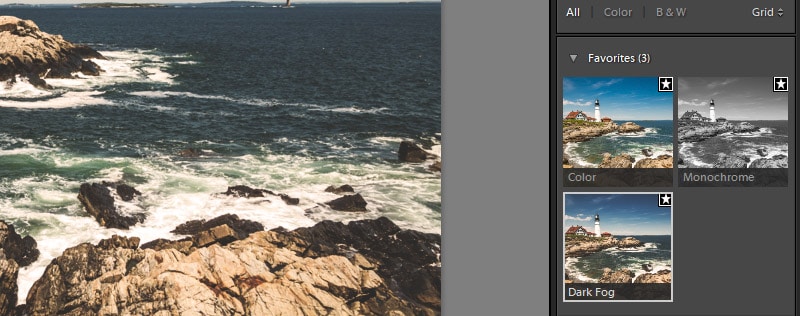
If you want to remove a Profile from your favorites, simply click on the star icon again to toggle it off.
Using Profiles in Photoshop
One of the best features of Profiles is that they can be used in Lightroom or Photoshop. When you install Creative Profiles they will automatically be available in both. If you open a raw file in Photoshop it will automatically open in Camera Raw. If you are working with a JPG you will need to open a Camera Raw Filter (go to Filter > Camera Raw Filter). The process of using Profiles is the same as in Lightroom. Click on the icon to open the Profiles Browser and then select the Profile that you want.
Profiles FAQ
Here we’re listing some questions that are frequently asked regarding Profiles, along with answers.
Can I use Profiles on an older version of Lightroom?
Not really. Previous versions include functionality for Camera Profiles, but options are much more limited than what you can do with the latest version of Lightroom. In order to take advantage of the new Profiles functionality you will need to have an Adobe Creative Cloud subscription.
Can I use Profiles on a mobile device?
Yes, if you are using the latest version of Lightroom CC. You can select one of the pre-installed Profiles, or you can install custom Profiles that you’ve purchased. You’ll install the custom Profiles on the desktop version and it will automatically sync to your mobile device. The sync can take a little bit of time.
Are Profiles better than presets?
Neither is really better or worse, they’re just different. Although Profiles are very useful, there are some things that can be accomplished with presets that cannot be accomplished with Profiles. For example, the workflow functionality of our Landscape Legend Lightroom Presets cannot be duplicated with Profiles.
Do Profiles make presets obsolete?
No. Your presets will still work the same way they always have.
How do I install Profiles?
You’ll need to place them in the Settings folder, inside the CameraRaw folder. It’s very similar to how you would install develop presets. If you are purchasing our Creative Profiles, documentation is included in both video and text format.
I’m having trouble installing Profiles.
The most common problem is that either Lightroom or Photoshop has not been updated. Both need to be updated to the latest version.
How do I get the Profiles in Photoshop?
When you install them, they will automatically be usable in both Lightroom and Photoshop (via Camera Raw).
Why don’t I see an “amount” slider?
The “amount” slider only applies to Creative Profiles. If you’re working with a Raw Profile or Camera Matching Profile you will not have the option to adjust the amount, so the “amount” slider is not shown.
Want to start using Profiles? Check out our pack of 60 Creative Profiles.


I created a color profile in Photoshop and it shows in Lightroom. In Lightroom CC it only shows when I import RAW files. Anyway I can get it to work for both JPEG and RAW files. I just want to be able to quickly apply camera calibration settings of the primary colors on Lightroom CC and not sure how to do that. Help!
Same problem! Did you figure out a workaround?
What Adobe Lightroom Color Profile should i use?