There are a number of different ways to merge or blend multiple exposures to create an HDR image. You could use software like Photomatix that has been created exclusively for HDR, you can use Photoshop’s HDR merge, you can do it manually by using layers and masks in Photoshop, and since the release of Lightroom 6/CC you can also do it right in Lightroom with no plugins or additional software needed.
There are pros and cons of each method. Doing it manually in Photoshop will give you the most control, but it will also take far more time than an automated process. Photomatix gives you robust options and settings, but it does require additional software to purchase. Lightroom’s HDR merge functionality is extremely convenient for those who already use Lightroom.It doesn’t give you loads of options, but it does work pretty well, especially if you are after a realistic HDR look.
In this article we’ll walk step-by-step through the process of creating an HDR image in Lightroom. This assumes that you have already captured multiple bracketed exposures to be used for the HDR merge, and that you have already imported those photos into Lightroom.
Don’t have multiple exposures to create the HDR merge? Try our HDR Hero Lightroom Presets.
Step 1: Select the Photos to Merge
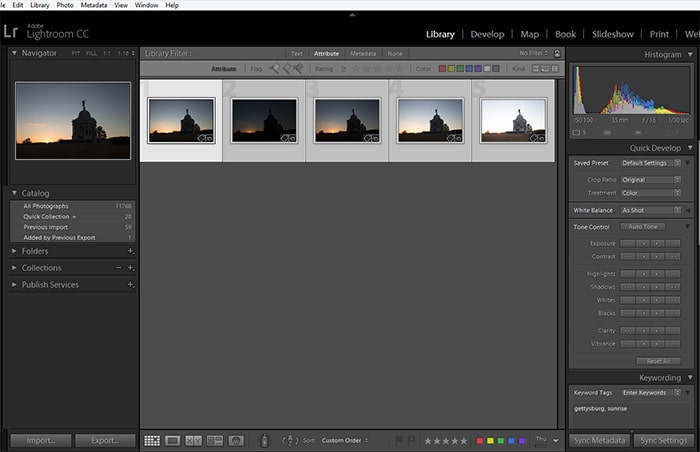
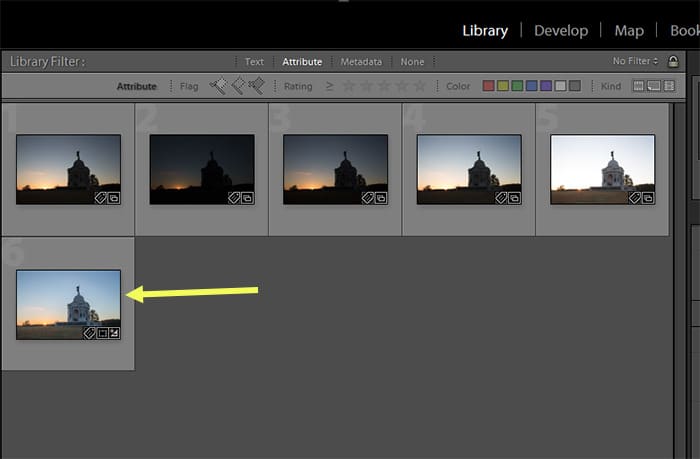
You’ll need at least two different exposures in order to create the HDR image. For this example I will be working with 5 different exposures. These photos were taken at sunrise in Gettysburg, Pennsylvania. The sky is much lighter than the foreground, so the HDR merge is helpful for showing the detail in the shadow areas of the foreground without blowing out the sky.
In Lightroom I will select all 5 of the photos that I want to use for the HDR image. To do this, click on the first photo and then hold down the shift key and click on the last photo. This will select the first photo, the last photo, and all photos in between.
Step 2: Go to Photo > Photo Merge > HDR
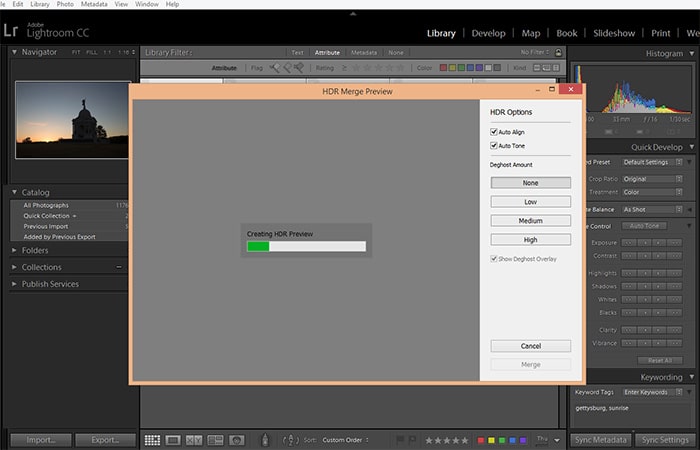
With the photos selected, go to Edit > Photo Merge > HDR. Alternatively, with the photos selected you can right click on any of the photos and go to Photo Merge > HDR. This will create the HDR preview and open the options for the HDR Merge.
Step 3: Chose the Settings
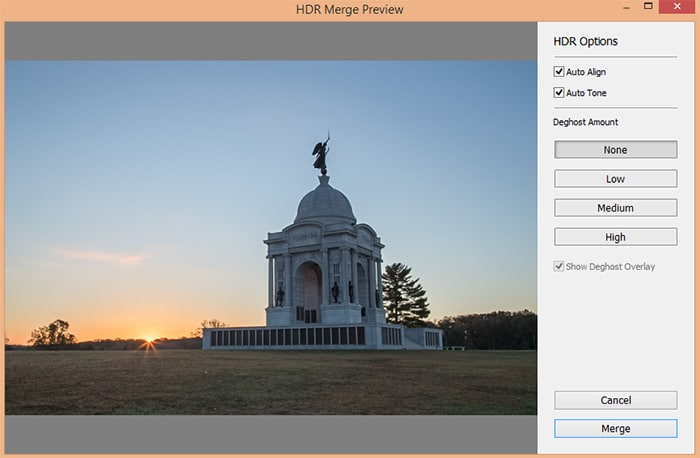
Once Lightroom has completed this step you will see the HDR preview and you will be able to select a few options to the right. Generally you will want to leave the “auto align” and “auto tone” options checked. The other option is the deghost amount. If you have moment in the scene you may need to use a higher deghost setting. In the case of this photo there was no movement, so I can leave it set at “none”. With the “show deghost overlay” box checked Lightroom will show you the areas of the photo that are impacted by using a red overlay.
Step 4: Click “Merge”
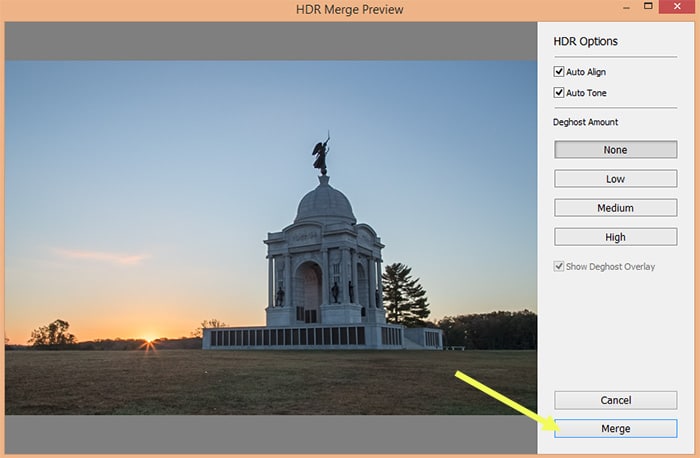
At this point you are ready to continue, so you can click the “merge” button at the bottom.
Step 5: Wait for Lightroom to Merge the Photos
Depending on how many photos you are including in the merge, as well as the specs of your computer, it may take anywhere from a few seconds to a few minutes to complete the merge. While the merge is being carried out you will see a “creating HDR” progress bar at the top.

Once the HDR merge is complete the HDR image will show up as a new photo and it will have “HDR” added to the end of the file name.
Step 6: Process the Photo as Usual in the Develop Module
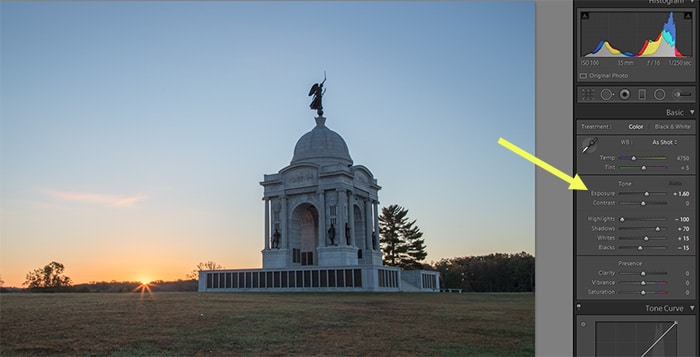
The photos that I used to make the HDR were raw files, and Lightroom creates the HDR in .dng format. It’s nice to have the flexibility of a .dng file as opposed to having the merged HDR image in .jpg format.
Now you can move to the Develop module and process the photo like you would process any other photo. The one difference is that through the HDR merge process Lightroom will adjust some of the settings, so instead of having all of the sliders at the default values some of them will already be adjusted. You can still change these settings if you would like. In this example photo the HDR image has exposure set to +1.60, as well as changes to highlights, shadows, whites, and blacks to increase the dynamic range.
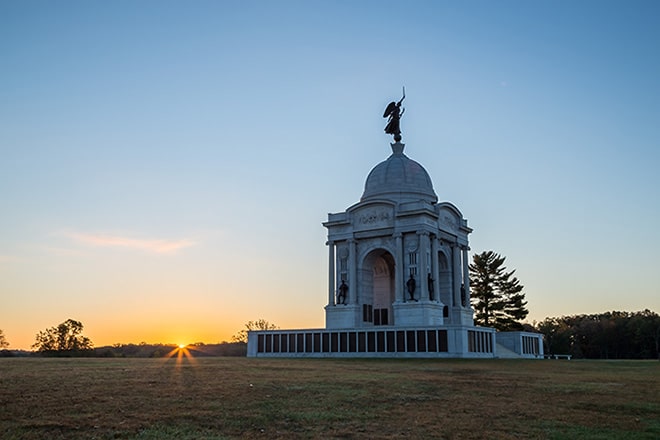
With this photo I have used our Landscape Legend Lightroom Presets for some minor adjustments, and the finished photo is shown below.






No Synchronize before Merge?
Hi Michael,
Are you asking about the auto sync feature to make sure the settings for each photo are the same? I haven’t made any adjustments to the images before the HDR merge so I don’t think it would accomplish anything to sync them first. Maybe I am misunderstanding you.
Hey Marc,
Well written and insightful article. You gave a comparison of different methods to merge the photos with the pros and cons of each method which I liked the most.
Thanks,
Abhinay