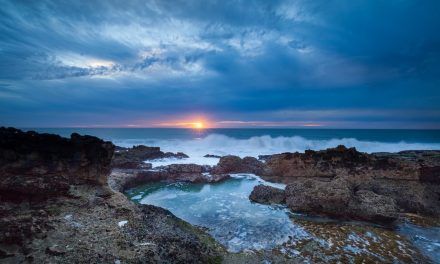
It’s not uncommon for landscape photographers to encounter some windy conditions on occasion. When the winds aren’t too strong, it’s pretty easy to deal with. But, in some instance the winds can be extremely fierce and it makes getting a decent shot seemingly impossible. Luckily, photographers tend to learn how to make the best of bad situations and wind is no exception. Next time you find yourself shooting in wicked winds, you’ll be armed with the helpful tips below to help you overcome it.
→ Related reading: Making the Most of Bad Weather
1. Relocate
Relocate to a spot that features some sort of wind barrier–something like a large boulder, a tree, or perhaps even your vehicle. Really, anything you can stand behind that will help block the wind from rattling your camera (and you). However, make sure you can still get a good composition from your new location. If it’s less windy, but you can’t find an interesting photo to take, you may want to look around some more for another spot. Composition isn’t really something you want to sacrifice!
2. Weigh It Down
Another good option to help reduce wind induced camera shake is to weigh down your tripod. Many tripods feature hooks that allow weights to be easily attached. That’s a convenient feature for a tripod to have, but if yours doesn’t happen to have hooks you can try using a length of paracord or rope to tie down the tripod with rocks, just make sure you don’t over do it and put stress on parts of the tripod that are not designed to be stressed with high weight loads.
In some cases it may be possible to physically hold the tripod by grabbing onto it and pulling downwards to keep it firmly stabilized onto the ground; however, this may end up resulting in additional camera shake if you are unable to hold onto it steadily. I’ve used this method in a pinch, but it isn’t recommenced if it can be avoided.
→ Related reading: 11 Steps to Tack Sharp Landscape Photos
3. Adjust Camera Settings
Now that we’ve discussed a couple ways you can help counteract camera shake, we have to deal with motion blur. In many cases, the wind will be blowing the trees, water, etc, around in your composition. To avoid that motion blur, you’ll need to shoot with a higher shutter speed. To avoid getting underexposed photos when using a fast shutter speed, there are a couple other settings you can adjust:
Aperture: By using a wider aperture, you can allow more light to pass through, to counteract the fast shutter speed. Though this is an effective option, try not to open up the aperture so much that it decreases the depth of field in way that is detrimental to the composition. Remember, a wider aperture generally equates to a more shallow depth of field. Additionally, you can refer to this guide on hyperfocal distance to help you maximize your depth of field at any aperture.
ISO: You can also increase your ISO setting to help you achieve faster shutter speeds, narrow aperture settings, or a combination of both. Using too high of an ISO may introduce noise to your images, but technology is improving and with most modern digital cameras you can still pull off shooting at 400 or even 800 without seeing too much of an impact. There have also been great improvements in software, which help to reduce noise during post production, so don’t be afraid to adjust the ISO if the situation calls for it.
4. When All Else Fails, Wait
Patience is a virtue. Sometimes the wind may very well present itself as an insurmountable obstacle. You’ll need to make a judgement call on whether or not it’s in your best interest to just stick out. If you happen to be dealing with gusts of wind that are intermittent, you may only have to wait a few moments and take a shot in between gusts. Other occasions, you may decide to just pack it up and try again another day. Be sure to make safety a number one priority!
Alternatively, you may also wish to seize the opportunity and see how you can use the wind to your artistic advantage. Get creative and take a few shots to see if you can harness motion blur and turn it into something awesome!
Photo license links: CC BY 2.0, CC BY-SA 2.0, CC BY-ND 2.0


Header photo is well chosen location for windy conditions but the bigger issue here is that you and your equipment will be completely drenched!
You need a weather sealed camera and lens for this one, plus the front element of the lens will be wet, wet, wet whatever you do.
Good luck!
good to know Before going there. Stilla beautiful shot. I like these tips.