
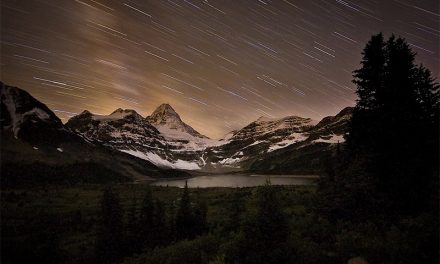
Photo by Anes Mulalic @ 400mm, 1/640s, F8, ISO800.
How many times have you seen a beautiful full moon, so big and bright that you could make out specific features along its surface with the naked eye? If you’re like me, you’ve stopped in the middle of the street more than a few times to admire it and take in the magnificent view. No doubt you’ve even tried photographing the moon, likely with a smartphone or a digital camera, maybe even a DSLR, but ended up disappointed. How could you not, when all you saw in the photo was a white glowing dot that paled in comparison with what your eyes were seeing.
It turns out taking a good photo of the moon is not as simple as ‘point and shoot’, even if you have the right gear. By right gear we’re talking a DSLR (or similar ILC) camera, proper telephoto lens and a tripod at the very least. But if you really want to capture and translate the emotional sensation of beauty you feel when you see it, it takes more than good equipment. That’s why we bring you this practical guide to photographing the moon.
Note that this guide is mainly focused on photographing the moon itself, and not panoramas, landscapes or other types of photos where the moon is only a part of the composition (for more on that topic, see How to Photograph Landscapes at Night). But don’t stray away from experimenting and adjusting these techniques to your needs.
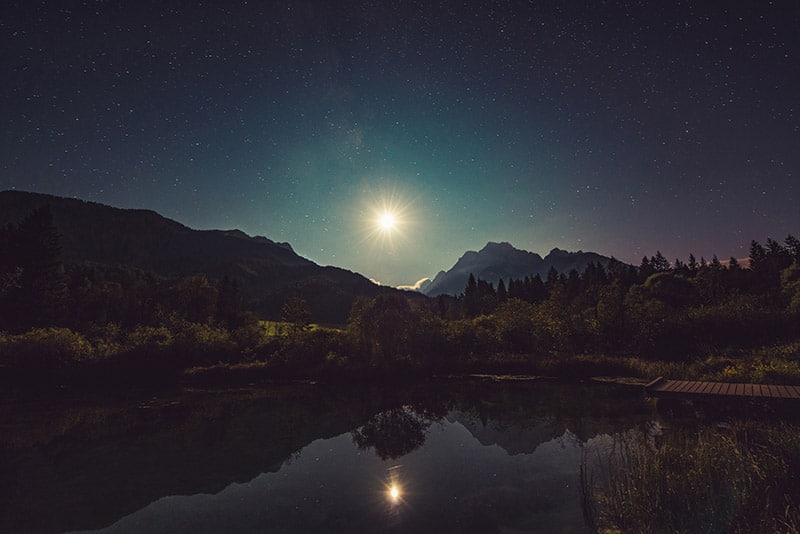
Photo by Ales Krivec / CC0
The Right Equipment
Before we start, I just want to make one thing clear. The moon can be photographed in many ways, including DIY setups such as mounting an external lens on a smartphone, or mounting a DSLR on a telescope. We won’t be covering these techniques in this article. In fact, we’ll be focusing on consumer-level equipment that can be purchased in any regular camera store and used by any photography enthusiast.
Camera
As far as cameras go, you can be relieved, you don’t need the 50-megapixel Canon 5DS or the flagship Nikon D850, though those wouldn’t hurt either. A camera with an APS-C sensor might be a better option here as the crop factor will give you a significant boost in focal length (zoom) of your lens. Canon 80D is a good option, and so is Nikon D7500. Entry-level DSLRs such at the Canon 600D or Nikon D3300 will do the job too.
Ultimately, what matters is that you have an interchangeable-lens (ILC) camera, which can be any DSLR, mirrorless or even a micro four thirds camera. Or, in case you want to make things simple as possible, we would recommend the Nikon Coolpix P900 – a point-and-shoot bridge camera with a ridiculously long optical zoom (83x or 2000mm focal length equivalent).
Lens
When shooting the moon, the lens is much more important than the camera. You’ll need a telephoto lens. For those unfamiliar with the term, without going into technical details, telephoto lens is a type of lens that has a large focal length, larger than the physical length of the lens. Or, in layman’s terms, a lens with lots of optical zoom. This can be a prime lens with a fixed focal length, or a zoom lens with variable focal length. It doesn’t need to be an expensive, fast lens – you’ll get to see why further down the article. Ideally, you’d want a 500mm or 600mm prime lens, but consumer kit lens such as Canon’s 70-300mm will get the shot too. Alternatively, you might want to consider the newest and bravest of Tamron’s consumer telephoto lens – the Tamron 18-400mm F/3.5 – 5.6. It covers a huge focal length range, making it a great travel lens, and giving you an edge for zooming in on the moon with the extra 100mm compared to standard kit telephoto lens (the top photo in this article was shot using this lens).
Tripod
Due to the nature of moon photography, i.e. the moon being 384,000 km away on an average distance, we’re going to use very long focal lengths. Zooming that much is bound to drastically increase the chances of motion blur due to the (un)stability of hand-held shooting. That’s why we’ll be needing a tripod. Any tripod will do, though you should note that very cheap tripods are usually not strong on stability, which could make focusing on the moon more difficult.
Tip: With the camera mounted on a tripod, use the shutter delay option if you don’t have a remote shutter.
Settings
Now, let’s take a look at some recommend settings for photographing the moon.
ISO
Recommended settings: ISO100 – ISO800 (ISO1600)
While ordinarily it is recommended to use the lowest ISO you can, it’s a bit trickier in this situation. We’re going to want to use very fast shutter speeds and narrow apertures to properly capture the moon which will require we pump up the ISO a bit. Don’t worry about the noise too much – we’ll handle that in post-processing. Besides, I’ve found a bit of visible noise adds to the charm of moon photography. If you’re using an APS-C sensor camera, don’t go over ISO800. If you’re using a full-frame, you can go even higher.
Shutter speed
Recommended setting: 1/320s – 1/640s
I’ve seen photographers recommend shooting the moon with 1/125s or similar shutter speeds. At a first glance this might make sense since we’re already using a tripod, so motion blur induced by hand-shake is out of the question, but there’s more to it.
Consider the speed of Earth rotation and the speed of the moon relative to Earth. It might seem like the moon is standing still, while in reality it is orbiting the Earth at a speed of 3683 km/h. I’ve found the best results come from higher shutter speeds, when everything is nicely frozen in a very narrow moment.
Aperture
Recommended setting: F/8 – F/20
Using a narrow aperture (high F number) will help you with two things. First, it will make manual focusing on the moon much easier thanks to the deep depth of field. Second, moon is very far away so a narrow aperture will ensure its nice and sharp.
The narrower the aperture the better, but given that we’re already using a fast shutter speed, if you we would go overboard with narrowing the aperture we’d get a very underexposed image. This would force us to use a very high ISO setting which would bring out too much noise, losing the details in the process.
Depending on the camera you’re using (i.e. how much noise can the sensor handle), you should play with different apertures and ISO combinations and see what produces the best result.
Other Settings
- White Balance: Auto
- Metering: Spot metering
- Image format: Raw
Focusing on the Moon
Manual focus is your safest bet here. You’ll want to use the live screen, if you have one, and the live screen’s zoom function. Alternatively, if your camera has live view contrast-detect autofocus feature, you can use that instead of focusing manually.
Post-processing
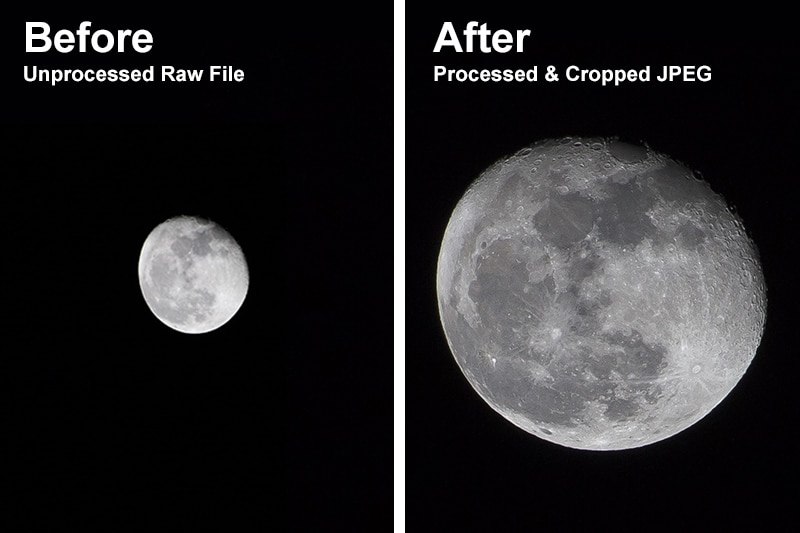
Now that we’ve captured some photos of the moon, don’t be dismayed if they don’t look particularly impressive. Processing them in Adobe Camera Raw (or Lightroom) is where the real magic happens.
Go ahead and open Adobe Photoshop and drag-n-drop your RAW image inside. Next, you’ll see the Camera Raw screen with lots of different settings. You’ll have to play around these until you hit the sweet spot.
Depending on the lens you’re using, you might see some color fringing around the edges of the moon. Use the Lens Correction tab in Camera Raw to correct & remove this colour. In my case, it was green, so I reduced Green Amount to 0.
Tip: In case you want to get as close as possible to the moon, and you’re not planning on printing your photos, don’t be afraid to crop the image. An entry-level DSRL will have something like a 18MP APS-C sensor. That’s a lot of pixels, and even if you heavily crop the image, say reducing the pixel count to 8MP, that’s still more than enough for sharing the photo online, and you’ll end up with a much more impressive, close-up shot of the moon.
There you go, everything you need to know to capture the moon with your camera. Happy shooting!


Well done for writing this article, this is a subject seldom covered and it’s exciting to see it covered!
In addition to all you say, assuming we are talking about a bright mom in clear skies the following basic exposure principles will apply:
@ISO 100 – f8 1/100s with Daylight white balance.
Now as you rightly say one may wish to adjust ones ISO upwards for the sake of increasing shutter speed, however this formula will see a correct exposure every time!
Why?
The distance between the moon and the sun, for all practical purposes, remains the same. This exposure will produce a ‘white with detail’ image of the moon. Ansel Adams would have placed the moon on zone 7, two stops up from mid grey at zone 5.
However I would always adjust the exposure formula for optimal lense sharpness (assuming we have to camera mounted on a tripod.) Optiomal sharpness is usually around 2 stops down from maximum aperture. So is you have a reasonable ‘kit’ lense that is wide open at f4, set the aperture at f8.
Having said that, always experiment with your setting, trying more or less exposure, alternative white balance settings etc, to see for yourself what your equipment can do 🙂
Great article, thanks very much, what a pleasure to find!