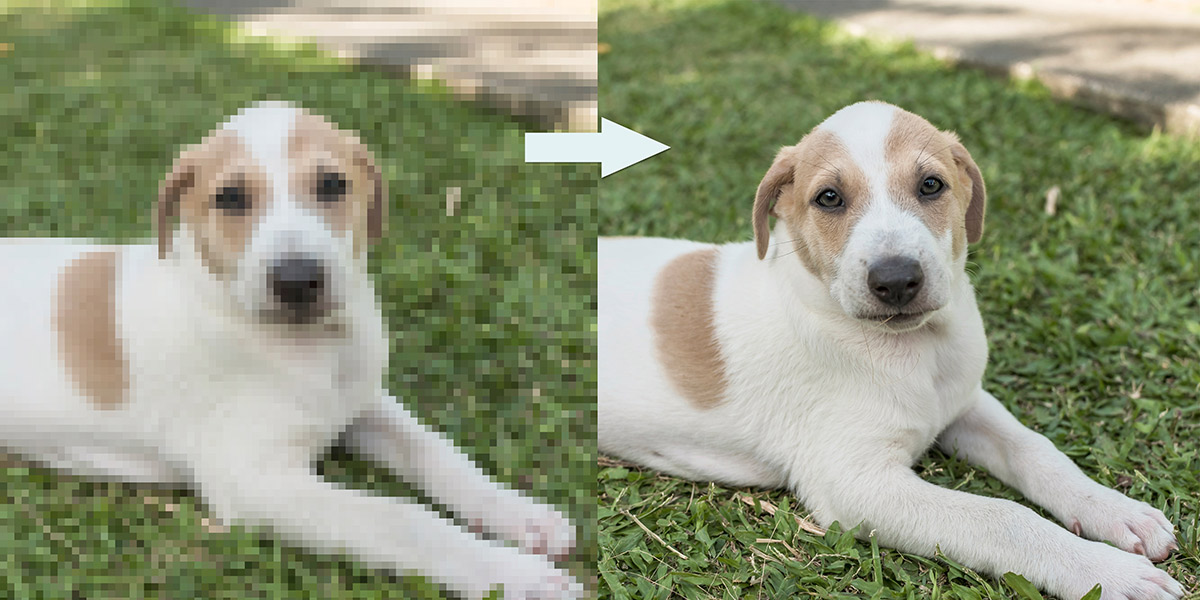
Whether you’re a professional photographer or you’re just fond of immortalizing special moments, it helps to know how to make a picture less blurry. With today’s technology, the process is quite easy.
In fact, you don’t have to be a professional just to learn how to improve blurry photos. With your mobile phone or your computer, you can easily improve the quality of your images.
In this post, you’ll learn simple yet effective tips on improving picture quality.
From using photo editing apps to adjusting your photography techniques, this guide can help you achieve clear photos all the time.
Using Mobile Options
Fixing blurry photos anywhere is possible with today’s apps. You can even add special effects and enhance other details if you want.
Take note that most mobile photo editing apps come with fees. If you are new and you’re still learning how to fix blurry photos, it’s a good idea to find an app that’s free and easy to use.
It shouldn’t give you a hard time figuring out how to increase sharpness, add a sharpening effect, or add artistic effects.
Snapseed
This is a popular picture editing tool available for Android and iPhone users. Here is a quick guide to using this tool:
- Open the Snapseed app.
- Tap the ‘+’ icon and add the image you want to edit.
- Click the ‘Tools’ tab found at the bottom of the application.
- Then click ‘Details’ (shown with an inverted triangle icon).
- Click the selections icon (found at the bottom in between the ‘+’ and check icon.
- A dropdown selection will appear. Choose ‘sharpen’.
- Using the slider, adjust the sharpness of your picture until all blurs are taken out.
- When you are satisfied with the output, tap the check mark found in the bottom right portion of the screen.
The best part? You can download the photo for free and without watermarks!
BeFunky
BeFunky is a free downloadable app you can use for increasing clarity on the go. This tool has various enhancement features to bring polished and professional-looking images.
Use the sharpen tool to bring clarity to the whole photo for standard pictures.
- Open the BeFunky app on your phone.
- Click the Photo Editor option.
- Use the Sharpen tool found in the Edit selection located on the left side of the app.
- You choose ‘Smart Sharpen’ or ‘Sharpen’. The ‘Smart Sharpen’ selection sharpens the significant edges while the ‘Sharpen’ option lets you manually manipulate the sharpness and contrast of the photo.
- Adjust the Amount of sharpness by using the sliding scale.
- When you’re satisfied with the edits, click ‘Apply’ and save the image to your phone.
Note: Before sharpening the photo, it’s best to make all the edits first.
Adobe Lightroom

Adobe Lightroom is no stranger to creating fresh and polished photos. You can get the free version if you’re an Android user and fix your blurry photo in a jiff anywhere at any time!
- Open the Adobe Lightroom application on your phone.
- Click the ‘+’ icon to upload your chosen photo.
- Tap the photo and open the editor feature.
- Click ‘Presets’ located at the bottom of the screen.
- Select the ‘Sharpening’ option.
- A selection of sharpening options will appear. Select according to your liking.
- When you’re done editing, select the check mark found at the top right corner of the screen to save your work.
Using Online Tools
Fotor
Fotor is your one-stop photo editor for fixing blurry photos. With its user-friendly interface, anyone with minimal photo editing knowledge would find this easy to navigate.
Go to the Fotor website, upload the photo, and then edit away!
- Sign in to your account to access all edited photos.
- Find the ‘Open’ icon at the top of the screen.
- Choose and add the image you’d like to sharpen.
- Click ‘Basic’ settings and select from the menu ‘Sharpness’.
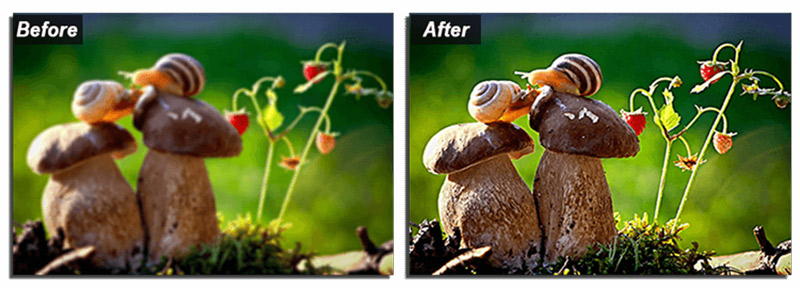
- Adjust the sharpness until you’re satisfied with the output. A comparison view is available to compare the original to the edited version.
- If the edit still falls below your expected result, you can go to the ‘Effect’ settings and use the ‘Tilt-Shift’ and ‘Tilt-Shift Brush’.
- Choose one and select the parts where you’d like to deblur.
- Use the slider to adjust the intensity of the blurring effect.
- Once satisfied with the output, save the photo and download it.
Lunapic
Lunapic is a free online tool to help you create quality and clean photos. You can log in to their website to start editing your photos.
- Go to the website.
- Select the ‘Adjust’ button and then the ‘Sharper’ option.
- Add the photo you’d like to edit.
- Use the button found on the ride side of the panel to adjust sharpness.
- Moving to the ride will make the image sharper, while moving the button to the left will make it blurry.
- When you’re satisfied with the output, click apply, then save the photo.
Pixlr
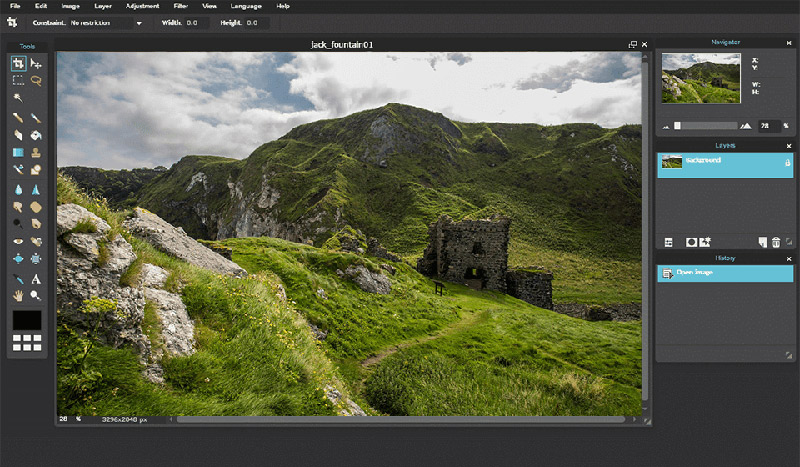
This is a free, web-based online photo editing tool you can use. It has an almost similar feel to Adobe Photoshop, so minimal photo editing know-how can go a long way to make exceptional photo outputs.
- Go to the Pixlr website to access the editing tool.
- Upload the photo you’d like to touch up, then click ‘Filter’ from the selection.
- Choose ‘Sharpen’ to edit the blurry photo.
- When you’re done editing, choose ‘Save Image As’ and select the appropriate format.
Using Desktop Options
Gimp
Gimp is another free online tool you can use to edit blurry photos and instantly make professional and fresh photos.
Its user-friendly interface makes it easy to manipulate any image, even for those with minimum photo editing knowledge.
- Go to the Gimp website and download the application.
- Once downloaded and installed, click CTRL + O on the keyboard.
- Add the photo you’d want to edit.
- Click the ‘Tools’ option, then go to the ‘Paint’ selection.
- Choose ‘Blur/Sharpen’.
- Adjust the image sharpness accordingly.
- When you’re done editing, click the ‘File’ tab and select ‘Save As’ to download the edited image.
Adobe Photoshop
Considered the ‘mother of all editing‘ tools, this photo editing software has been a go-to for many photographers and editors.
For anyone looking for professional output with myriads of editing features, Adobe trumps them all.
Adobe Photoshop is a premium photo editing software that you can download from their website.
- Click ‘Photoshop Elements’.
- Add the picture you’d like to edit.
- Select the ‘Filters’ option and then choose ‘Enhance’.
- Choose the ‘Unsharp’ selection.
- Adjust the amount of sharpness and radium accordingly.
- Select ‘Save’ to store the edited image.
Blurity
This interface is user-friendly and easier to navigate than the other two tools mentioned.
However, it might only have a limited enhancement feature since you can only do present sharpness.
- Go to the Blurity website to download the software. A one-time payment will be required to get full access to its features.
- Once installed, click the ‘Open Image’ button and choose the photo you’d like to edit.
- When the image is already processed, choose the ‘Basic’ or ‘Advanced’ option. The slider found below these selections will help you manually adjust the settings to get the desired effect.
- When you’re done editing, click the ‘Save Image As’ button found in the upper right corner of the screen.
Using Your Camera Settings
Sometimes, the trick is to take better pictures. That way, you won’t have to stress yourself out finding the best app to fix blurry photos and improve the clarity of blurry images.
If you’re a novice photographer, you might be taking blurry pictures now and then. So, how to take the perfect photo without using any tool? Just tweak a few settings in your camera.
Avoid missing out on good shots, and follow these simple tips to make every snap picture perfect!
Holding the Camera Properly
Shaking is the single-most culprit for blurry photos. You can avoid this by holding the camera with both hands, tree branches, walls, or any stable object to have the camera still.
Or better yet, bring a reliable tripod and bring it along for the trip.
Aperture
Finding the right speed may require some art and skill. Using a faster shutter speed, use a larger aperture setting. Play with this until you find a suitable medium where you are satisfied with the output.
Shutter Speed
Finding the correct shutter speed for those using a mobile phone could distinguish between novice and professional photos.
Adjusting to a faster shutter speed setting will improve the sharpness and clarity of your images.
Focus
Adjusting the lens’ focus will help improve the quality of your photos. Autofocus features are available in your mobile phone or camera setting.
However, these are not perfect and will still give you blurry pictures now and then.
Give your camera some time to adjust and focus on the object. Manual shots will often give you polished and quality images. Of course, if you don’t get it the first time, try and try some more until the photos are taken to your liking.
Image Stabilization
More advanced phones usually have an image stabilization feature to prevent blurry images.
Stabilizers may also be purchased as a separate item for DSLR cameras and avoid the camera shake.
Feel free to experiment as you go along and find which method works best for you.
Bottom Line
With these easy tools and camera tips, you don’t have to worry about your photo’s overall quality. You won’t even have to fear getting blurry pictures again.
When you encounter a blurry photo, you know what editing tools to use to ensure you get great and clear pictures every time. Try these tips for yourself and see the difference!
Do you have any tips for fixing blurry images? We would love to hear from you in the comments section!