Photographing water as a primary subject or as part of the story offers limitless, creative opportunities. Over 70% of the earth’s surface is covered in water and there’s anywhere from 50-65% of water within us. As photographers, we see and take images of water in many forms.
From reflections, silky waterfalls, rippling waves, abstracts to seeing to the bottom of the pond, water serves as a picture-perfect subject, stage, and backdrop. Water is one of our most precious natural resources.
In any state, there are no limitations to the vast creativity that you as the photographer can capture and process as your own work of art. Water is both vital for our survival and beautiful to the eyes.
The three states of matter – solid, liquid and gas apply to water. They all look so different that we may not even think about the fact we are simply photographing water. Understanding conditions that create the various states combined with ideas for inspiration will help us take advantage of water’s diverse beauty.
Each of the states produces properties that work as a framing backdrop or main subject.
Taking advantage of water’s diversity is easy, finding your own style and creative composition is where the work begins. It may be slight adjustments of settings is all that’s needed to maximize the shot or choosing a different lens. Other scenarios may call for an extra tool or two.
Water can take many forms and can make a great main focal point, supporting feature, or even a compositional element.
If you are looking to add some extra drama or depth to your image, then water should be the first place you turn. The versatile element can help enhance your images like almost nothing else. With water you can capture amazing reflections, add additional light to a scene, or add a certain mood to a composition–water’s a great way to add a sense of life and drama to an otherwise ordinary scene.
Let’s explore how to creatively and effectively photograph the various states of water using reflections, abstracts, tools, shutter speeds, and lenses.
→ Related reading: Essential Seascape Photography Tips
Different Forms of Water
From snow, rain, and sleet –to rushing waterfalls and the sea, water takes many different forms, and there’s apply opportunity for you to include it in your images.
Simply including water in your images can be a great way to add interest to them, but knowing how to capture it effectively will enable you to use water to drastically enhance your images.
The Ocean
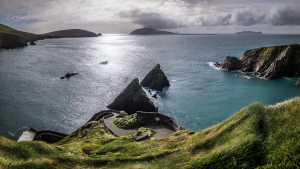
The ocean is undoubtedly one of the most photographed bodies of water, and for good reason. It’s attractive and satisfying to capture and view. It’s also always changing –the view over the ocean looks very different from one day to the next. During the changing of the tides, you can capture some wild and powerful waves as they crash against the rocks. Use a fast shutter speed to freeze the motion of the waves, or a slower shutter speed to gently blur their motion.
Waterfalls and Rivers
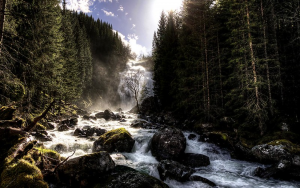
Waterfalls are perhaps the most sought after forms of water. There’s something amazing about standing near the edge of a rushing waterfall and feeling how powerful it is.
When capturing a waterfall, you can use a slow shutter speed to slur the motion resulting in soft, gently blurred water. Or, if you prefer to freeze the movement –use a faster shutter speed. Remember, the longer your exposure the more blurred the motion will be. You may also want to use an ND filter for longer exposures. This will allow you to slow the shutter speed down long enough to capture your image, without letting too much light in.
Lakes and Ponds
Smaller bodies of water, such as lakes and ponds are great water sources –and are often photogenic too! They also present a great opportunity to capture a reflection, since these shallow bodies of water are less susceptible to waves, and tend to be still and quiet. As a bonus, ponds and lakes also attract wildlife, which can add extra interest to your landscapes –if you’re patient enough to wait!
Bonus Tip: Looking to capture reflections? Keep in mind that light reflects differently on different bodies of water. In most cases, you’ll want to look for a surface that’s smooth and use a narrow aperture –something like f/16 to ensure that the entire image is clear and in-focus. But if the surface is choppy, you can always use a tripod and a slower shutter speed to capture reflections that are gently blurred for a more abstract image.
Puddles
Don’t have a large body of water on hand? No worries! Even a puddle can be a great water source. Look for puddles after a heavy rain –they can also be ideal for capturing a tranquil reflection or adding some extra light into your images. Keep in mind that your composition can help you to make the most of the small amount of water. Getting down low to the ground can help you to fill your frame with more of the water, helping it to appear more imposing and dramatic.
Water – Atmosphere
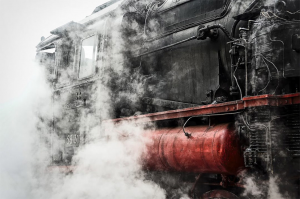
How many time’s have you said, “I’m going to go photograph some gas today?” Probably not often. Water in a gaseous state is identified with steam.
Where to find steam? Anywhere there’s a stove with water to boil, a hot cup of joe, a natural forming hot spring, refineries, and steam trains. Water turns out steam when it reaches 212 degrees Fahrenheit.
Steam trains bring history and a hint of melancholy. The lines and curves of heavy steel and forged metals gleam through the steam. Peter Drach’s isolation of the color red in post-processing with the use of black adds the vintage perspective to the image.
Optimize the appearance of steam both indoors and out by the use of backlighting or side-lighting with a contrasting, darker background.
Water – Solid States
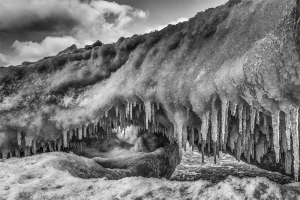
Water in a solid-state has many different appearances. Clear ice, colored ice, ice in a glass, icicles, snow, and ice formations are examples. In solid sates, water can show itself in many textures, densities, and formations.
The image below was taken on the winter beach of Lake Michigan. It doesn’t really look like a beach in the traditional sense. The ice shelf also had a small ice cave with stalactites. A super-wide angle lens provided an up-close look to the icicles that looked like the ‘teeth’ of the cave.
The black and white, along with heavy usage of the clarity and contrast sliders in Lightroom CC accentuated the harshness of the ice.
Ice in a solid-state, such as the ice shard below was taken with a macro lens. The image worked well in both color and black and white. In the end, I chose black and white due to the silver-like tones.
Water – Liquid States
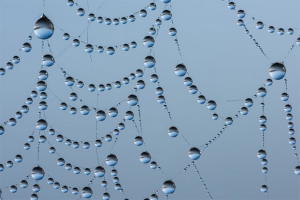
Water gleams, glistens and sparkles. Droplets on a spider web look like jewels in the morning light. When photographing in the early hours or low light conditions, a tripod and shutter release is recommended. These tools help provide sharp, sharp images. Take advantage of the camera’s LCD screen to inspect the overall composition too.
Water as a Mirror
While the eyes are the mirror of the soul, water is a mirror for nature. To create images that have reflective properties, all you need is a willing subject or imagination.
Using a large depth of field (large f/stop number) will maximize the larger view and big perspective.
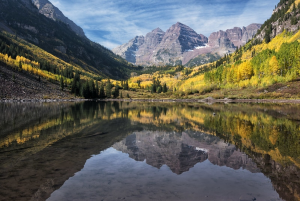
Majestic mountains reflected in still pools immediately come to mind. For a mysterious and calming touch, amethyst hues during the blue hour illuminate the ripples caused by the light breeze.
Still streams and ponds with heavy cloud cover surrounded by rich colors travel into the distance.
In addition to the traditional reflection image, watch for water surfaces bathed with colors and abstract shapes. With a light breeze and shade, combined with the surrounding foliage, a slightly mysterious watercolor effect was the outcome.
Night reflections on water equals mood, romance or even a sense of mystery.
→ For more please see Using Reflections in Landscape Photography.
Beneath the Surface
While water reflection photography shows what is on top of the water, interesting shapes, colors and life are underneath the surface.
A Circular Polarizer (think sunglasses for your lens) filter placed on the front of your lens will eliminate glare and reflections from the water’s surface so that you can see underneath.
Smooth and Silky
A favorite for many photographers is water images where a creamy, silky effect is created by using slow shutter speeds. Two tools are always needed to maximize image quality when using slow shutter speeds. 1) A sturdy tripod and 2) remote shutter release.
Additionally, the time of day and lighting will also determine if a filter is needed. Before sunrise or after sunset, the lighting may allow for slow shutter speeds from 1/2 second and longer.
When the lighting conditions are too bright for the needed shutter speed, I’ve used circular polarizing filters and also neutral density filters.
The Smoky Mountain waterfall was taken at about nine in the morning. The lighting was filtered by many trees, but still too bright for the desired shutter speed. By using a B+W 6-stop equivalent neutral density filter on a Nikon 28mm 1.8 lens, the shutter speed was 8 seconds.
Before sunrise in Nags Head, a picture-perfect blue hour provided soft, low light. With the low light, a shutter speed of 1.3 seconds was all that was needed to show soft water movement and the diagonal patterns left in the wake. The lens was a Nikon 14-24mm with settings of ISO 125, f/20, 20mm. Tripod and cable release was used.
→ For more please see Guide to Long Exposure Landscape Photography.
Water’s Rush
When photographing water, whether it’s waterfalls, streams or waves, don’t stick with one effect or even one type of lens. Alter your composition, lenses, and settings to capture the water’s power. The morning waves (and I) were being blown by stiff fifteen to twenty miles per hour winds.
Each wave’s crest glimmered in the golden-hour sun. The wind created a dense mist that intermingled with the wave’s splash.
ISO was raised, shooting at 1/250 second at 200mm using a 70-200mm 2.8 lens. As there was still too much in the overall image, I cropped out a bit of the distracting foreground to hone in on the wave’s depth.
Mist & Fog
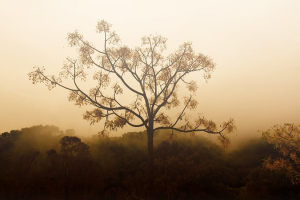
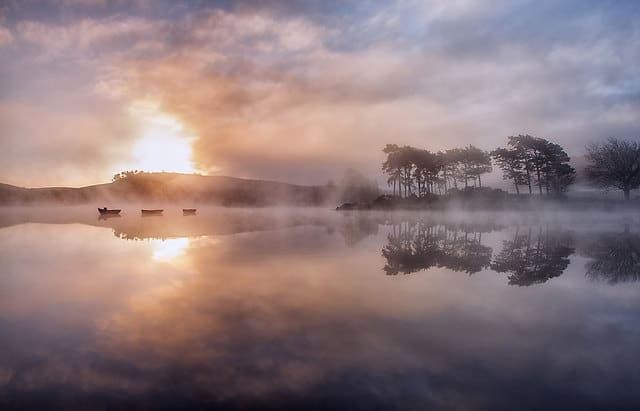
Mist and fog consist of a varying density cloud with tiny water droplets hanging in the atmosphere.
While mist and fog are used interchangeably, there are differences. The density of fog and mist is different. The visibility in the mist is greater than fog which is denser.
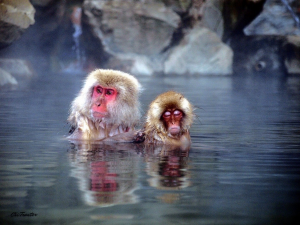
The snow monkeys in the mist with their bright colorful faces almost look human. When photographing in a zoo, the subjects are not going to go very far. This provides extra time to inspect your images during shooting time to avoid the hand of man in the background.
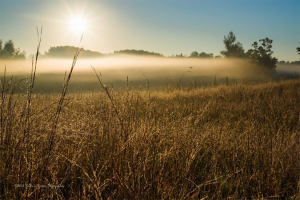
Conditions for natural forming mist can occur when the air is cooler than the earth. When this happens, it’s common to see mist hovering over low orchard fields, ponds, and streams.
Mist and fog can help add a certain mysterious or ethereal feel to your images –and are great opportunities for capturing some beautiful images. Sometimes, you may have some unexpected fog roll in late in the afternoon, but in most cases, morning is the best time for capturing predictable fog.
For normally appears when there’s a fluctuation in the temperature, like when the morning sun comes up.
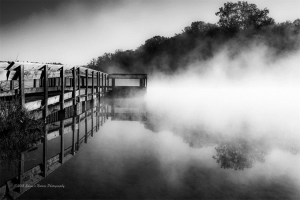
When post-processing your images and the mist/fog is not quite as dramatic as you were expecting, try processing in black and white. Push the clarity and contrast sliders to the far right to maximize texture and then all the way to the left to soften the appearance.
Photographing mist early in the morning, late in the day is made hazier, soft and more dense with long exposure. Shorter, fast exposures show texture and actual density.
In most cases, you’ll want to check the weather forecast the night before, lookout for a clear morning following a cold night.
→ For more please see How to Photograph in Mist & Fog.
Using Water to Add Light to Your Images
One of the great things about photographing bodies of water –from the sea, all the way on down to puddles, is that it can be a great way to add some additional light into an image. This is especially useful when photographing during the evening –or say, golden hour, when the sky may be bright, but the foreground often tends to be dark. By incorporating a body of water into your images, you can help to add some much-needed light back into your image.
Two guiding principles in water photography:
- Use settings and brighter light conditions that enable fast shutter speeds to capture fast action such as water splashes, droplets.
- For softer images, use lighting, settings, and tools such as filters that support slower shutter speeds.
To maximize shooting time in either case, bracket your photos (BKT) to get multiple shots of the same image using faster and slower speeds so that you’ll have plenty to choose from.
Safety Tip: When watching the weather to go photograph fog, take the necessary precautions with driving plans. Photographing fog over water, mountains are relatively safe. Driving through fog can be very dangerous.
As you can see, there are a number of different ways that water can benefit your images. When you’re out with your camera, look for water that you can include in your scenes –and enjoy capturing spectacular images.
Photo license links: CC BY 2.0, CC BY-ND 2.0


