With any kind of job, there are always health and safety issues that might come up. Many of them may not even be obvious until you really think about it. As a photographer, particularly if you work freelance, there is often no managerial structure in place to warn you about hazards and stop you from working in an unsafe manner.
Follow these safety tips to ensure that you keep yourself safe even as you take your landscape or nature photographs.
1. Watch the Ground
No matter where you are or what you are taking photographs of, be sure to watch the ground. It’s not uncommon for photographers to walk forwards and backwards with the camera to their face, trying to get the perfect distance for the shot.
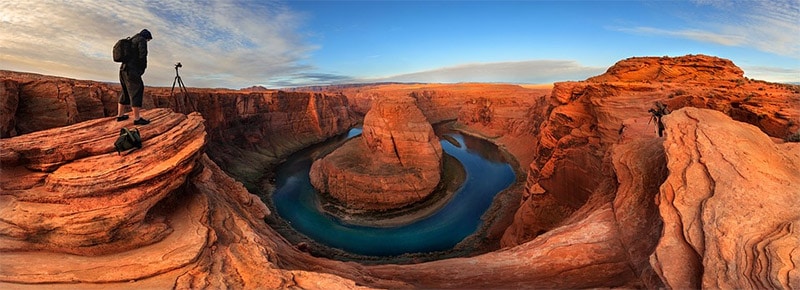
But if you don’t keep one eye on the ground, you may find yourself getting injured. When you start to photograph, be sure to sweep the area visually and make a mental note of dips, holes, edges, and so on that you could potentially walk into.
2. Keep Your Distance
When photographing animals, particularly wild animals, it’s usually best to use a telephoto lens and stand as far away as possible. This is not just a case of looking after your own safety – it’s also possible that animals could be attracted to your camera and could damage it in some way. Whether dealing with lions, elephants, or animals that aren’t normally considered dangerous, it’s best to play it safe and keep your distance.
3. Leave an Itinerary
When heading out on a trip, create an itinerary which details where you are going and for how long, as well as the routes you will take. While you will need a copy with you, you should also leave a copy behind. Why? Because if your vehicle breaks down in a remote area with no phone service, you could be waiting for a long time for someone to find you if they don’t know when you should be back or where you went.
You should plan a check-in time with someone you know, at a point which is far beyond where you would expect to be able to call them or return home, so that they can raise the alarm if you don’t make it.
4. Plan for All Weather
When out on a trip, even if you’re just going for an hour or two, always plan for all kinds of weather. Forecasts can be wrong, and weather can change quickly.
If you get broken down somewhere as in the above example, you could be stuck for a while. Pack at least a coat which can be used to protect both yourself and your camera from a sudden downpour. Umbrellas, hats, plenty of water bottles, and snacks are also a good idea. Depending on the part of the world you are in, sunscreen and handheld fans might be needed for heatwaves.
5. Bring a Map
Technology may be an amazing thing, but it is not impervious to failure. If you’re out on location looking for a specific landmark, and your phone has no service, how are you going to find it? Bring an actual physical map with you, and learn how to read it. This will help you no end when you lose service or your phone runs out of battery.
6. Do Some Research
Before you head out to shoot, do a bit of research about the area you are heading to. What kind of animals live wild there, and what do you need to look out for? If you are going to an exotic area, are there any poisonous animals such as snakes or insects to avoid? Do you need protective clothing of any kind?
Check for information about hidden sinkholes, sudden cliffs, and other hazards that spring up in wilder landscapes. You should also find out about hiking trails which you can follow in order to stay safer.
→ Related reading: 7 Sites and Apps for Researching and Scouting Photography Locations
7. Carry a Survival Kit
Wherever you are going, and especially if you are going to be out for more than a couple of hours, take a survival kit. This should include a basic first aid kit, snacks which are good for energy, tools for building a fire, a waterproof poncho or sheet, and water bottle.
You should also think about including specific safety tools depending on what region you are in – for example, hiking to photograph desert canyons will require different survival items than trekking through the rainforest.
8. Check the Permits
Though it may not exactly concern your physical safety, there may be legal repercussions if you do not have the right permits to shoot in certain locations. There are some places where you will need to apply for a permit and pay a fee if you want to take photographs; in others, photography may not be allowed, perhaps for cultural or spiritual reasons. You may also need to carry identification and other documents on your person to prove to anyone who may wish to check you on your way.
9. Bring a Guide
If you are going somewhere truly risky – like the aforementioned desert canyons, a mountain peak, or a remote part of the world which is detached from civilization – then you should bring along a guide. This guide should be well-traversed in the area, knowing where to go and where to stay away from. They should also speak English as well as whatever the local language may be, to help you communicate with others and stay out of trouble. Pay them to accompany you for the whole trip – and they may be able to make themselves even more valuable by pointing out the most beautiful vantage points.
There are lots of things to think about when photographing landscapes and nature, and as a photographer, it’s common that you would just focus on the creative points. Taking care of your safety, however, will ensure you can return to take many more photographs in the future.





That was a great article! Thanks, Rhiannon. It is easy to get caught up in having that ‘perfect’ shot that we may not be looking out for our own safety. Appreciate the reminder!
I would add, if you’re hiking a trail in an area, especially in an area where there are several, leave a note on your dashboard, easily visible, saying which trail you’re hiking.
That’s a good idea. Thanks!