
Recently we released a free Old Film Photoshop Action (courtesy of our friends at Shutter Pulse) that makes it easy to give your photos a nice aged-film look. Actions are a great way to speed up your workflow, but they shouldn’t replace the need to understand the ins and outs of Photoshop. Today we’ll walk through the process of creating this old film look from scratch. The settings and adjustment layers used in this tutorial are the same ones used by the Old Film Photoshop Action. Let’s get started.
If you don’t already have Photoshop you can download a free trial here.
Here is a before version of the sample photo that we’ll be using for the tutorial. If you want to work along with the same photo you can download it here from ISO Republic.

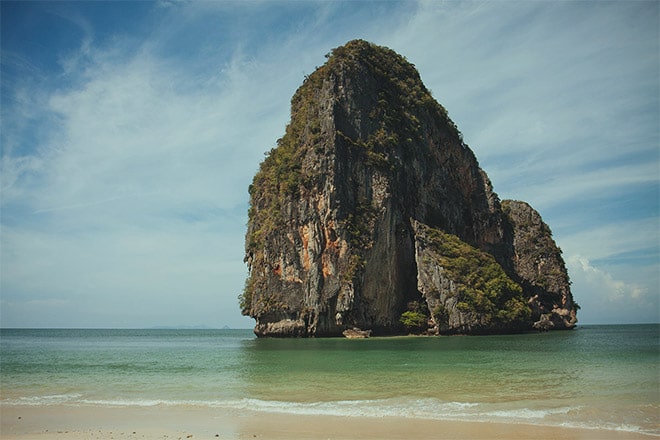
And here is a preview of the end result:

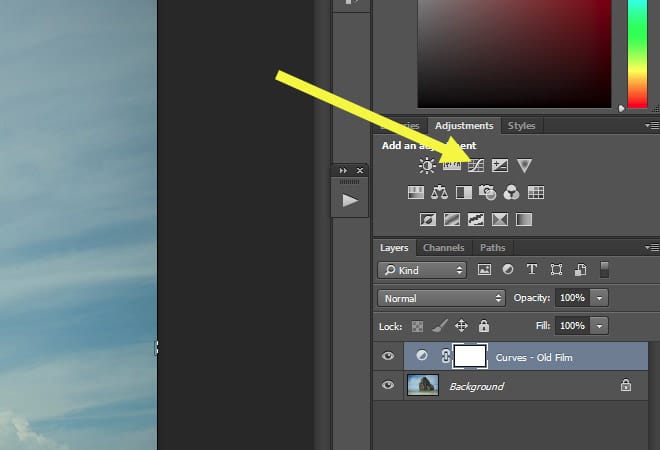
The first step is to add a curves adjustment layer. You can do this by clicking on the curves icon under “adjustments” at the right side of the screen.
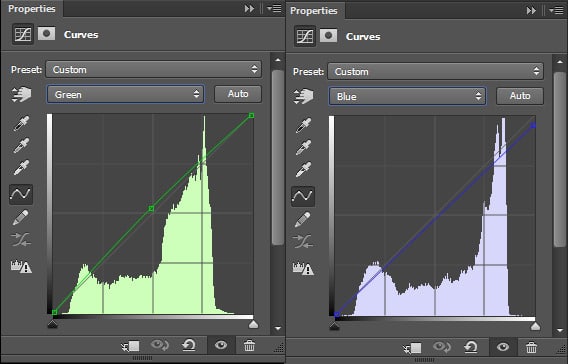
First we’ll adjust the green and blue curves. Give the greens a small lift near the middle of the curve. For the blue curve, drop the right end point just a little. Make your curves resemble the ones shown below.
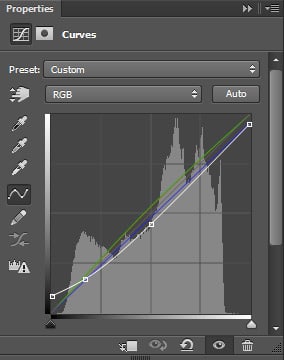
Next, adjust the RGB curve by lifting the left end point, like the curve shown below.
Now that we’re done with the curves we’ll add a black and white adjustment layer. You can do this by clicking on the icon shown below.
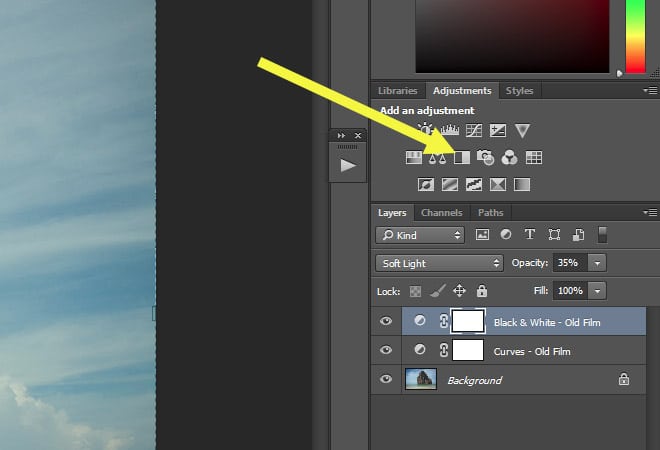
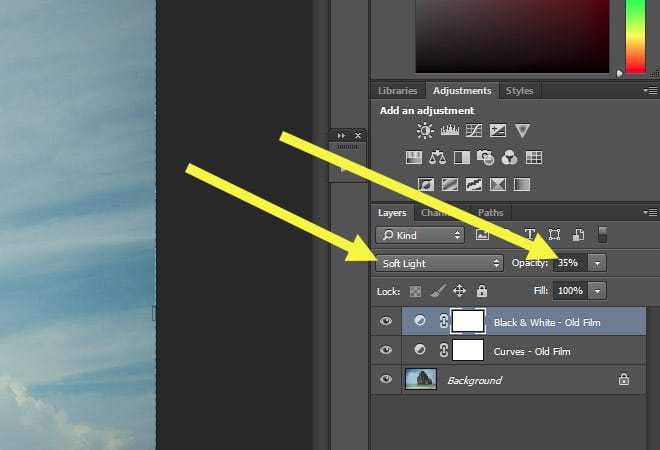
Change the blend mode of the black & white adjustment layer to “soft light” and set the opacity to 35.
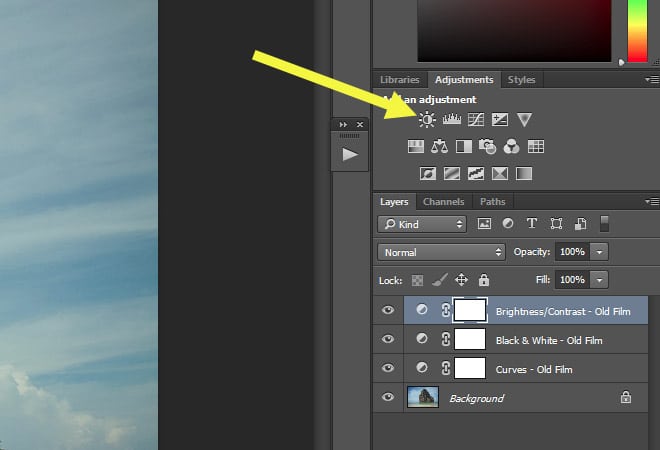
Next, add a brightness/contrast adjustment layer by clicking on the icon shown below.
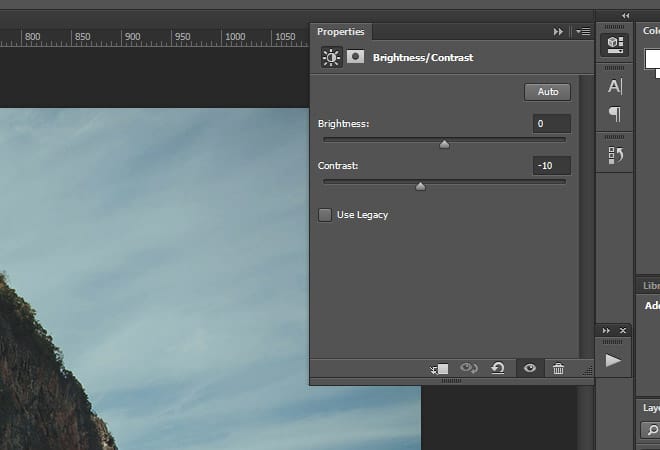
Then change the contrast setting to -10. This is a subtle change, but it will help to give the photo that aged look by reducing contrast.
At this point our work in progress photo looks like this:
Next, add a vibrance adjustment layer by clicking on the icon shown below.
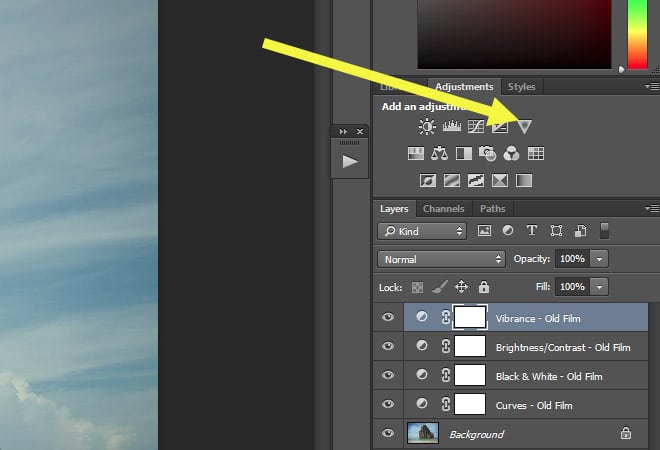
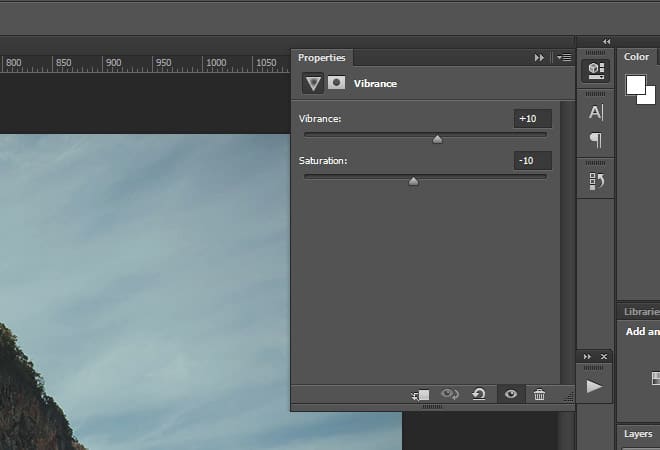
We’ll make another subtle adjustment here to help with the aged look. Set vibrance to +10 and saturation to -10.
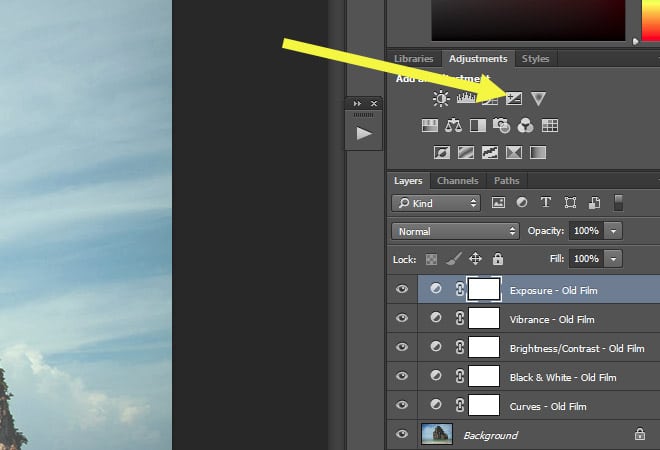
The last step is to add an exposure adjustment layer by clicking on the icon shown below.
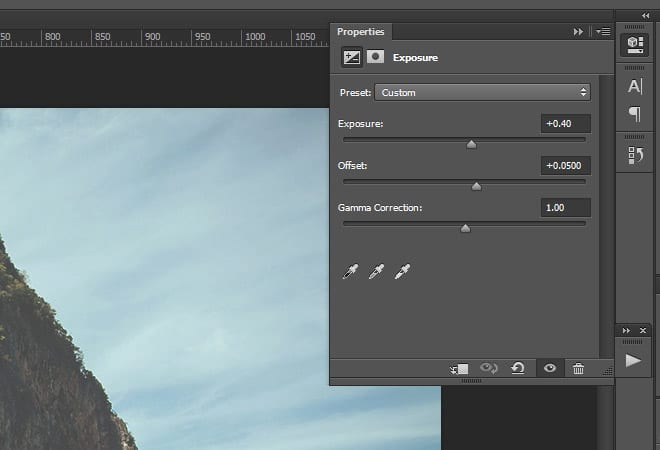
Set the exposure to +0.40 and offset to +0.0500, which will lighten the photo.
And the end result is:
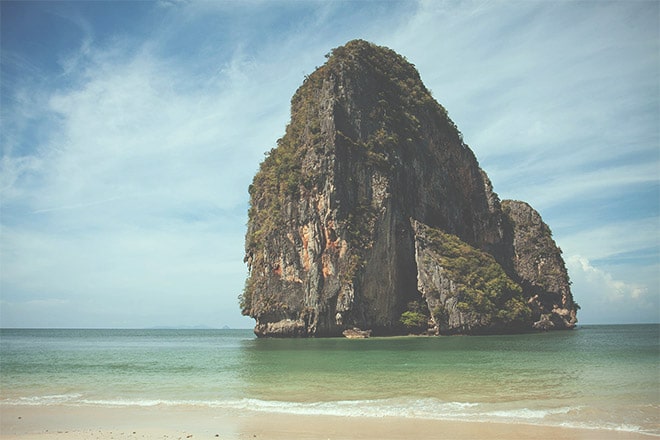
Of course, the specific settings that you use may vary from one photo to the next, but the settings here will give you a good starting point. Don’t forget, if you want to get this old film look very quickly and easily you can get the free Photoshop action here.





Thanks for this awesome tutorial! Time ago I discovered PsdFilm to emulate vintage films within Photoshop.