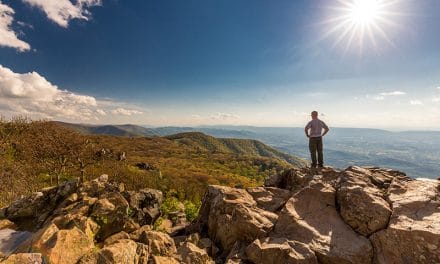
by Sheen’s Nature Photography
Exposure compensation is a powerful tool used for subtle adjustments or dramatic effects. The right exposure is subject to the preferences of the photographer and the viewer. Determining whether the image should be darker, lighter or true to the actual scene is an art and a science.
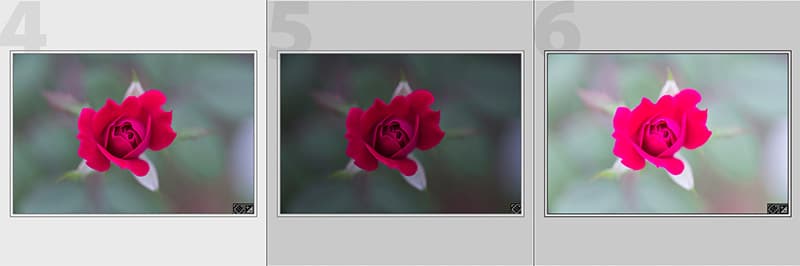
The three raw files of the rose below were taken using the same f/stop, in this case f/4. ISO was set at 500. These files had not been processed in Lightroom yet. The exposure of each image was changed by adjusting the shutter speed using exposure bracketing which we’ll cover below. The first file was the baseline using my selected settings. This was followed by two images with increased and decreased shutter speeds.
by Sheen’s Nature Photography
Which rose would you select to process? Why?
We’ll provide an overview of the basic exposure fundamentals and how exposure compensation works.
What is the Difference Between Exposure and Exposure Compensation?
Exposure is the amount of light that reaches the sensor based on your combination of: a) lens aperture – how wide or small the lens opening is based on the f/stop selected, b) shutter speed – the amount of time the shutter is open and c) ISO – sensor speed or sensitivity to light. These three elements are commonly referred to as the Exposure Triangle.
When an adjustment is made in one of the Exposure Triangle’s elements, it will impact the others.
- Increasing ISO will increase shutter speed. Decreasing ISO will slow the shutter speed.
- A wide aperture, which is a low f/stop number increases speed. A small aperture, which is a high f/stop number decreases speed.
- Increasing shutter speed reduces the amount of light since the shutter is open for a less amount of time. Reducing the shutter speed allows more light in, brightening the image.
It takes practice balancing these elements. Another tool that complements this combination is Exposure Compensation.

by Sheen’s Nature Photography
Exposure compensation allows the photographer to adjust the exposure of the selected settings and the camera’s light meter. The basic function of exposure compensation is to increase or decrease shutter speed.
When shooting in aperture priority mode, exposure compensation will adjust the shutter speed. With shutter priority, the aperture (f/stop number) changes. In manual mode, the exposure compensation button is no longer active. The meter is moved to the positive or negative by adjusting the ISO, aperture and shutter speed.
Case study: The black swallowtail butterfly pictured above was constantly flitting his wings. A shutter speed of 1/2000 was needed to freeze the butterfly in action. The afternoon light was fading quickly while I was shooting. I used a big aperture (f/3.2) with my ISO set at 500 to compensate for the low light. I moved my exposure compensation the left by one stop which increased my shutter speed to 1/2000 seconds.
How Exposure Compensation Works
Exposure compensation settings are stated in terms of exposure value numbers (EV numbers). Values range on from EV +5.0 to EV –5.0. When the EV is increased to the positive, the exposure is brighter and the shutter speed is reduced. The lower the EV, the shutter speed is faster resulting in a darker photograph.
Depending on your camera model, there is an exposure compensation button that can be pressed while moving one of the camera dials. You may need to check your camera manual for specific instructions.
Each camera reads a scene a little bit differently. As a photographer, we have individual preferences of how we want our images to feel versus how our camera reads a given scene.
Exposure Compensation is an effective tool for our own expression and preferences.
Exposure Bracketing: Exposure Compensation on Steroids
Exposure bracketing takes three or more consecutive photographs of the same scene using different exposure settings. One image will be captured at the camera’s settings, one will be brighter and the other darker as in the three roses above.
By having multiple exposures, there is more to choose from in post processing. Multiple exposures of the same scene can also be processed using HDR.
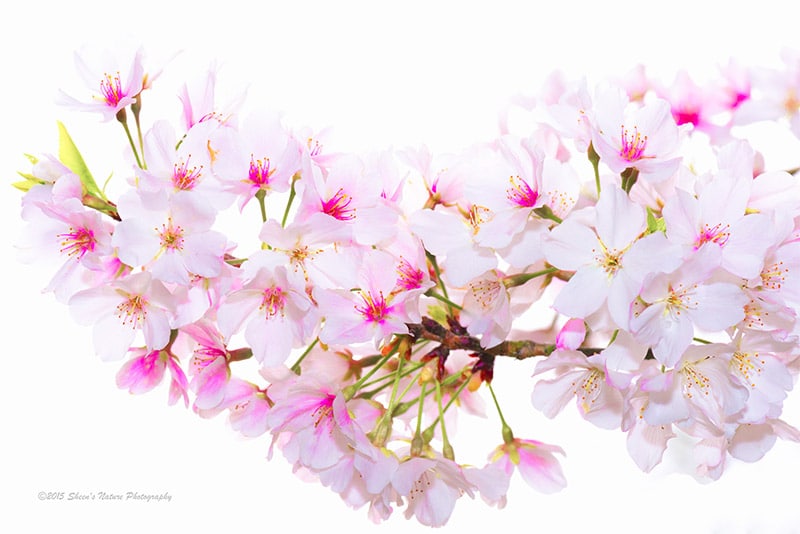
The cherry blossoms below were a bit overexposed with a few blown out highlights. This image was one of three exposures. Instead of processing in HDR, I selected the brighter image and applied post processing creativity with exaggerated highlights and whites.
by Sheen’s Nature Photography
For more information on Exposure Bracketing: Introduction to Exposure Bracketing.
Don’t Forget to Check Your Work As You Go!
Take periodic reviews of your histogram to check your work. Even when shooting fast moving objects, stop for a quick breather to check your exposure. This will help ensure that you have multiple images to choose from in post processing.