The filter factor! As photographers we all want to spend time in the field creating beautiful, impactful images. Filters can play a significant factor in making that happen. Photographers almost universally agree that lighting is extremely important, if not the most important element. Lighting brings out detail, frames our subjects and plays a major role in our composition. The right lighting when combined with good composition and techniques, makes our images shine. When the lighting doesn’t work, many of those files end up being dropped quickly into the digital dumpster. The use of filters provides additional creativity and management of light.
There are several types of filters to choose from including:
- Circular polarizing filters
- Neutral density filters
- Graduated neutral density filters
- Warming/cooling filters
There are also other specialty filters that are available by various filter manufacturers. We’ll review the four types of filters mentioned above. Photography tips and buying considerations are also included.
Circular Polarizing Filters
Known as ‘polarized sunglasses’ for your lenses, a circular polarizer will be used many times over. Just as your line of sight is impacted by polarized sunglasses, the same thing happens with a circular polarizing filter. Colors become more vibrant and saturated. Clarity and details are more visible. Glare is significantly reduced.
The amount of saturation can be dialed by rotating the filter from neutral to more polarization. While rotating the filter simply observe the saturation of the colors and stop rotating when you have achieved the desired appearance.
The sunflowers below were captured using a polarizing filter with a 50mm lens. The filter brought out the details of the flowers, the vivid yellows and greens along with the heavy clouds in the background.
Harsh rays are effectively diffused with a polarizing filter when used later in the morning and during the brightest times of the day. What may appear washed out and boring without a filter becomes a bright, colorful image. Skies become brighter, clouds have more detail. Since glare is reduced with a circular polarizing filter, under water details can be photographed.
In essence, a circular polarizing filter can technically ‘extend’ your photography day.
Neutral Density Filters
Create silky, buttery waterfalls and water images. Add motion and movement with the gentle blur of long exposures. Add artistry, drama, softness and feeling.
Neutral density filters provide the photographer an easy to use, artistic tool. The gray glass reduces the amount of light that passes through the lens to the sensor without changing the color of the light or subject. The shutter speed is reduced based on the density or darkness of the gray glass.
Neutral density filters also allow for slower shutter speeds at wide apertures. This provides photographers with creative latitude. An example would be being able to leverage a shallow depth of field in brighter lighting.
Neutral density filters are available in multiple density levels. The darker the gray, the lesser the light, which requires a slower shutter speed. When working with darker neutral density filters 1) switch to manual focus and 2) set your camera to manual to better control shutter speed.
→ Related reading: Guide to Long Exposure Landscape Photography
Working with neutral density filters is trial and error. Practicing in various conditions is recommended. Since the amount of light passing through to the sensor is reduced, a tripod and remote shutter release is highly suggested to maintain a sharp image.
The pier below in Avon, North Carolina was taken after sunrise. Even though it wasn’t overly bright, a neutral density filter was needed to add some silkiness and texture to the water.
Graduated Density Filters
As a neutral filter reduces the same amount of light over the entire image, a graduated neutral density filter blocks some of the light. The filter begins as clear glass then fades to darker, neutral density grey glass. Graduated neutral density filters balance lights and darks in an image such as a bright sky and dark foreground. Place the clear glass over the dark area and the darker gray over the brighter area.
Graduated filters can be purchased as a hard edge or soft edge based on your preference.

by Sergio Tudela Romero / CC B Y 2.0
Cooling & Warming Filters
Warming and cooling filters are also available. They are used to compensate for the various differences in the photographed color of light. For example, a warming filter reduces the cool color cast of some film and digital cameras.
As a result of powerful post processing software and temperature color correction/modification, these filters are not as widely used.
Selecting filters & brands:
Selecting:
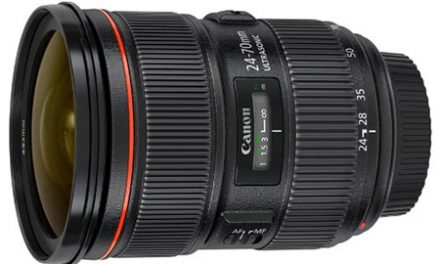
Filters are purchased by filter size. Different lenses have different filter size dimensions. Check your lens specifications before ordering your filter to ensure you purchase the correct size. As filters can be costly, you may want to begin with your most used lens for landscapes and outdoors.
Another option is to buy a step up adapter ring for your lenses that have a smaller thread size. The potential downside is that your lens hood may not work with the adapter and larger filter attached.
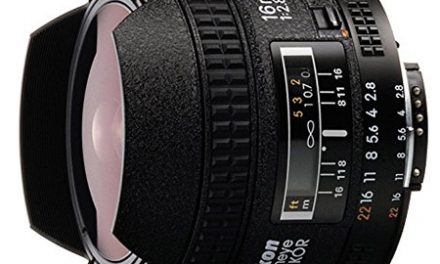
Extra-wide lenses such as Nikon’s 14-24mm 2.8 and others require a special ring and filter that is available by Lee. Their quality is outstanding, however it is an investment to acquire the ring, adapter and filters.
Brands:
There are several brands to choose from. These include but are not limited to: B+W by Schneider Optics, Hoya, Lee, Singh-Ray, Heliopan and Tiffen.
Photography tips and reminders when working with filters:
In closing, here’s a list of tips when working with filters:
- Check your settings via the camera menu to ensure the in-camera long exposure noise reduction setting is turned off. If this is turned on, it will take the camera roughly the same amount of time to write the image as it did to take the photograph.
- Depending on the density/darkness of the neutral density filter, you may need to focus on your subject, switch to manual mode and then gently place the neutral density filter on the lens. A tripod and cable release is highly suggested to minimize any shutter shake.
- When situations call for a tripod, remember to turn off image stabilization.
- Avoid light leaks into the sensor by placing a a light cloth over the viewfinder’s eye piece
- Avoid touching the filter glass and keep it clean as you would your lenses. I always keep a bubble blower in my carry bag to blow away dust too.
- When not in use, keep filters clean and scratch free by storing them either in the container they came in or a filter case.


Good tips at the end, and great overview of ND and polarizer use. Do you have any that are further depth on use of the ND filters? Thanks in advance. Liz
Hi Liz,
We have a detailed guide on long exposures (https://loadedlandscapes.com/guide-to-long-exposure-photography/) that covers more on how to use ND filters for your long exposure photos.