Lightroom’s graduated filter tool is an invaluable resource when processing landscape photos. With the graduated filter tool, you can make selective adjustments that impact a certain part of your photo without impacting other parts.
For example, if you wanted to lighten the foreground area below the horizon without impacting the sky.
The graduated filter tool is fairly simple to use, and in this video, Simon Plant covers the basics of the tool, how it works, and shows examples in real-world situations.
Want to learn step-by-step how to effectively process your landscape photos in Lightroom? See more about our video training course Lightroom for Landscapes.
Be sure to subscribe to Loaded Landscapes by email or to our YouTube channel to make sure that you don’t miss future video tutorials.
→ Related video: How to Use Lightroom’s Radial Filter to Enhance Your Photos
Some notes regarding Lightroom’s Graduated Filter:
- Use the keyboard shortcut “M” to access the graduated filter tool.
- Hold the shift key while dragging to keep it level.
- Use the keyboard shortcut “H” to hide the pins and lines while previewing your image.
- You can use multiple stacked graduated filters on any image.
Customize the Effects of Lightroom’s Graduated Filter
The graduated filter tool in Lightroom is extremely useful for landscape and nature photography. You can use this tool in a similar way that you would use a graduated neutral density filter on a lens, to balance out the exposure of the image. It’s common to have a scene where the sky is much lighter/brighter than a dark foreground, and Lightroom’s graduated filter can really make a big difference by balancing out that exposure.
The problem with the graduated filter, or even a graduated neutral density filter attached to your lens, is that the gradient is totally linear, and the subjects of your landscape photos will very rarely involve only straight lines. For example, there will often be trees, mountains, cliffs, or even man-made structures that jut into the sky in your photos.
If you are using a graduated filter to darken the sky you will wind up darkening everything above the horizon, including things like trees that you may not want to darken. Also, the horizon is rarely perfectly straight.
Related video: How to Use Lightroom’s Graduated Filter
Fortunately, in Lightroom, it is very possible to customize the effects of a graduated filter so that it only impacts the right parts of your photos. The end result is a much more natural look, rather than being very obvious that you used the filter.
In this video, Simon Plant demonstrates how to brush out certain parts of the graduated filter to get this customized effect.
If you don’t already have Lightroom you can download a free trial here.
7 Simple Ways to Improve Landscape Photos with Lightroom’s Graduated Filter
Lightroom’s graduated filter is an incredibly powerful tool for landscape and nature photographers. With the help of the graduated filter, you can make selective adjustments that impact only the parts of the photo that you want to impact, without impacting the other parts to you want to leave untouched.
There are a lot of different ways that you can use the graduated filter. The more you use it, the more comfortable you will get with the tool. You’ll find that it becomes a very important part of your workflow for processing landscape photos.
If you want to make the process even easier you can pick up our Landscape Legend Lightroom Presets. Landscape Legend includes graduated filter presets that allow you to do all of the things shown in this article. If you don’t have the presets you can still do these things manually, it’s just not as quick as it would be with the help of the presets.
1. Lighten or Darken the Sky
Probably the most basic use of the graduated filter is to replicate the effect of using a graduated neutral density filter in the field. Graduated neutral density filters are often used to prevent the highlights in a sky from being blown out. For example, if the sky is much brighter than the dark shadows of the foreground.
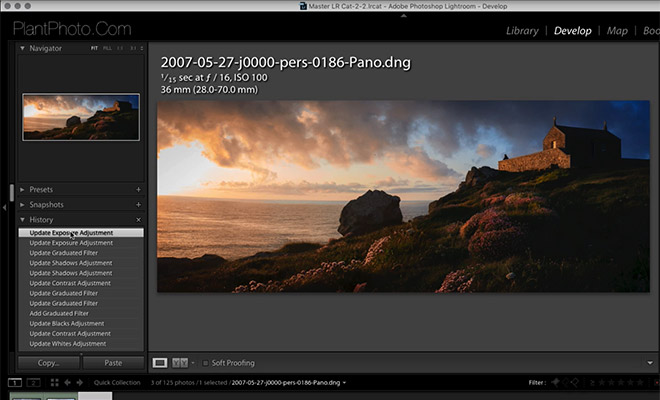
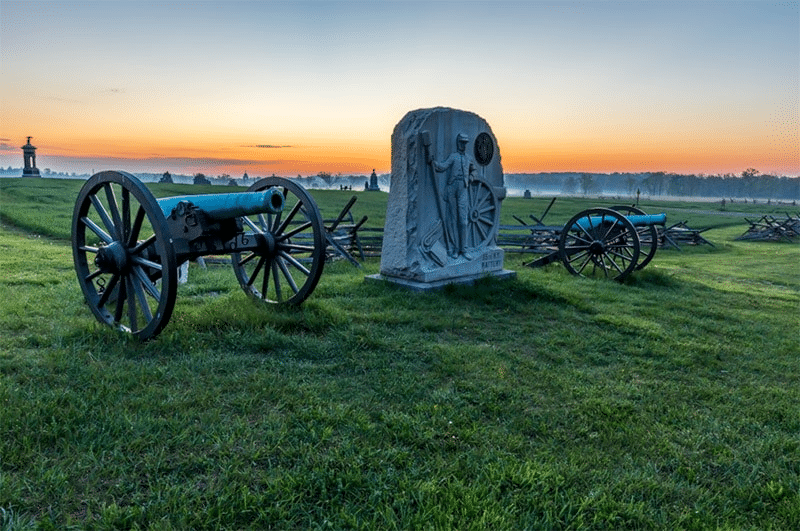
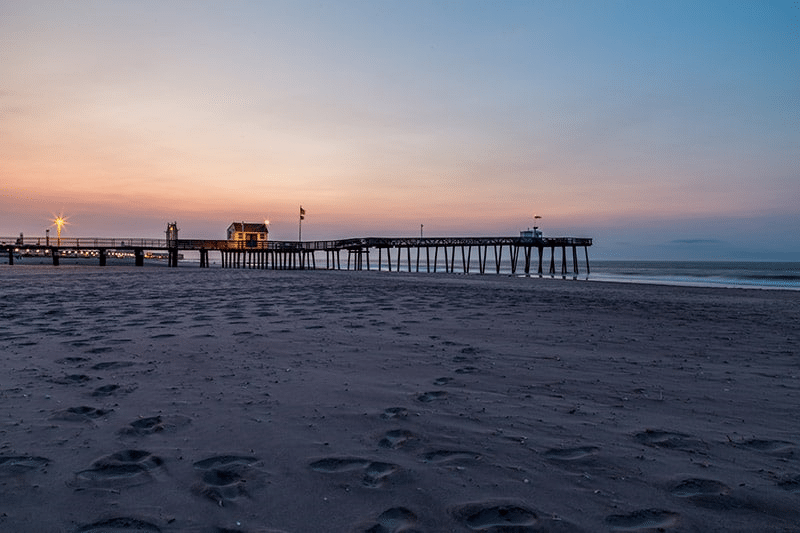
This sunrise photo has a bright sky and could be improved by using a graduated filter in Lightroom to darken the sky without impacting the foreground, which is already pretty dark.
When I added this filter to the photo I dragged down with my mouse, so the filter will be impacting the top of the photo. The area above the top line (indicated by the yellow arrow below) will be completely impacted by the settings I use in the graduated filter. The area between the center line and the top line (indicated by the white arrow) will be a gradual transition.
If I wanted the transition to be softer or more gradual I could increase the distance between the center line and the outer lines.

In this case, I want to darken the sky by half a stop, so I’ll set the exposure on the filter to -0.50.
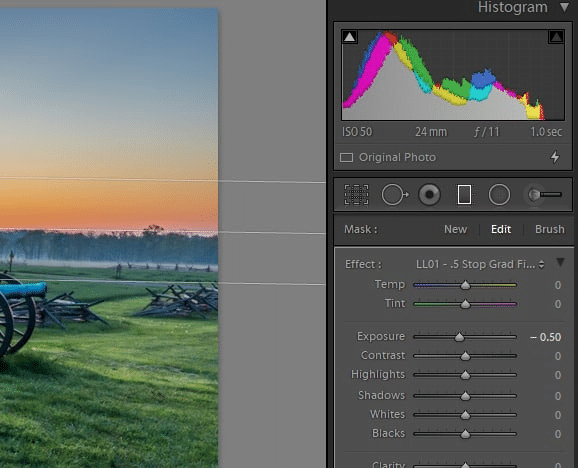
So that means everything above the top line will have the exposure impacted by -0.50, and from the centerline to the top line, it will be a gradual transition.
Landscape Legend includes several different presets like this to replicate the effect of a graduated neutral density filter. After applying this preset and lining up the pin, I still have one step to do. The top of the monument is being impacted by the filter, and I want to erase that part out so it’s not impacted.
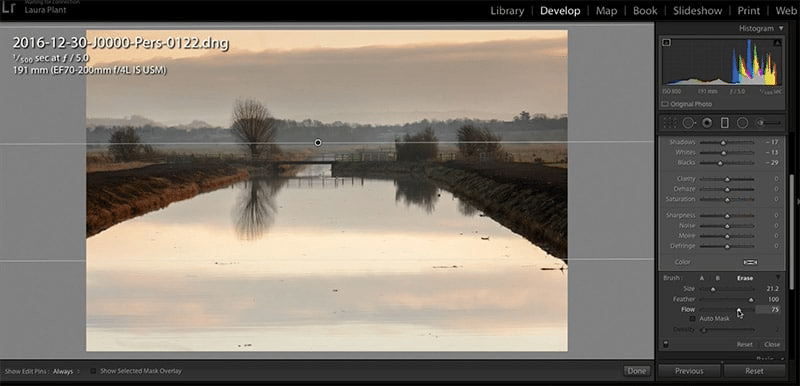
To erase a section of the grad filter click on Brush (shown by the white arrow below) and then click on Erase (shown by the yellow arrow).
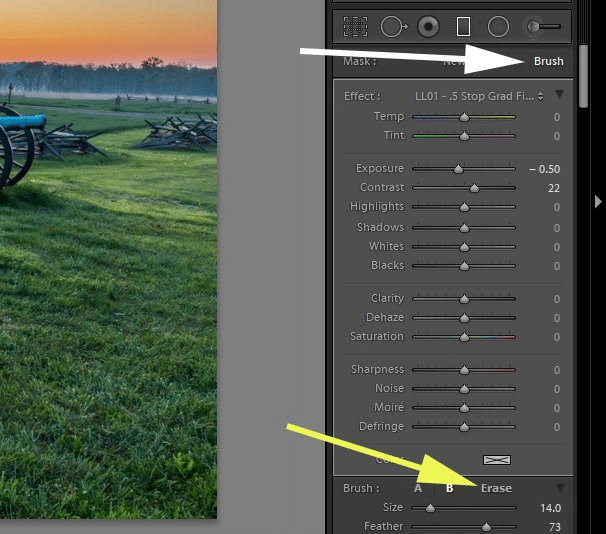
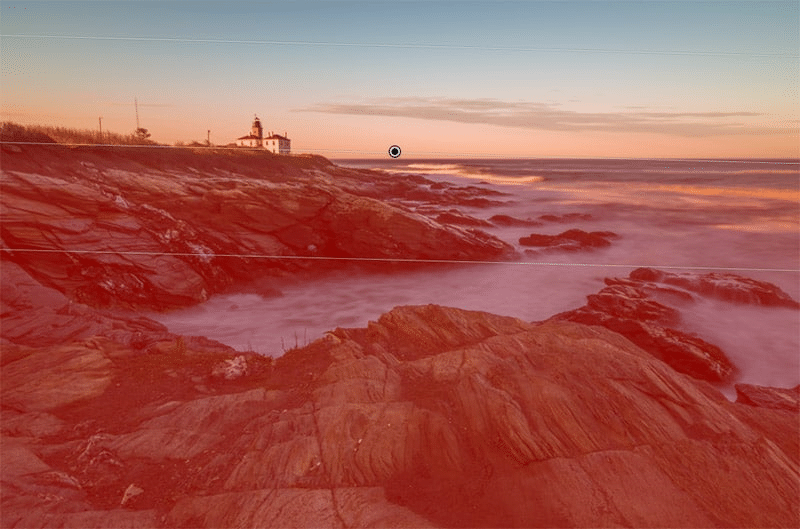
Next, tick the box for “show selected mask overlay” (shown below). This will show a red mask wherever the filter is impacting the photo. Use your mouse to brush over and erase the red from the areas where you don’t want the filter, in this case, the monument.

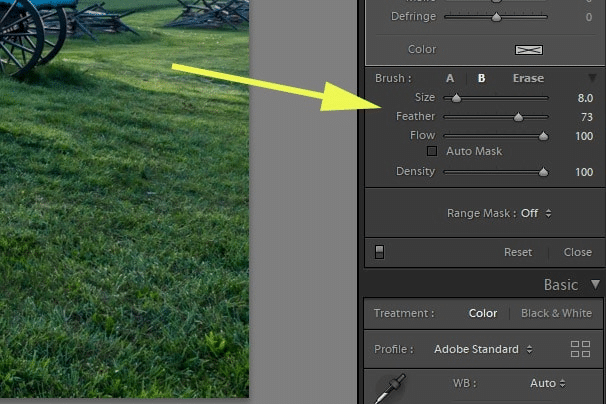
You can use the settings in the graduated filter to control the size and softness of the brush (shown below). If you tick the box for “auto mask” it will attempt to keep a defined edge around objects. For example, in this case, it would help to erase the monument without erasing part of the sky as well.
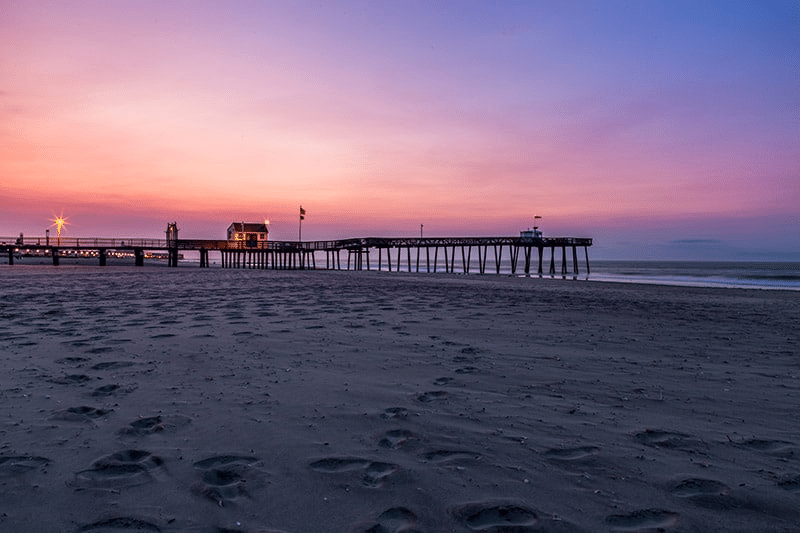
After I’ve erased out the monument and unchecked the “show selected mask overlay” the photo looks like this:
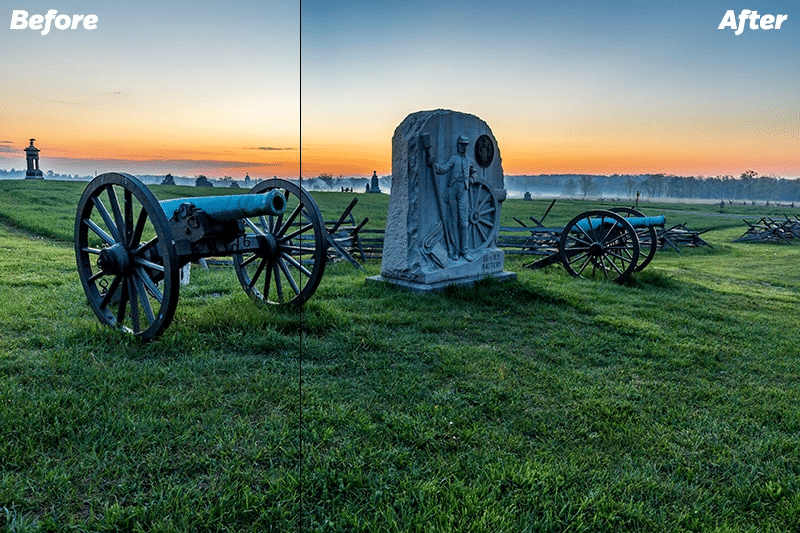
The sky in the photo is not quite as bright as it originally was, and I think it looks better. In this case, I only used a small exposure change (-0.50), but if you use a larger exposure adjustment the impact will be more noticeable.
2. Enhance a Blue Sky
The sky is an important part of your landscape photos, and sometimes you might want to make the sky bluer. If you use a graduated filter to do this you can boost the blues in the sky without boosting blues in other parts of the photo.
For example, if your photo includes water in the foreground and you bump up the blue saturation in the HSL settings, it will impact the entire photo. As a result, the water in the foreground may become too blue.
With the grad filter, you can impact only the sky, and you can erase out any parts that you don’t want to impact.
In the photo below, I want to add some blue to the sky.
In this case, all I am going to do is use one of the “blue sky” presets (there are 3 different strengths) from Landscape Legend and drag the center pin to line up the graduated filter with the horizon. Here is the end result:
If you’re doing it manually, you can add color to the grad filter by clicking the icon shown below.
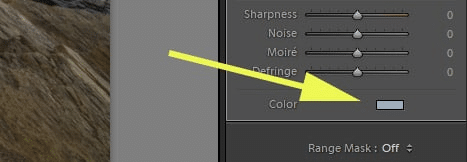
You can also adjust other settings like exposure, temperature, highlights, and saturation to get the look that you want.
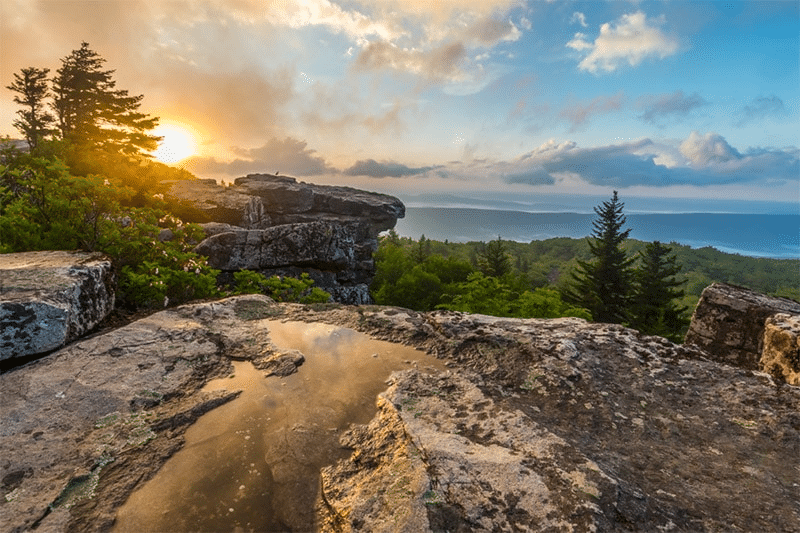
3. Add Drama to the Sky
For photos with cloudy skies, you can use a graduated filter to increase contrast in the sky and add some drama. Here is a before version of a sunrise photo.
Landscape Legend has two presets (different strengths) that add drama to the sky. After applying one of the presets and lining it up to the horizon the photo looks like this:
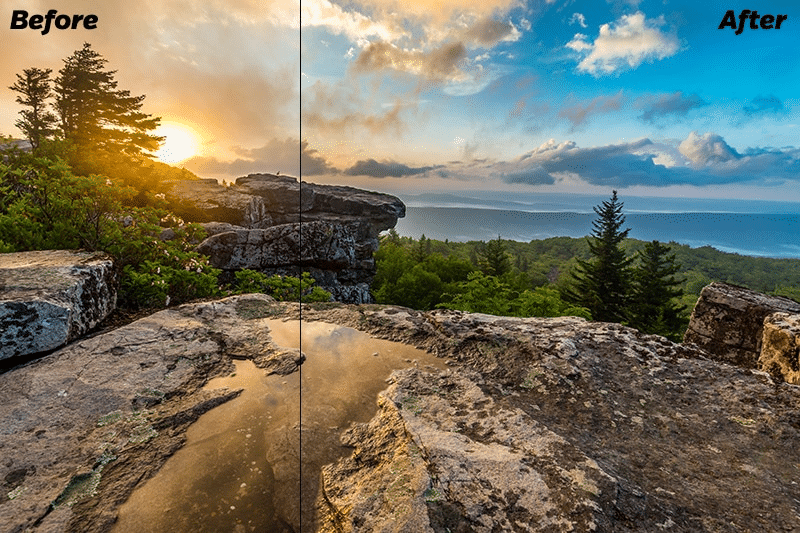
If you’re doing it manually you can bump up the contrast on the graduated filter, and also try out the clarity and saturation sliders.
4. Enhance a Sunrise or Sunset
One of my favorite ways to use the graduated filter is to enhance the colors of sunrise or sunset. Sometimes your photos may not match the same intensity of color that you saw with your eyes. Or maybe the colors of the sunrise or sunset were a little dull and you want to enhance it.
Either way, it’s possible with the help of the graduated filter.
Landscape Legend includes presets for working with orange, red, and purple (4 strengths for each). Typically, you’ll get the best results if you pick the color that was present in the sky and use a preset to enhance it.
Here is the before version of a sunrise photo that doesn’t have much color in the sky.
For this photo I used one of the purple sunrise/sunsets presets and the end result is below.
If you’re doing it manually you can apply color to the graduated filter, and try some of the other sliders like temperature, saturation, exposure, and highlights.
5. Selective Sharpening
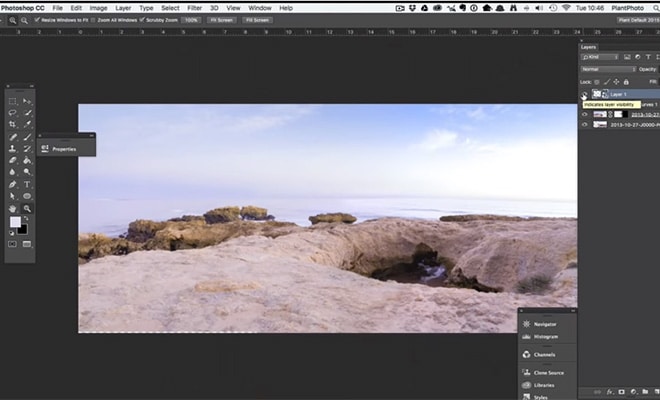
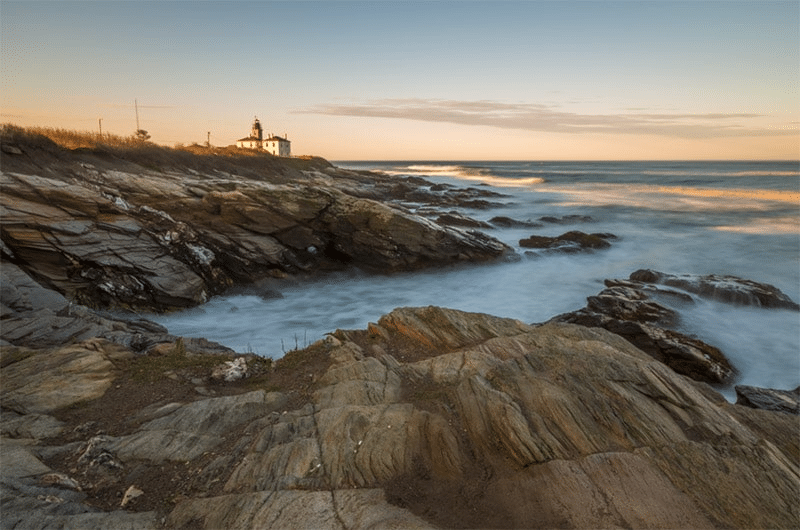
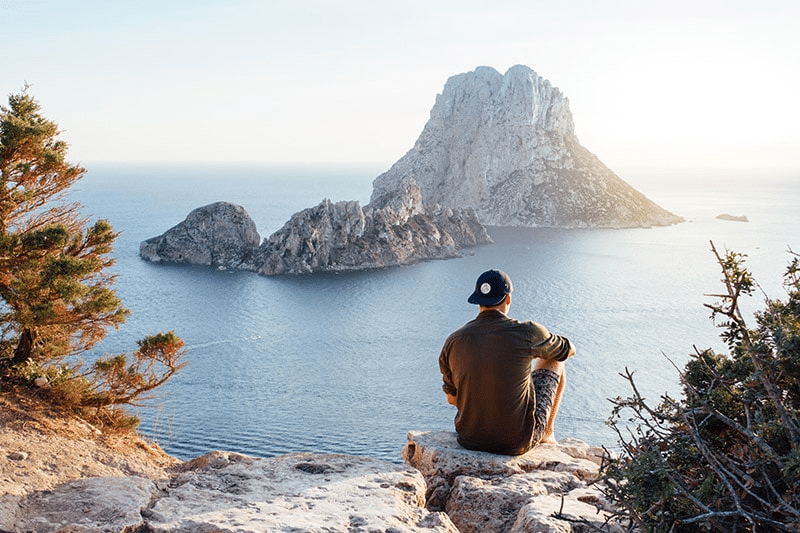
With the graduated filter, you can also sharpen (or blur) specific parts of a photo. In this sample photo, I want to sharpen the rocks without sharpening the other parts of the photo like the water or sky. I could actually do this with either the graduated filter or the adjustment brush, but since this article is about the graduated filter that’s what I’ll go with.
Here is the before version:
This time when you apply the graduated filter you want it to impact the bottom of the photo, so if you are applying the filter manually you will drag the mouse up when you’re adding it to the photo (you can always spin it around after it’s applied if you have it upside down).
Landscape Legend includes a few different presets for sharpening the foreground, so I am using one of them. After applying the preset I’ll line it up and tick the box for “show selected mask overlay”.
After a quick attempt to erase the right parts of the mask, it looks like this:

If you’re doing it manually you can adjust the sharpening and clarity sliders to get the look that you want. On this small photo, it’s a little bit hard to see the impact, so I went with a stronger effect than I would normally just to try and make the difference visible in this preview.
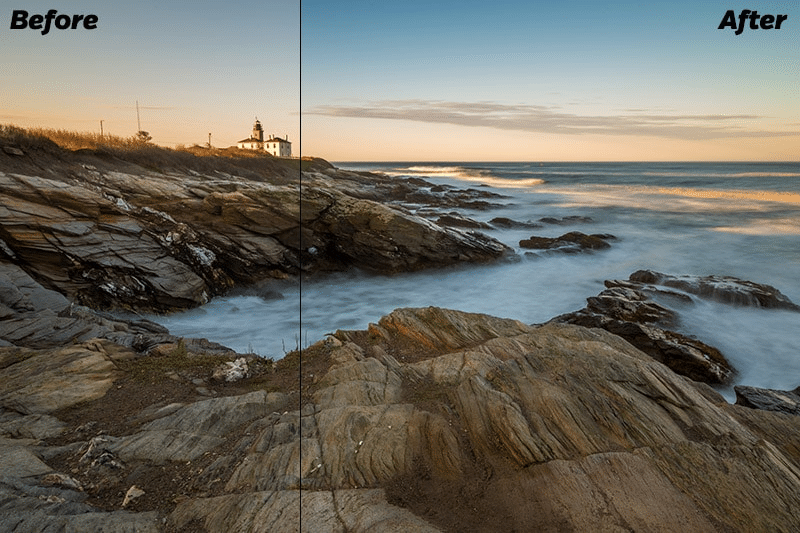
6. Dehaze
The Dehaze slider is really powerful for adding or removing haze. If you use the Dehaze slider on the graduated filter you can have precise control to add or remove haze only on certain parts of the photo, instead of on the entire photo.
Here is a before photo:
I want to Dehaze the sky. Landscape Legend has a few different strengths of Dehaze presets, so I will simply use one of them. If you’re doing it manually you can move the Dehaze slider to the right.
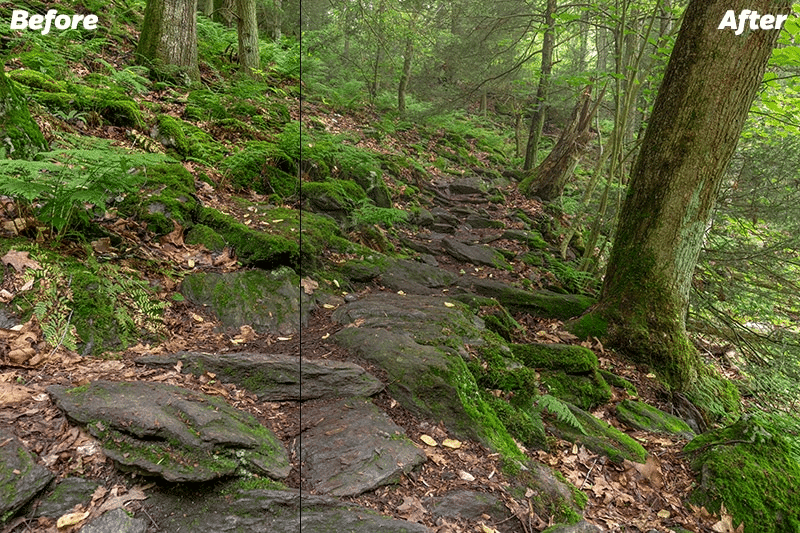
Here is the before and after shot:
7. Add Haze
Likewise, you can also use the graduated filter to add haze. Just move it to the left and it will introduce haze, but be careful not to push it too far.
Landscape Legend includes some haze graduated filter presets, so I will use one of them.
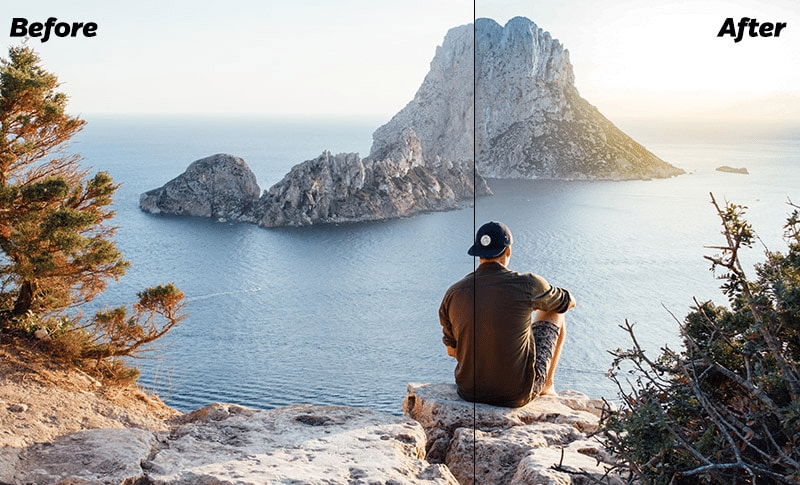
After applying the preset I brushed over the large tree in the foreground to erase the haze so it looks more like the haze is off in the distance. Here is a before and after. I only added a small amount of haze to keep it from looking unnatural, but hopefully, you can see the difference.
Start Using the Graduated Filter
If you don’t already use the grad filter with your landscape and nature photos, see if you can put one of these examples to good use with your own photos. You can either do it manually or pick up the Landscape Legend Lightroom Presets to help.