The Grand Canyon is one of the most iconic landscapes in the United States and is, of course, a favorite destination of many photographers. Although there are endless amazing photographic opportunities at the Grand Canyon, some planning is needed to get the most out of your trip, and in this guide, we’ll take a detailed look at Grand Canyon in a way that will help you to get the most out of your time there.
Two of the main reasons why it is so important to plan are the massive size of the canyon and its surrounding areas, and the seasonal changes that take place in this area of Arizona. The canyon itself is 277 miles long and up to 18 miles wide. Much of the area around the canyon is a part of Grand Canyon National Park. Many of the popular locations at and around the Grand Canyon are quite spread out, and driving from one area to another (such as the north rim to the south rim) can take a considerable amount of time.
With this in mind, you’ll want to know exactly what spots and locations are most important so you can plan accordingly. Likewise, the weather is also a factor that will impact your visit and it should be accounted for. The north rim is closed for the winter (facilities may be closed from October through May).
Later on, in this article, we’ll take a more detailed look at the seasons and the best times to visit.
→ See More of the Best Places to Photograph in Arizona
Landscape photographers can find beauty just about anywhere at the Grand Canyon, but some spots are more popular than others. While it is a good idea to get off of the main roads and trails to get more unique and interesting views, here is a look at some of the locations you may want to consider in your planning.
→ Related reading: Photographing Sedona, Arizona
Yavapai Point is near the south entrance of the park and provides a spectacular view of the canyon. Because of the panoramic view, it is a good location for both sunrise and sunset.
When entering Grand Canyon National Park from the south entrance, Mather Point is one of the first viewpoints. It is also the location of the visitor’s center and starting point for the shuttle buses. From Mather’s point, you have a view of Vishnu Temple.
To the east of the Grand Canyon Village is Desert View Drive, which is the main road that extends for 25 miles and includes several major viewpoints. This road is open to private vehicles, and shuttles are also available.
For more information on the points of interest along Desert View Drive please see this page. The five viewpoints listed below are located on Desert View Drive.
Shoshone Point is not one of the major viewpoints, and that is part of the reason I recommend it. It is not marked on the road or most maps, but it is not all that hard to find. It is about 2 miles southeast of Yaki Point.
There is an unpaved road that leads to it, but most of the time that road is gated off and closed to vehicles. You’ll have to hike about one mile from the parking lot to reach Shoshone Point. You can park on the north side of the road around mile marker 245 where there is a small parking lot.
This is a good location for sunset photos, partly because you won’t have to deal with many other people. When I was there for sunset there were about 5 other people in the general area. If you do go for sunset be sure to bring a flashlight for the hike back to the parking lot.
Shoshone Point is sometimes used for private events, including weddings, so there is a chance you will run into that, but I have no idea how often that would be.
Yaki Point is also a little bit off the main road, and during the summer you will need to take the shuttle to reach it, as the road is closed to cars for the busy season. Yaki Point is also the location of the South Kaibab Trail, one of the main trails in the park. Hiking down the trail, even just partway, allows you to view the canyon from a different perspective as compared to the viewpoints at the rim.
If you’re looking for unique photos this is a great way to do it.
Grandview Point is one of the major viewpoints on Desert View Drive and is also the starting point of the Grandview Trail. The trail is very steep.
Navajo Point is just a few minutes’ drive west of the Desert View Watchtower and it provides a nice view of the tower, and of the canyon itself. Navajo Point is the highest point on the south rim (aside from the top of the watchtower).
At the far east end of the south rim of the canyon is the Desert View Watchtower, a 70-foot tower that overlooks the canyon and the surrounding desert. The tower itself is an excellent subject for photos, and it also provides views for photos of the surrounding area. The tower is easily accessed by the main road from Grand Canyon Village, but it is a 20-mile drive.
As you go east from the village there are many different viewpoints and trails, and the tower is at the last of the major stops.
Hermit Road runs along the west end of the Grand Canyon Village at the south rim and it includes several viewpoints like Maricopa Point, Powell Point, Hopi Point, Mojave Point, the Abyss, Pima Point, and Hermit’s Rest. Hermit’s Rest is the last point (at the far west end) and is about 7 miles from the village. Hermit Road is closed to cars except in December, January, and February.
The rest of the year it can be reached by the shuttle buses, on foot, or by bike.
The Rim Trail follows the rim of the canyon along the road and if you are up for some short hikes you can easily walk between the viewpoints. In some areas, the trail is paved and in other areas, it is just a dirt trail.
For more information on the points along Hermit Road please see this page.
The north rim is not as popular with visitors as the south rim, but there are plenty of locations at the north rim worthy of attention from photographers. The park area of the north rim (including lodging, restaurants, and stores) close for the winter from and are only open mid-May to mid-October.
Horseshoe Bend is an amazing site that I highly recommend visiting. It is located to the north of the canyon near Page, AZ (also near Lake Powell). The is a parking lot off US Route 89 for visitors of Horseshoe Bend, but you will need to hike 3/4 of a mile over some rocky terrain to reach it.
The overlook at Horseshoe Bend is about 1,000 feet above the Colorado River and provides a stunning photo opportunity. The overlook area is uneven and rocky, so you will need to be careful. Bring a wide-angle lens or create a panoramic to capture the entire scene.
It’s a popular location, but the hike discourages a lot of people so you won’t have the massive crowds like at some of the other destinations at the Grand Canyon.
Bright Angel Point is located near the Grand Canyon Lodge. From the lodge, there is a paved .5 mile (roundtrip) trail that leads to the viewpoint where you will get a beautiful view of Bright Angel Canyon.
Point Imperial is the highest point on the north rim and provides an excellent view of the Painted Desert and the east end of the canyon.
Cape Royal is accessible via the same scenic drive as Point Imperial, and there are several other smaller viewpoints along the way as well. From Cape Royal, you’ll have an amazing and open view. The visibility east and west makes it a great choice for both sunrise and sunset.
You can see the Colorado River as well as the Desert View Watchtower on the south rim.
Toroweap on the northwest rim is not easily accessible, but well worth the effort. It provides a stunning and steep 3000 foot to the Colorado River. To get there you will need a high clearance vehicle (no gas, water, food, or phone service is available there).
It is open from sunrise to 30 minutes after sunset, and camping permits are available.
For more information on getting to Toroweap please see this page.
On the west side of the Grand Canyon is one of the most picturesque waterfalls you will find anywhere. Havasu Falls is located within the Havasupai reservation and getting there is part of the challenge. For starters, it’s quite a distance from most of the other major landmarks at the Grand Canyon.
To reach the 100-foot waterfall and the beautiful blue water, you will need to hike 10 miles, rent a mule, or take a helicopter. There is a lodge with rooms available, with a two-mile hike to the falls. You’ll need to plan well in advance if you want to visit Havasu Falls.
Reservations for camping should be made a few months in advance. You can get information from the Havasupai Tribe, and you may find this guide from Ordinary Traveler to be a great help for planning your visit.
→ Related reading: Photographing Zion National Park
Lipan Point (south), Navajo Point (south), Yavapai Point (south), Toroweep (north), Point Imperial (north), Cape Royal (north).
Shoshone Point (south), Lipan Point (south), Navajo Point (south) Yavapai Point (south), Mather Point (south), and Cape Royal (north).
The Grand Canyon is amazing year-round, but the north rim is inaccessible for much of the winter, and the north rim park areas are closed from mid-October to mid-May. Grand Canyon Village and Desert View Drive on the south rim are open year-round.
The summer months will bring the largest crowds, especially at the south rim, and the major viewpoints are packed with people during these months. Even at the busiest times you can get some solitude and avoid much of the crowd by hiking on trails, or simply by walking a little ways away from the shuttle bus stops at the main viewpoints. However, you can’t avoid people on the roads or the crowded shuttle buses, and certain areas of the park are closed to private vehicles so the shuttle is the best mode of transportation.
July through September is monsoon season, which often brings dramatic skis and sometimes a lightning storm.
Fall and spring months are far less crowded than the summer, although the most popular viewpoints still have plenty of people. September and October are generally good months to visit the popular south rim.
The winter months are far less crowded at the south rim, and the snow also provides an opportunity for some very unique photos that will stand out. Even though the south rim is open year-round, some of the roads getting to the park can be a little hazardous during snowstorms, so plan accordingly.
For visiting the north rim you have fewer options since it is only open from May to October, but the crowds at the north rim are generally much smaller than at the south rim.
There are lodges available inside the National Park just a short distance from some of the major viewpoints at the south rim. You may be able to find a room in a town outside the park for a bit less money, but the convenience factor of staying inside the park is pretty nice. Trailer Village RV Park is also very conveniently located for those traveling in an RV.
You can see a good, detailed review of Trailer Village at Wheeling It.
The park areas are accessible by private vehicle in most places. Hermit Road, to the west of Grand Canyon Village at the south rim, is closed to private vehicles except in December, January, and February. The shuttles are free and make it easy to get the various viewpoints along Hermit Road, and if you’d like you can also walk on the trail for the 7-mile road.
Desert View Drive, to the east of Grand Canyon Village at the south rim, is accessible by private vehicle except for a small stretch that leads to Yaki Point. To get to Yaki Point you’ll need to take the shuttle. The shuttle does not run to the far east end of Desert View Drive, to the watchtower, so you will need to drive or have other transportation to get there.
To get the shots that you want you will most likely need to do at least a little bit of hiking. The park is full of trails, and in many areas, you can simply walk away from the viewpoints to get a different view and to avoid a crowd.
The South Kaibab Trail is one of the major trails and is easily accessible at the popular south rim. If you plan to hike to the bottom you will need to plan to camp overnight. You can easily hike down part way and then hike back up during the same day.
To reach the trailhead, you will need to take the shuttle bus to Yaki Point.
For more information on the trail please see this page.
At the north rim, three different trails start at the same parking lot and trailhead. The North Kaibab Trail, Ken Patrick Trail, and Uncle Jim Trail. The parking lot is about 2 miles north of the Grand Canyon Lodge on the main park road.
The North Kaibab Trail is 14 miles long (28 miles roundtrip) and takes you down into the canyon to Bright Angel Campground. Some smaller trails along with it can make for good day hikes.
For information on those please see this page.
For stunning views from the river, you can take a rafting expedition. Some areas of the river are quite rough and provide an adventurous ride, by rafting excursions are available for all levels of experience and adventure. Half-day, full-day, and multi-day trips are available.
Trips from Glen Canyon Dam to Lee’s Ferry are offered by Colorado River Discovery.
These trips begin in Page, AZ.
Grand Canyon from Airplane by Loaded Landscapes
If you want to get an aerial view of the Grand Canyon you can take a ride in a helicopter or airplane. The Grand Canyon National Park Airport is located just south of the Grand Canyon Village and there are plenty of tours available. Several different tour operators use the airport.
In general, airplane tours are considerably cheaper than helicopter tours. One thing to keep in mind if you are trying to decide between the two is that the airplanes fly much higher than the helicopters, so you will get a much different view from each. I chose the airplane mostly because window access is easier and I hadn’t really considered the different height that I would get from a plane as compared to the helicopter.
I would guess that the helicopter ride would probably have been a little more fun since the fly just above the trees at some points, but I liked the high view from the airplane.
→ Related reading: Photography Guide to Great Smoky Mountains National Park
So now that we have looked at some of the best locations, when to visit, and how to get around, let’s look at some general tips to get the most out of your time photographing the Grand Canyon.
I mentioned this at the start of the article, and it is worth repeating. Most people visiting the Grand Canyon are dealing with limited amounts of time, so planning is essential. Simply driving from the north rim to the south rim will take several hours, and if you hope to visit points at the west like Havasu Falls or Toroweap you’ll need even more time.
If you just get to the village at the south rim and look up the places that you want to go you will be disappointed at how inaccessible some of them will be, especially if you are on a short trip. Plan and pick out the locations that are most important to you, and the difficulty of getting to each place will also factor in.
One of the nice things about the south rim, even though it is popular and can be crowded, you can still easily access many different viewpoints and trails and pack a lot into a short visit.
Part of the planning process involves research, and hopefully, this article has helped with that research. You can find plenty of forum threads and blog posts where people list their favorite spots at the canyon, and that’s how I found out about the unmarked Shoshone Point.
Think about what is most important to you. If you want to get unique winter shots to plan a trip during winter months to the south rim. If you want to get beautiful sunrise or sunset photos to decide on the locations that interest you the most and head towards them.
In the south, the vast majority of visitors will be at the main viewpoints where the shuttles stop and with the biggest parking lots. If you find some less popular, but often equally amazing, spots you can have photos that most visitors will never be able to get. There are a lot of different ways to get away from the main viewpoints.
You could hike down into the canyon on the North or South Kaibab Trail. You could explore any of the other trails in the park, walk between the viewpoints instead of driving, or simply explore the edges of the viewpoints. Most visitors congregate at the area by the parking lot or shuttle bus stop, but at most viewpoints, you can explore a little (be careful because the only safety rails will be at the viewpoint) and get some very unique views and have some space to yourself.
Most photographs of the Grand Canyon are taken from the rim. Changing your vantage point, even if it is only a little, can make a big difference. As you hike down one of the trails you get different views down. You can also change your vantage point by getting higher, either at the Desert View Watchtower or on a helicopter or airplane.
Tree on the Ledge by Loaded Landscapes
Some of the most captivating photos of the Grand Canyon, and landscapes in general, involve a foreground element. Look for opportunities to use rocks, trees, plants, and even people as foreground elements to add interest to your compositions.
The Grand Canyon is an amazing sight and capturing the size is very difficult to do with a photograph. One of the ways you can achieve perspective and show the size of the canyon is to include people in your composition. There are several places along the south rim where you can get a view at a distance of people at the edge as they observe the canyon from a viewpoint.
Many of the viewpoints jut out into the canyon, and if you walk away from the viewpoint you can get a shot of the canyon with a lot of really tiny people at the top.
The weather can be a major factor when visiting and photographing the Grand Canyon. Even in the summer, the temperature can change drastically in the evening, and then if you factor in the elevation changes temperature can vary even more. Storms can provide excellent opportunities for beautiful photos at the canyon but always take safety precautions.
This is especially true if you are hiking or camping or visiting one of the more remote locations. Winter, of course, brings its challenges.
One of the challenges of photographing the Grand Canyon is knowing what to include in your composition and what you want to accomplish with the photo. Just about everywhere you look there are amazing views and the sheer size of it can be overwhelming. One of the best ways to get great photos is to focus on specific details.
It could be objects at the rim or textures and patterns at the bottom of the canyon.
Here we’ll take a look at some of the gear that you’ll want to take with you for your trip to the grand canyon.
Sunset and sunrise are great times to be photographing the canyon, but many of the best locations are not right next to a parking lot where you can quickly jump back into your car after the sunsets. To get the shots that you want there is a good chance you will need to walk or hike before sunrise or after sunset. Be sure to have a flashlight and some spare batteries in your bag.
When it comes to processing your landscape photos, the Landscape Legend Lightroom Presets can be a huge time saver. The set includes more than 290 presets, which includes 100 one-click presets and loads of stackable workflow presets that give you countless options.
While it is not photography gear, having water with you is essential. In the summer the heat can quickly take a toll, and throughout the year if you are hiking you are sure to need water. Water is not available in all locations, so be sure to always have some with you.
In the village, there are some water stations where you can fill up your bottle.
The Pine Creek Gorge is often called the Pennsylvania Grand Canyon. In my opinion, that name is a disservice. The landscape is nothing like the real Grand Canyon, and it sets the bar impossibly high.
The Pine Creek Gorge is a beautiful area, one of the best in Pennsylvania. It is well worth visiting even if you, like me, prefer not to call it by its unofficial name.
This 47-mile gorge in north-central Pennsylvania is mostly surrounded by the Tioga State Forest. Leonard Harrison State Park and Colton Point State Park are located at the northern end of the gorge and are two of the most popular spots along the gorge. Both parks provide nice views of the gorge and Pine Creek.
From a photography perspective, the gorge offers scenic overlooks, beautiful forests, and waterfalls. Some of the views and waterfalls are easy to access, others are much more difficult. This page will feature some of the areas that are easier to access, and in a future post, I may cover some of the areas that are more difficult to reach.
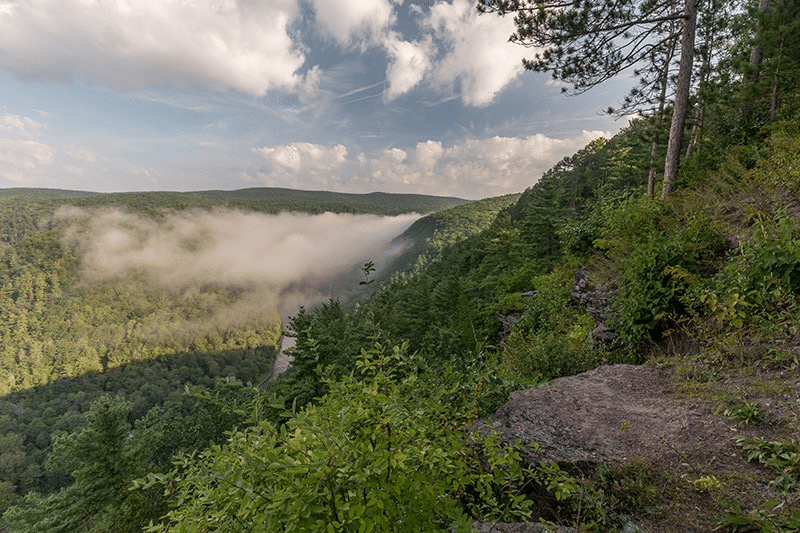
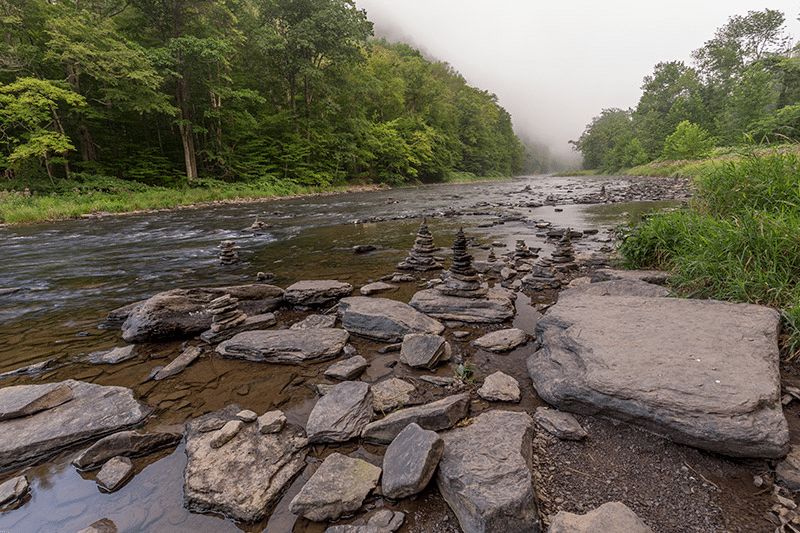
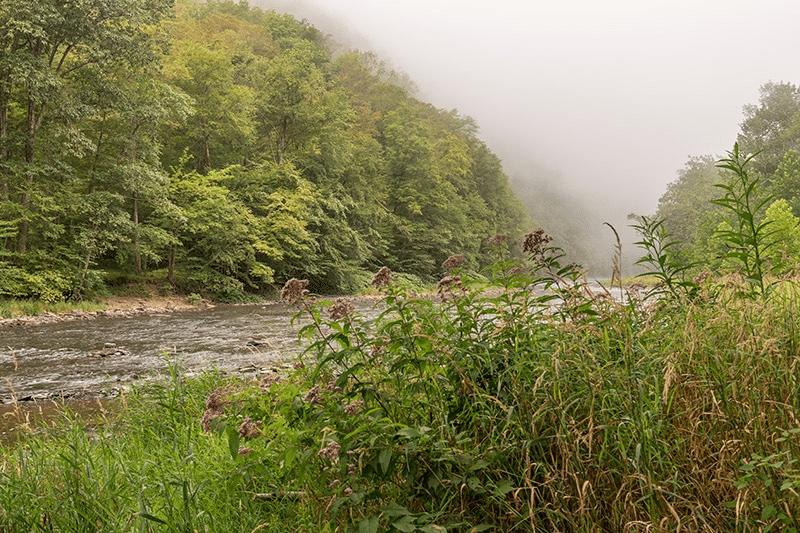
On the morning of my recent visit the gorge was filled with fog, so, unfortunately, the overlooks had very limited views or no views at all.
→ See More of the Best Places to Photograph in Pennsylvania
Leonard Harrison State Park is one of the more well-known state parks in Pennsylvania and is what many people associate with the Pine Creek Gorge. As far as state parks go, it is not a huge park at less than 600 acres. It is located on the east side of the gorge and features several scenic overlooks that provide nice views of the north end of the gorge.
You can look across to the west side of the gorge, you can see Pine Creek at the bottom, and depending on what viewpoint you are at, you can look north or south.
The GPS coordinates to reach the park are: 41.697113, -77.453859
There is only one entrance to the park, so it is pretty easy to find your way around. From the parking lot, you can easily reach a few different viewpoints.
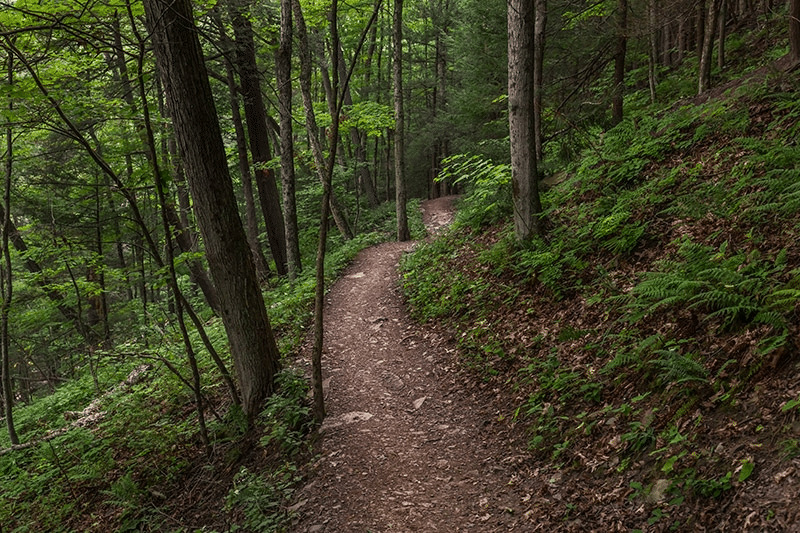
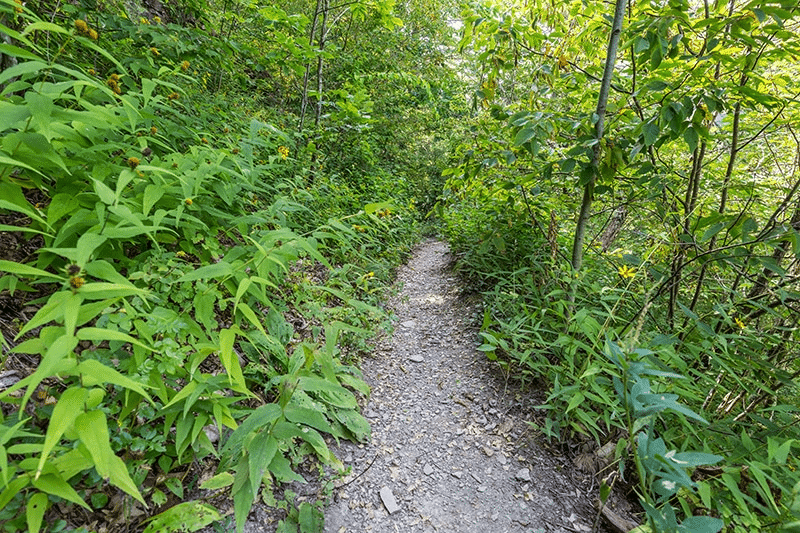
There are only two trails in the park, but both are worth hiking. The Overlook Trail is about a half-mile loop that leads to Otter View, which provides one of the best views in the park. This trail is steep in some places.
The Turkey Path is a 2-mile out-and-back hike that takes you from the rim down to the bottom of the gorge. This is a highlight of the park that you don’t want to miss. It’s pretty steep, but the trail uses many switchbacks to make the steepness manageable.
There are also several areas of wooden boardwalks and stairs. The trail is very well maintained and wide in some places.
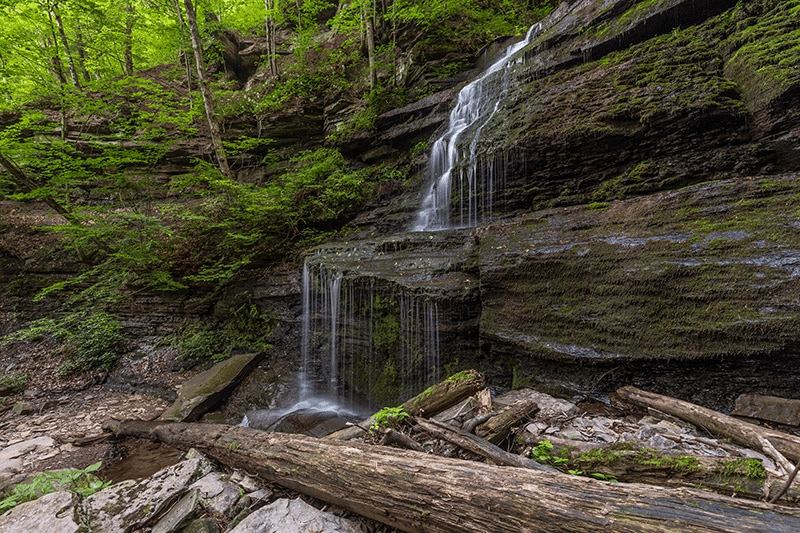
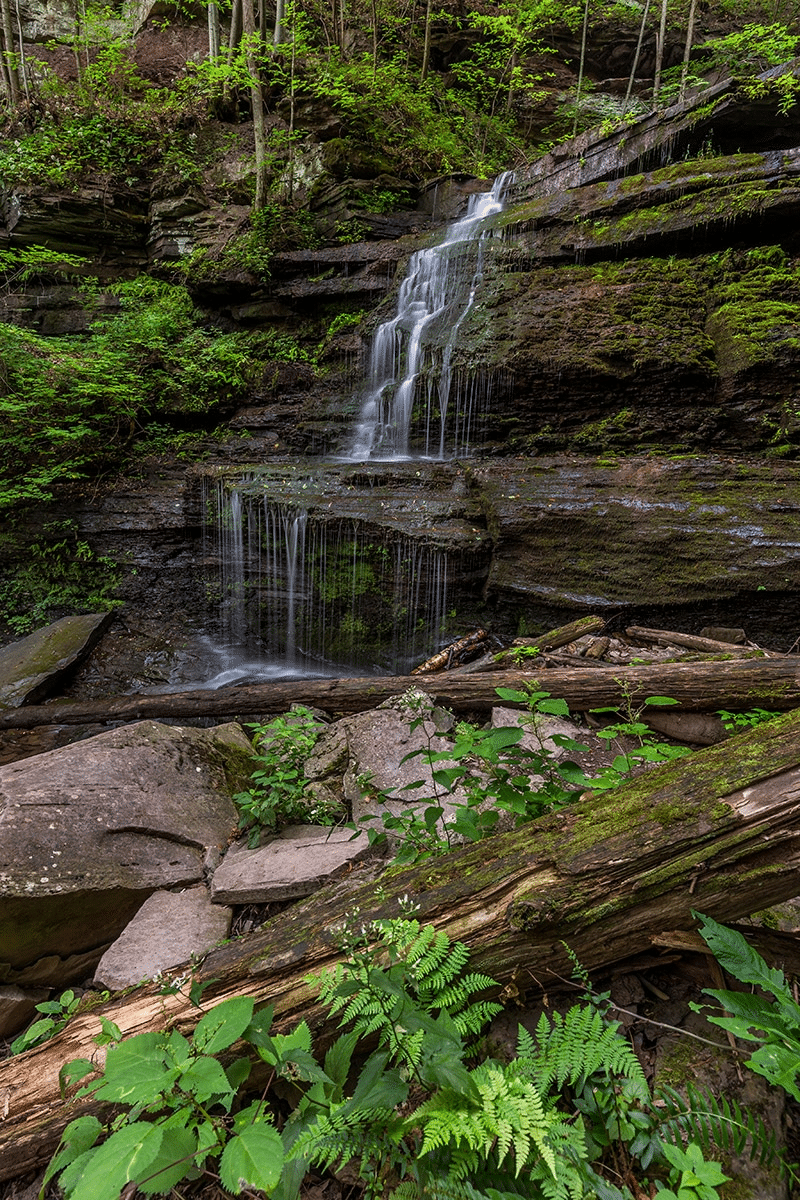
The lower half of the Turkey Path goes along Little Four Mile Run and features a few waterfalls. The volume of water flowing here is not that high, so spring or after a good rain is the best time to view the waterfalls.
At the bottom of the Turkey Path, you’ll reach Pine Creek.
The Pine Creek Trail, a 62-mile multi-purpose trail that runs alongside the creek.
Colton Point State Park is on the west side of the gorge and provides several overlooks. Leonard Harrison State Park is more developed and has nicer facilities. Colton Point is also a small state park at less than 400 acres.
The GPS coordinates of the parking lot are: 41.700563, -77.465530
If you are traveling from Leonard Harrison State Park to Colton Point State Park you will go north to Ansonia, use Route 6 to cross Pine Creek, and then turn onto Colton Road. After a few miles, you will reach the state park.
Along Colton Road, before you enter Colton Point State Park you will come to a parking lot for Barbour Rock. The trailhead is at the following GPS coordinates: 41.723239, -77.455797
The trail to Barbour Rock is an easy 1.5-mile hike (roundtrip). From Barbour Rock, you will have one of the best views of the gorge.
After you enter Colton Point State Park you will quickly come to the first overlook. There is a small parking lot here, and in my opinion, this is one of the best overlooks in the park.
All of the photos in this article have been processed using the Landscape Legend Lightroom Presets. Learn more about Landscape Legend here.
After taking in the view at the first overlook, can drive further, or hike on the trail to the other overlooks. The other overlooks are nice, but in my opinion, the first one provides the best view for photographs.
There are two trails in Colton Point State Park. The Rim Trail runs along the rim of the gorge, and it connects the different overlooks.
To make things confusing, Colton Point State Park also has a trail called the Turkey Path. Like the Turkey Path at Leonard Harrison State Park, it is steep and leads you down to the bottom of the gorge. However, there are some significant differences between the two Turkey Paths (by the way, they are separate trails and do not connect because of the creek at the bottom of the gorge).
The Turkey Path at Leonard Harrison State Park is better maintained. You won’t find any nice boardwalks or wooden stairs on the Turkey Path at Colton Point State Park. The Turkey Path at Leonard Harrison State Park is also generally wider.
The Turkey Path at Colton State Park is narrow in some places, with steeper drops off the side of the trail. Still, both trails are highlights of the area and are well worth taking.
It is possible to photograph some waterfalls from the Turkey Path at Colton Point State Park as well. However, on my recent trip, the first waterfall had such a low volume of water I didn’t even bother taking any photos. Lower on the trail, I could hear a much more powerful waterfall, and I could see it a little bit through the trees.
You have to go off-trail to reach it, and it is quite steep but possible. I hiked down to this one but when I got there I saw a few big trees were down right in front of the waterfall, so I didn’t get any photos of that one either.
The West Rim Trail is a 30-mile trail that runs through the Tioga State Forest along the west side of the Pine Creek Gorge. If you’re up for a long hike that rewards you for with outstanding views, this is a great trail. I can’t say much about this trail because I have never hiked it myself.
There are several waterfalls in the area of the Pine Creek Gorge. However, many of them are very remote and require bushwacking or walking in the water to reach. There are no established trails that lead to most of these waterfalls. I may cover some of these waterfalls in future articles, but for now, I wanted to focus on the points of interest that are easier to reach.
Photo license links: CC BY-SA 2.0, CC BY-SA 3.0, CC BY 2.0, CC BY-ND 3.0
The weather can be unpredictable, even in the most temperate of climates. Rainy days can…
Haze can be a photographer's ally, but it is a trouble to endure most of…
As a landscape photographer, you often find yourself drawn to the expansive views and deep…
When you're traveling, it's always a good idea to travel light. The fewer things you're…
Volcano photography is an enriching hobby. Even though a lot of work goes into the…
You may not have heard of Norway’s second largest island, Senja Island. This underrated must-visit…
View Comments
Great travel photography article and beautiful photos!
Thanks Chanone
Hi Marc;
Just looked at your helpful hints, including the valuable tip about using foreground to get a 3D-depth feel to photos that reach into the incredible canyon.
Also was disappointed to learn, via your guide, that the Hermit's Road route is closed to cars for most of the year. Will have to find out now how early the shuttles run since I don't want to be taking photos at noon.
Mike
Hi Mike,
Thanks for your comment. I don't remember how early the shuttle starts running, and I wasn't able to find an answer right now online. I know you can access the road by bike, so maybe that will be a possibility for you. When you get there I would recommend talking to one of the park rangers in the visitor's center, they may have some suggestions about how to get around early in the morning. I got some help from a friendly ranger with finding a spot that wasn't marked on the map.
Dear Mark,
Greetings from Tokyo Marriott Hotel!
Our wedding couple wishes to shoot wedding photos at Grand Canyon and thinking of hiring a photographer there. Would appreciate it if you could introduce us the photographer who can take wedding photos there.
Best regards,
Jun
Hi Jun,
I'm sorry but I don't know any wedding photographers near the Grand Canyon.
Hi Marc,
We are planning a 7 day visit in June, starting in Vegas and wondered if you could advise us if it is too much to fit in Grand Canyon, Monument, Bryce and Zion? Or would it be better to spend more time at fewer locations? If so, where would you recommend from a photographers point of view to spend those valuable 7 days!
Rob,
Thanks for your comment. I think it depends on your personal preferences. If you like to move quickly and see a lot, and you're ok with missing out on some of the details of each place, you can fit all of those places into a 7 day trip. You could easily spend a few weeks at the Grand Canyon or Zion alone, so you will really only be able to scratch the surface in those places if you only have a day or two there, but you can still get a good feel for them and get some great photos. For example, if you only have a day or a day and a half at Zion you will be limited to driving the main roads of the park and taking the shuttle through the main canyon area. There are many popular and worthwhile hikes like The Narrows and Angel's Landing that you just won't have time for. But you can still enjoy the park that way. The same thing is true with the Grand Canyon. With just a day or two there you will probably be limited to just the popular points at the south rim, or just the north rim. You won't have time to do any longer hikes down into the canyon or go to places that are a little harder to access like Havasu Falls. But if you are happy to hit up just the south rim and not venture too far you can see everything and get some great photos in a day or two. I haven't been to Bryce Canyon or Monument Valley yet, but from what I have researched they should be a little easier to manage in a limited time. If I were planning to just have a day or two at the Grand Canyon or Zion I would focus on the south rim at the Grand Canyon because you can cover pretty much everything from the rim of the canyon in a short time. And at Zion I would use one day to take the shuttle up and down the main canyon with none of the major hikes and any additional time I would use to drive the upper east canyon. There are a lot of places where you can park and explore on foot without wandering too far from the road and without taking too much time. And if you are driving from the south rim of the Grand Canyon to Zion or vice versa you may be going through Page, AZ where you can make a stop at Horseshoe Bend, which I would definitely recommend. I hope that helps. If you haven't already seen my guide to Zion you can find it here http://loadedlandscapes.com/zion-national-park/
Marc,
Thanks so much for the advice, it's greatly appreciated. Would really like to get to Havasu Falls, but I gather it is difficult to get a telephone answer from the lodge owners there in order to book! Have you ever been and would it be worth the effort?
I would sacrifice a day at Bryce if I could arrange Havasu!
Your site is very helpful and an interesting read, thanks again.
Rob
Hi Rob,
I have not been to Havasu Falls. It's definitely on my list. My guess is that it would be difficult for you to fit in your trip, but you might be able to make it work. It's a bit of a drive from anywhere else, plus you'll have to leave plenty of time for the trek/ride in and out.
Marc....you need to hit Bryce. Sunrise there and hiking into the Hoodoo's is still number one on our list after hiking numerous parks. No words for that place. Hope you get there soon!
Hi Robin,
It's definitely on my list.
Hey Marc.
Great article. We'll be at the Grand Canyon in early September 2016 and will definitely put your tips to good use. While there, we hope to take a helicopter tour of the canyon for photos. What time of day would you recommend? Many thanks.
Hi Liz,
I haven't done a helicopter ride myself. I think the plane ride I took over the canyon was late morning or early afternoon. Ideally I would say early in the morning or later in the day would be best. That is based on those golden hours being better in general for photography, not anything specific to the Grand Canyon. Enjoy your trip!
Hi, Marc! Great post with much documentation and many interesting details. Next year I will return to the Grand Canyon and especially the North Rim, hope to have good lights! A greeting from Spain!
( Apologies for my english) ;)
Alberto,
No apologies needed. Your English is great. Thanks for your comment and I hope this information is helpful for you on your next trip.
Thanks for taking time to prepare this very useful guide to photographing the Grand Canyon.
You're welcome Bob!
Hi Marc,
Great article with loads of helpful tips--thanks so much!!
Am trying to find out if there is a specific spot in the Grand Canyon that you think would be a good location to shoot the supermoon that is coming up on November 14th. (We are located near Phoenix, and am thinking of driving to either the Grand Canyon or Monument Valley for the "event.") Would appreciate any feedback you can give, Marc.
Hi Susan,
Thanks for your comment. Unfortunately, I don't have information or suggestions for locations to shoot the supermoon. I didn't do any photographing of the moon at the Grand Canyon and haven't done any research on those types of locations. You may want to try an app like https://photoephemeris.com to do some research.
Hi Marc,
Thanks for all the tips. I'll be there next week for a short stay and the locations are really helpful. I hope that the light and weather are as cooperative.
You're welcome Don. I hope you have a great trip!
Great photos! Would you recommend using a 16mm-35mm f/4L IS lens for the grand canyon? I also have an 85mm f/1.8 lens and 18-135mm f/3.5-5.6 IS lens? I would appreciate your advice :)
Hi Isabel,
The 16-35 will be good. You'll also probably want something longer to capture details that are far away. 85mm may be enough in some cases, but you'll probably want more reach than that. So my guess is you'll use the 18-135mm more than the 85mm prime lens.