Photo by Tom Eversley
Sharpness is a critical aspect of photography, and learning how to maximize the sharpness will allow you to take your landscape photography to the next level. In this article we’ll take a look at the steps you can take to get super-sharp photos.
Prerequisites for Sharper Photos:
Before you head out on your next photographic journey, make sure you have these areas covered.
1. Invest in Quality Lenses
The lens you are using can have a significant impact on the sharpness of your photos. Quality lenses will allow you to get the best sharpness possible, so prioritize quality lenses when assembling your kit. Most quality lenses will come at a price, but it is better to have just one or two quality lenses rather than several cheap lenses, especially when maximum sharpness is your goal.
2. Get to Know Your Lenses
When it comes to depth of field you will generally want to use a smaller aperture (larger f-stop number) to achieve maximum depth of field. With that in mind you may decide to set the aperture to f/22 or the minimum aperture allowed by your lens, but this will actually cause a loss of some sharpness. Most lenses will not produce the sharpest photos at the extreme edge of their range. Typically you would want to use something like f/10 – f/16 for maximum sharpness, but it will vary from lens to lens. That’s why it is critical that you get to know your lenses well. Once you know how your lens typically performs you can base your exposure decisions accordingly, and the result will be the sharpest photos possible.
If you’re not sure at what apertures your lenses produce the sharpest photos it is quite simple to run some tests and find out. Just take your camera, lenses, and tripod out to a park, or anyplace where you can photograph a typical landscape, and take photos of the same scene at a variety of different apertures. When you return home you can view the images at 100% on your monitor and see how they compare to determine what aperture produces the sharpest images.
3. Learn to Be Comfortable with Manual Focus
Even if you are using autofocus lenses there are plenty of situations where you will be better off using manual focus (some examples include night photography, exposure bracketing, creating panoramas, and situations when autofocus isn’t working as well as you’d like). Manual focus can be a little intimidating if you don’t have experience with it, but with a little bit of practice you can easily get the experience that you need. For more see this guide to manual focus.

Steps to Sharp Photos When Shooting:
Ok, now that you have those prerequisites down we can move on to the tips for when you are actually taking your landscape photos.
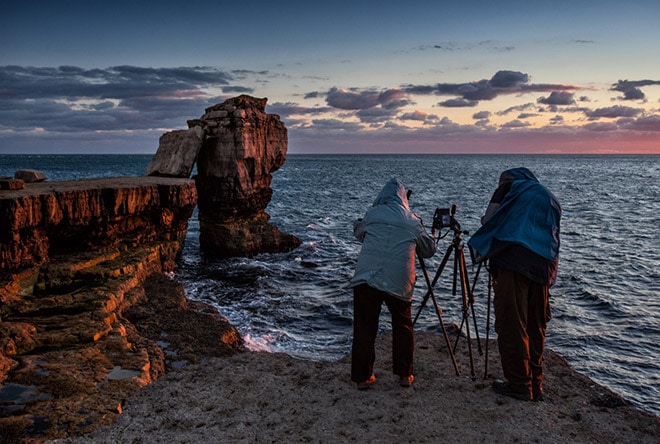
4. Use a Sturdy Tripod
Whenever possible use a tripod. Most landscape photography is conducive to using a tripod because you will generally have plenty of time to set up your shot and get everything just right. In fact, using a tripod is a great way to force yourself to slow down and concentrate on the fine details involved in getting the best photos.
Just like must types of photography gear, there is a great deal of variance in the quality of tripods available. You can pick up a cheap tripod for a very small amount of money, but in many cases you’ll get what you pay for (see our recommended gear). If you are investing a considerable amount of money into a quality camera body and lenses, why skimp on a tripod?
A quality tripod for landscape photography should be sturdy and lightweight. You’ll be out in the elements and the tripod must be able to remain steady even on windy days, otherwise your photos will be blury, and even worse, you may have some broken gear if the tripod blows over. You’ll also want a tripod that is light because in many situations you’ll be hiking or carrying it quite a distance. A tripod that is too heavy is likely to get left behind more often than not, and if that’s the case it is not doing you any good.
Tighten your tripod
In addition to simply having a quality tripod you should also make sure it is tightened. Any loose parts can result in movement or shaking that will blur photos. I’ve also had a tripod head fall off while I was hiking because it wasn’t tight. Now I carry an allen wrench in my camera bag so I can always tighten the tripod if needed.
Add weight to the tripod’s center column
Another way to make your tripod even more steady or stable is to add some weight to the center column. You don’t need to add a lot of weight, but even a small amount can help to anchor it in a windy conditions.
5. Remove Unneeded Filters
Filters can serve many purposes in landscape photography, but they are not always needed. If you don’t need that polarizer or UV filter to get the shot that you want, take it off. Filters, especially cheaper ones, can reduce the sharpness of your photos. Removing filters won’t usually amount to significant gains in terms of sharpness, but it can help, and when used in combination with the other steps listed here it can help you to get the sharpest photos. That being said, if the filter serves a specific purpose for your shot, leave it on.
6. Enable Mirror Lockup
Mirror lockup can help to improve sharpness by reducing any shock or vibration created by the function of the mirror when taking a photo. This allows the mirror to move out of the way before it will impact the photo. Refer to your camera’s manual to learn how to enable mirror lockup on your camera.
7. Turn Off Image Stabilization (when using a tripod)
Lenses with image stabilization or vibration reduction can help to get sharper photos by reducing the effects of movement when a photo is being taken by hand, but when the camera is mounted to a sturdy tripod there should be no movement. In these situations the image stabilization can actually do more harm than good, and you are likely to get sharper photos with it turned off.
Some lens manufacturers recommend that you leave image stabilization turned on when you are using a tripod and others say to turn it off. The best thing to do is test your lenses to see which is best, but in most cases you will want to turn it off when you are using a tripod.
8. Focus with a Purpose
Where you choose to focus will have an impact on the overall sharpness of your photo. The general rule of thumb with landscapes is to focus about 1/3 of the way into the scene for maximum sharpness, but like everything else in photography this is a creative decision. Don’t simply fall into the routine of focusing the same way with each photo. Instead, have a purpose for your decisions related to focus with each photo. In some situations you won’t want to have the entire scene in focus from edge-to-edge, so be sure to have a purpose.
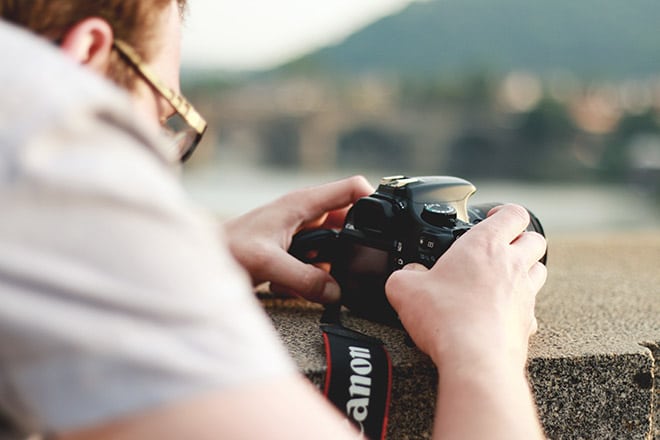
9. Use a Cable Shutter Release
Even the smallest movement of the shutter button can cause a small amount of shaking that will reduce the sharpness of a photo. You can avoid touching the shutter button at all by using a cable release. If you don’t have a cable release an alternative is to use the camera’s timer so it will shoot 2 seconds (or some other interval) after you press the trigger, eliminating any shaking or vibration while the photo is being taken. However, cable releases are very affordable and will make your work with a tripod much easier and more effective, so it’s best to spend a little bit of money if you don’t already have one (see our recommendations). Cable releases also come in very handy when shooting long exposures in bulb mode (over 30 seconds). With the cable release you can lock the shutter so it will stay open as long as you want without needing to manually hold the shutter button.
10. Check Live View
The LCD screen can be very helpful for checking the sharpness of your photos both before and after they have been taken. If you are focusing manually you can use live view before taking the shot. Zoom in and check the focal point of the photo to make sure you have it focused well. After your shots, whether you are using manual or auto focus, you can use the LCD screen to zoom in and check the focus. That way if your focus is off you can try again rather than waiting till you get home to notice the issue on your monitor.
11. Apply Finishing Touches in Photoshop or Lightroom
Both Photoshop and Lightroom make it possible to apply sharpening to your photo in post processing. Keep in mind that this will not be a substitution or a replacement for the need to get the photo as sharp as possible in the camera. Sharpening in post production can help, but it is really only a way to put the finishing touch on your photos.
4 Tips for Times When You Can’t Use a Tripod
Although using a tripod is highly recommended there will be times you it’s not practical or possible to use a tripod and you have to resort to holding the camera by hand. Many of the tips above are based on the assumption that you are using a tripod, but when that is not the case please keep these tips in mind.
1. Use Another Object to Steady Yourself
Just because you don’t have a tripod at your disposal doesn’t mean that you can’t get some help stabilizing your camera. You can use a sturdy object to help steady yourself and the camera. It could involve leaning against a wall, steadying your camera on a large rock, or making use of whatever is around you. While it may not be as ideal as using a tripod, having anything to provide some extra support and stabilization can help when it comes to sharpness.
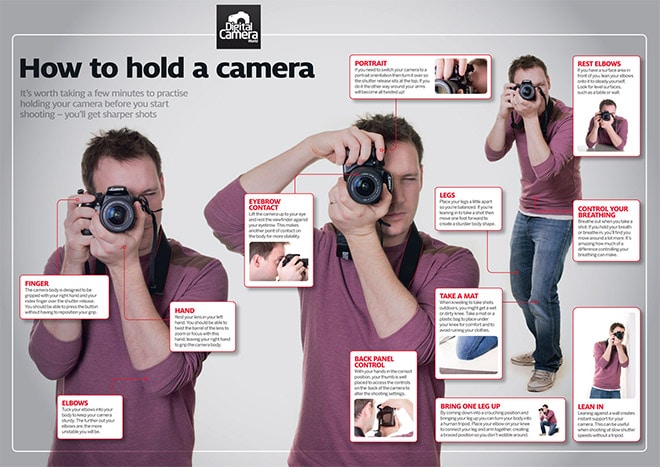
2. Hold the Camera Correctly
While it may sound obvious, holding the camera properly will give you the best ability to keep it steady. This article at Digital Camera World includes the diagram below, demonstrating the most effective ways to hold the camera.
3. Use a Faster Shutter Speed
When you are using a tripod you are able to use slow shutter speeds because the camera will be steady, but when hand holding the camera you will get much sharper photos if you stick to faster shutter speeds. Of course, this eliminates one of the creative aspects that you can use with your photos, but in general you can still capture beautiful landscapes with fast shutter speeds. The slowest shutter speed you can use will depend on how steady you are and the focal length you are using, as well as if your camera has image stabilization.
4. Turn on Image Stabilization
I mentioned earlier that when you are using a tripod you will generally want to turn image stabilization off. When you are not using a tripod you should turn it back on as it is intended to reduce the impact of vibration from handheld shooting.
Follow these tips and you’ll find that your landscape photos are sharper and better in quality.
Infographic
The infographic below was designed to complement the information in this article. Feel free to share the infographic on social media, or add it to your site with the embed code below the infographic.


Awesome site!!!